45
CARD ADJUSTMENT (Continued)
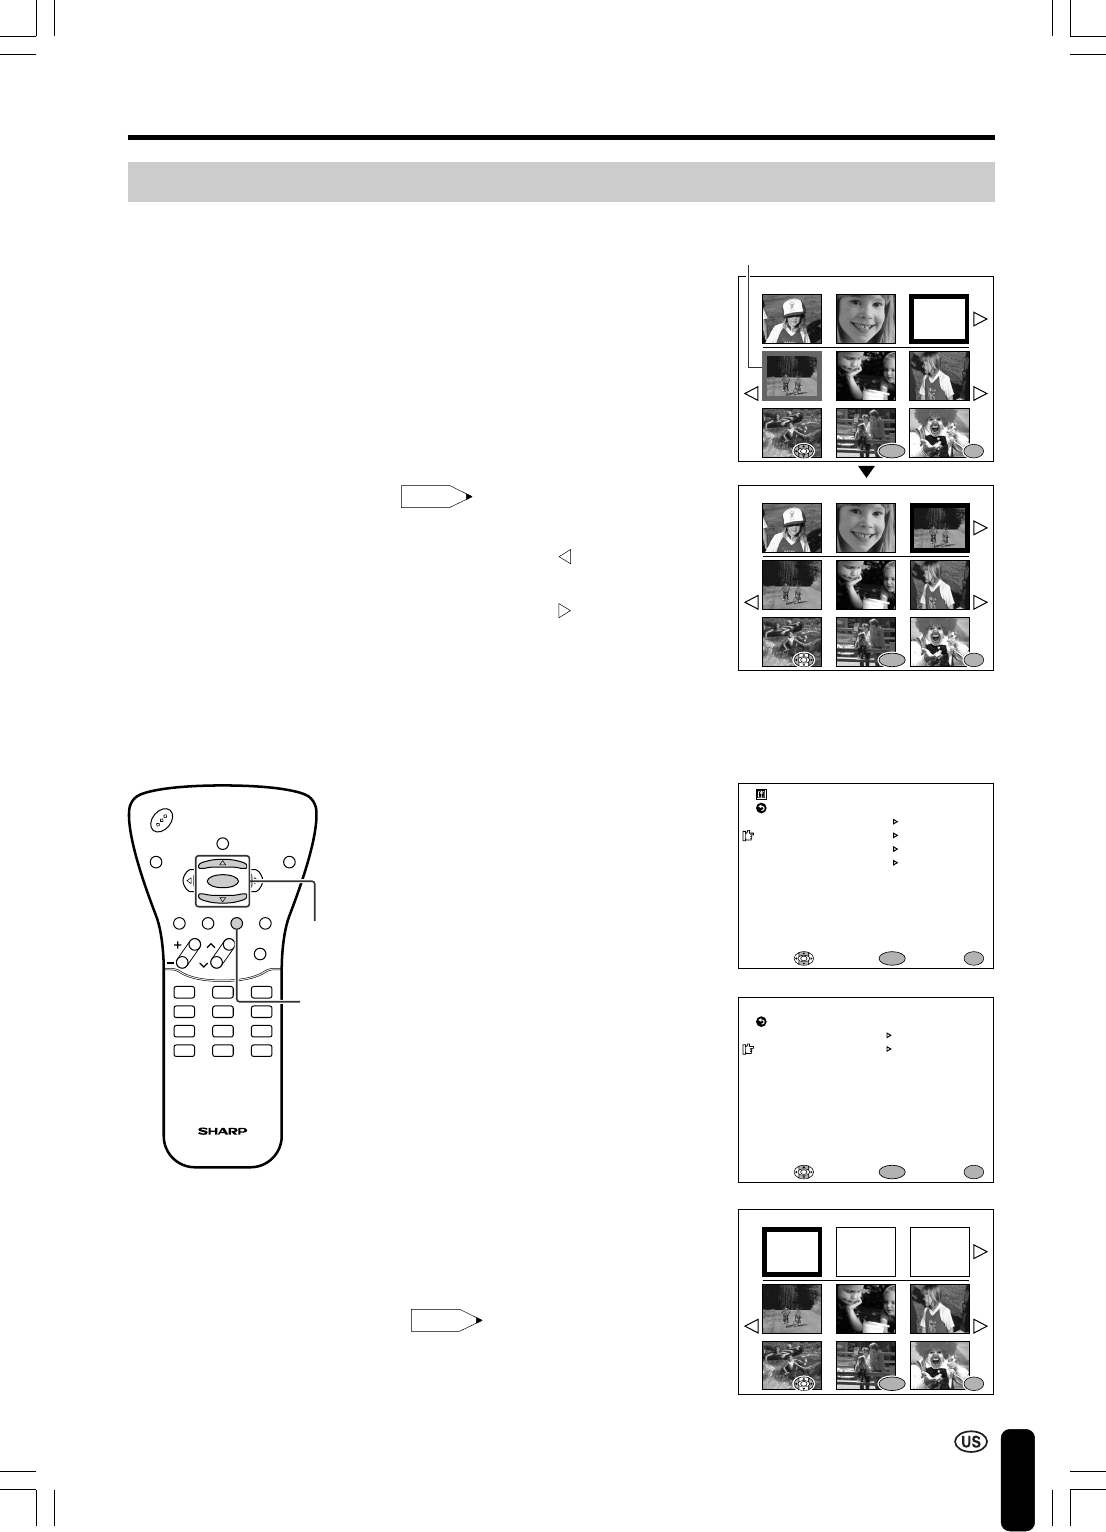
■ Erasing the MY PROGRAM Settings
1 Press MENU to display the MENU
screen, press ]/[ to move the
cursor to CARD SETTING, and
press ENTER to display the CARD
SETTING screen.
2 Press ]/[ to move the cursor to
MY PROGRAM, and press ENTER.
3 Press ]/[ to move the cursor to
ERASE ALL PROGRAM, and press
ENTER. All images in the
registration area will be erased.
1
4
7
MTS
2
5
8
0
3
6
9
100
POWER
DISPLAY
SLEEP CARD
ENTER
CHVOL
FLASHBACK
MUTE BRIGHT MENU TV/VIDEO
RETURN
SLIDE SHO
W SETT I NG
M
Y PROGRA
M
ROTATE
SOUND SETTING
SELECT:
MENU
CARD SETTING
ENTER:
ENTER
EXIT:
RETURN
ERASE ALL
PROGRA
M
SET
PROGRA
M
M
Y PROGRA
M
SELECT:
MENU
ENTER:
ENTER
EXIT:
SELECT: ENTER:SELECT:
MENU
ENTER:
ENTER
M
Y PROGRA
M
2113
23
EXI T:EXIT:
● Repeat steps 4 and 5 given in
“Registering MY PROGRAM Images”
to register new images.
SELECT: ENTER:SELECT:
MENU
ENTER:
ENTER
M
Y PROGRA
M
2113
23
EXI T:EXIT:
SELECT: ENTER:SELECT:
MENU
ENTER:
ENTER
M
Y PROGRA
M
2113
23
EXI T:EXIT:
6 Press ]/[/</ > to select the
image to be registered, moving the
selection marker (yellow) in the
selection area, and press ENTER.
The image is then registered in the
registration area that was specified
in step 4. (see page 44)
7 Repeat steps 5 and 6 to register
more images.
Adjusting the MY PROGRAM Settings (Continued)
ENTER/
]/[
MENU
Selection marker (yellow)
Note
● The previous six images are displayed by
aligning the selection marker (yellow) with
the triangular mark and pressing <.
The next six images are displayed by
aligning the selection marker (yellow) with
the triangular mark and pressing >.
● If an image is registered in a location
number for which another image has
already been registered, the previous
image is dropped from the registered
entries and overwritten by the new image.
Note
LC-20B1U-GBpp36-47 02.2.21, 4:41 PM45


