Page 3For technical questions, please call 1‑800‑444‑3353.SKU 65053
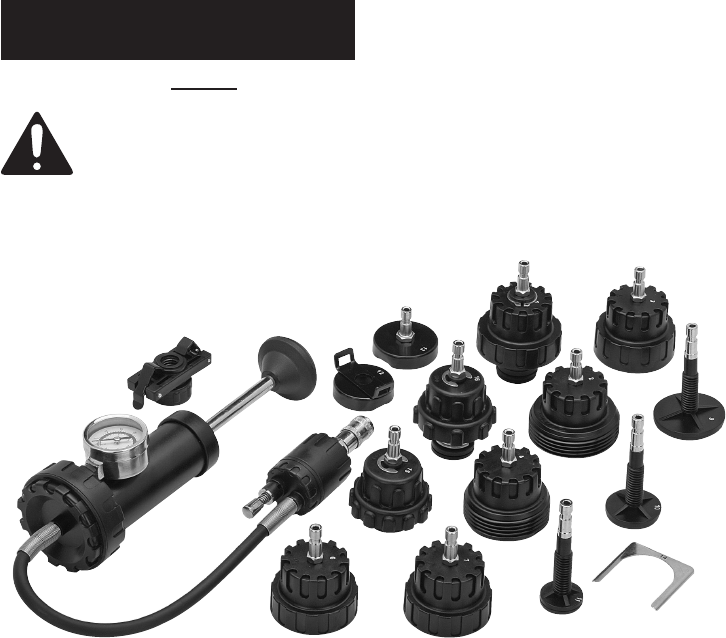
12. Radiator Conversion Cap: Use with
item 8 above (Adjustable Stationary
Seat), item 9 (50mm Seat), and
item 11 (27mm Seat); Suzuki
®
.
13. Radiator Test Cap: Use for radiator’s
upper cap, for use with Kia
®
14. Stainless Fastener: Use for all
Adapters and Seat accessories
with: Toyota
®
, Suzuki
®
,
Mitsubishi
®
, Nissan
®
.
15. Adapter: For use with
Honda
®
, Toyota
®
.
16. Adapter: For use with Opel
®
,
Hyundai
®
, Honda
®
, Mitsubishi
®
,
Ford
®
, Nissan
®
, Mazda
®
, Toyota
®
.
Operating Instructions
Read the ENTIRE IMPORTANT
SAFETY INFORMATION
section at the beginning of
this document including
all text under subheadings
therein before set up or
use of this product.
1. Refer to the vehicle’s service
manual for specic radiator
pressure testing instructions.
2. Loosen the vehicle’s radiator
cap slowly to relieve any excess
pressure before removing the
cap completely. Use gloves and
a damp cloth if the cap is hot.
3. Select the Proper Adapter and
conguration of the Stationary
Seat accessories. Securely attach
the adapter to the ller neck of
the radiator or expansion tank.
4. Attach the Quick Connector of the
Hand Pump onto the Adapter.
5. Rapidly pump the Hand Pump
Handle while watching the pressure
gauge. Pressurize the radiator up
to the optimal pressure only ‑ Do not
overpressurize the radiator. Ideal
readings should range between 12
and 15 PSI. If the pressure level is
below the range, a leak in the radiator
or hose is the source of the problem.
6. Once the test is complete, release
the air pressure by pressing the
Pressure Release Valve on the Hand
(1)
(8)
(15)
(7) (6)
(4)
(11)
(10)
(9)
(3)
(2)
(5)
(16)
(13)
(12)
(14)


