85
Network Scanner
(Option)
Select a destination (PC)
∗
∗
A destination will be indicated
“ROUTING MENU” : refer to optional
Document Distribution System (DA-WR10).
NOTE:
If the Panasonic Communication Utility software
is not started on your PC, a destination is not
shown on the Touch Panel Display.
Select a Mode if required
Resolution
∗
Exposure
Original mode
2-Sided Original
Thin Original
PC Screen
Refer to PDMS Operating
Instructions on the
CD-ROM.
3 4
5
9 10
∗
150dpi: Text mode only.
6
File name
(Max. 20 characters)
Ex.: Jack
7
8
Select a file
format
8
When “CUSTOM” is selected.
When
“DATE/TIME”
is selected.
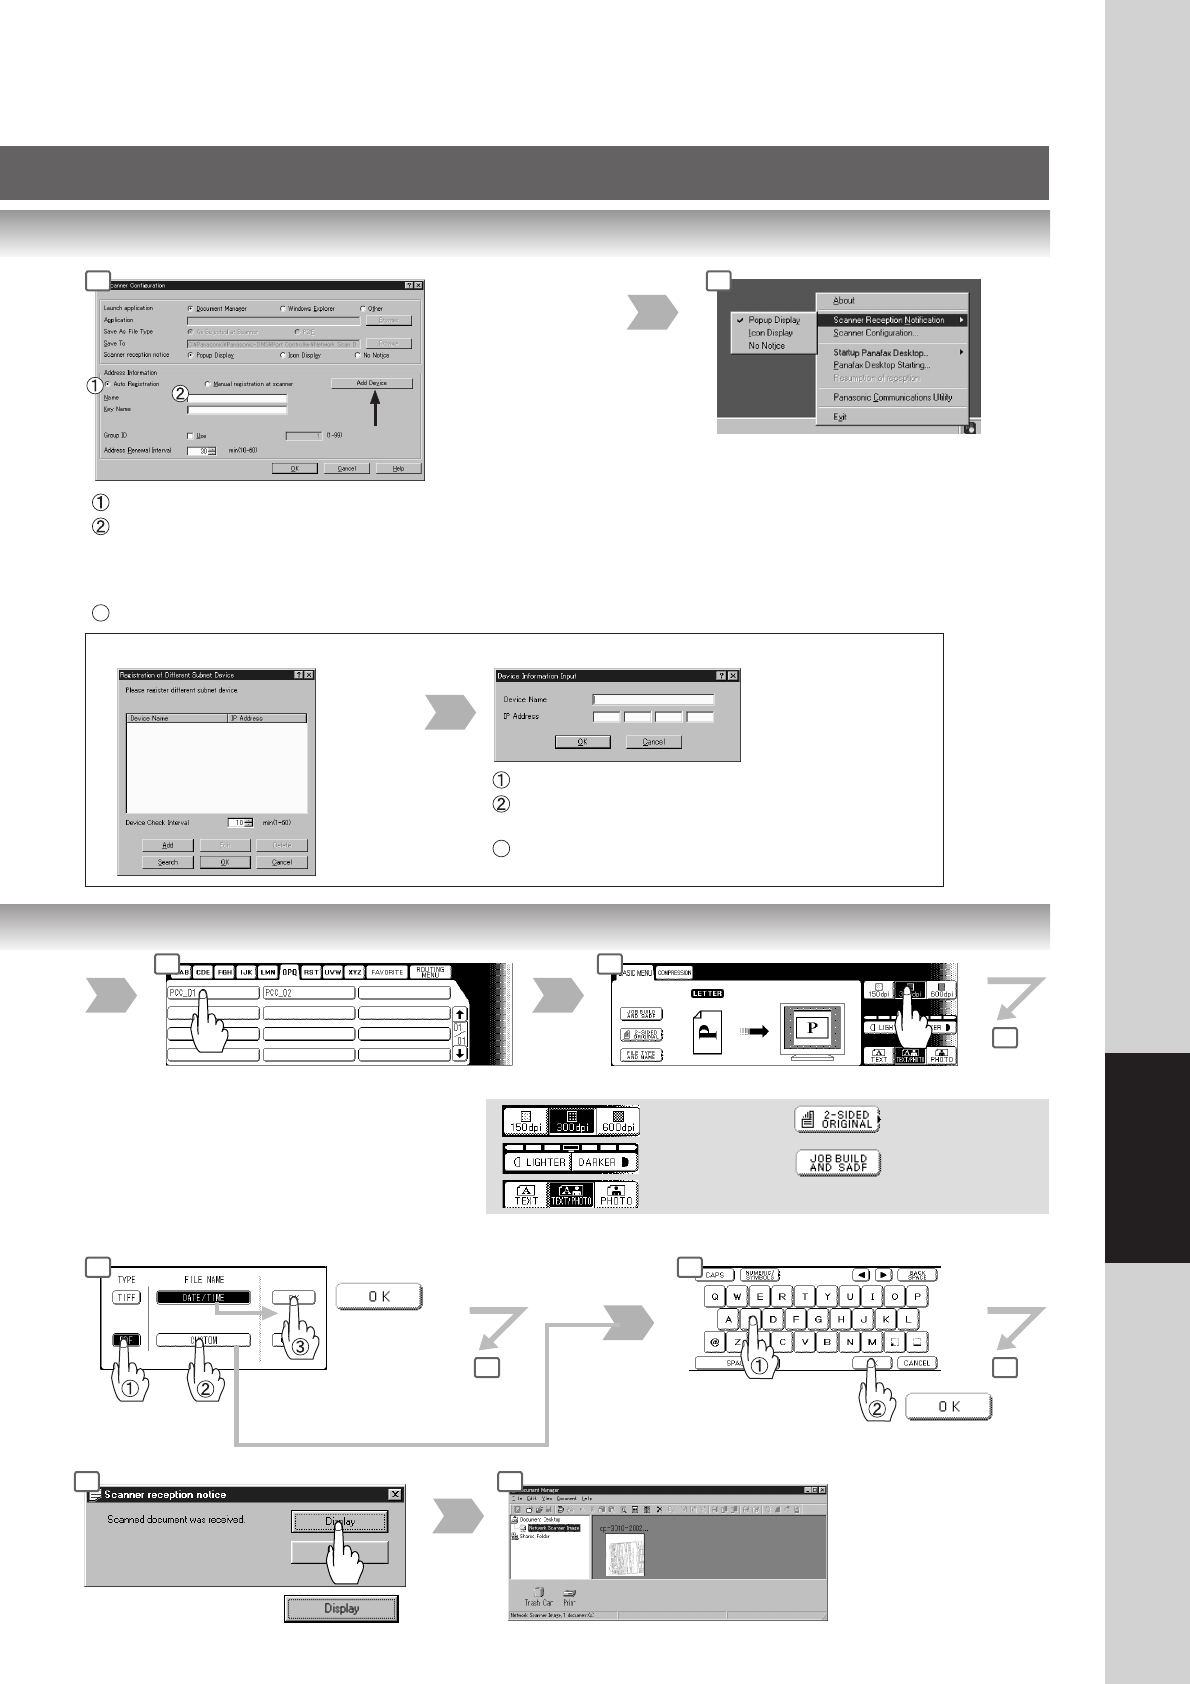
2
Select “Auto Registration”.
Set the PC and Key Name to be saved on the machine.
When the DP-3530/4530/6030 is installed on a different subnet
mask
∗
of the network (LAN), Select "Add Device" then, register the
machine by following the steps below.
3
Click OK.
Right-click on the Panasonic
Communications Utility icon, and select
one of the Scanner Reception
Notifications (Pop up Display or Icon
Display).
Click "Add".
Input the machine's Device Name and IP Address.
Click OK.
Returns to the screen on the left.
3
Click OK.
Returns to the Scanner Configuration screen above.
When the DP-3530/4530/6030 is installed on a different subnet mask
∗∗
∗∗
∗
of the network.
NOTE:
∗
Consult your system administrator for
detail of your subnet mask.
3


