16
ENGLISH
A Valve stem
[Fully closed at the factory, when connecting the piping, when evacuating,
and when charging additional refrigerant. Open fully after the operations
above are completed.]
B Stopper pin [Prevents the valve stem from turning 90° or more.]
C Packing (Accessory)
D Connecting pipe (Accessory)
[Use packing and securely install this pipe to the valve flange so that gas
leakage will not occur. (Tightening torque: 43 N·m (430 kg-cm)) Coat both
surfaces of the packing with refrigerator oil.]
E Open (Operate slowly)
F Cap, copper packing
[Remove the cap and operate the valve stem. Always reinstall the cap after
operation is completed. (Valve stem cap tightening torque: 25 N·m (250
kg-cm) or more)]
G Service port
[Use this port to evacuate the refrigerant piping and add an additional charge
at the site.
Open and close the port using a double-ended wrench.
Always reinstall the cap after operation is completed. (Service port cap
tightening torque: 14 N·m (140 kg-cm) or more)]
H Flare nut
[Tightening torque: 80 N·m (800 kg-cm)
Loosen and tighten this nut using a double-ended wrench.
Coat the flare contact surface with refrigerator oil.]
I ø15.88
J ø31.75 (PUHY-P400)
ø38.1 (PUHY-P500)
K Field piping
[Braze to the connecting pipe. (When brazing, use unoxidized brazing.)]
Appropriate tightening torque by torque wrench
Copper pipe external dia. (mm) Tightening torque (N·m) / (kg-cm)
ø6.35 14 to 18 / 140 to 180
ø9.52 35 to 42 / 350 to 420
ø12.7 50 to 57.5 / 500 to 575
ø15.88 75 to 80 / 750 to 800
ø19.05 100 to 140 / 1000 to 1400
Tightening angle standard
Pipe diameter (mm) Tightening angle (°)
ø6.35, ø9.52 60 to 90
ø12.7, ø15.88 30 to 60
ø19.05 20 to 35
Note:
If a torque wrench is not available, use the following method as a
standard.
When you tighten the flare nut with a wrench, you will reach a point
where the tightening torque will abrupt increase. Turn the flare nut
beyond this point by the angle shown in the table above.
Caution:
• Always remove the connecting pipe from the ball valve and braze
it outside the unit.
- Brazing the connecting pipe while it is installed will heat the ball
valve and cause trouble or gas leakage. The piping, etc. inside the
unit may also be burned.
• Use ester oil, ether oil or alkylbenzene (small amount) as the
refrigerator oil to coat flares and flange connections.
- The refrigerator oil will degrade if it is mixed with a large amount of
mineral oil.
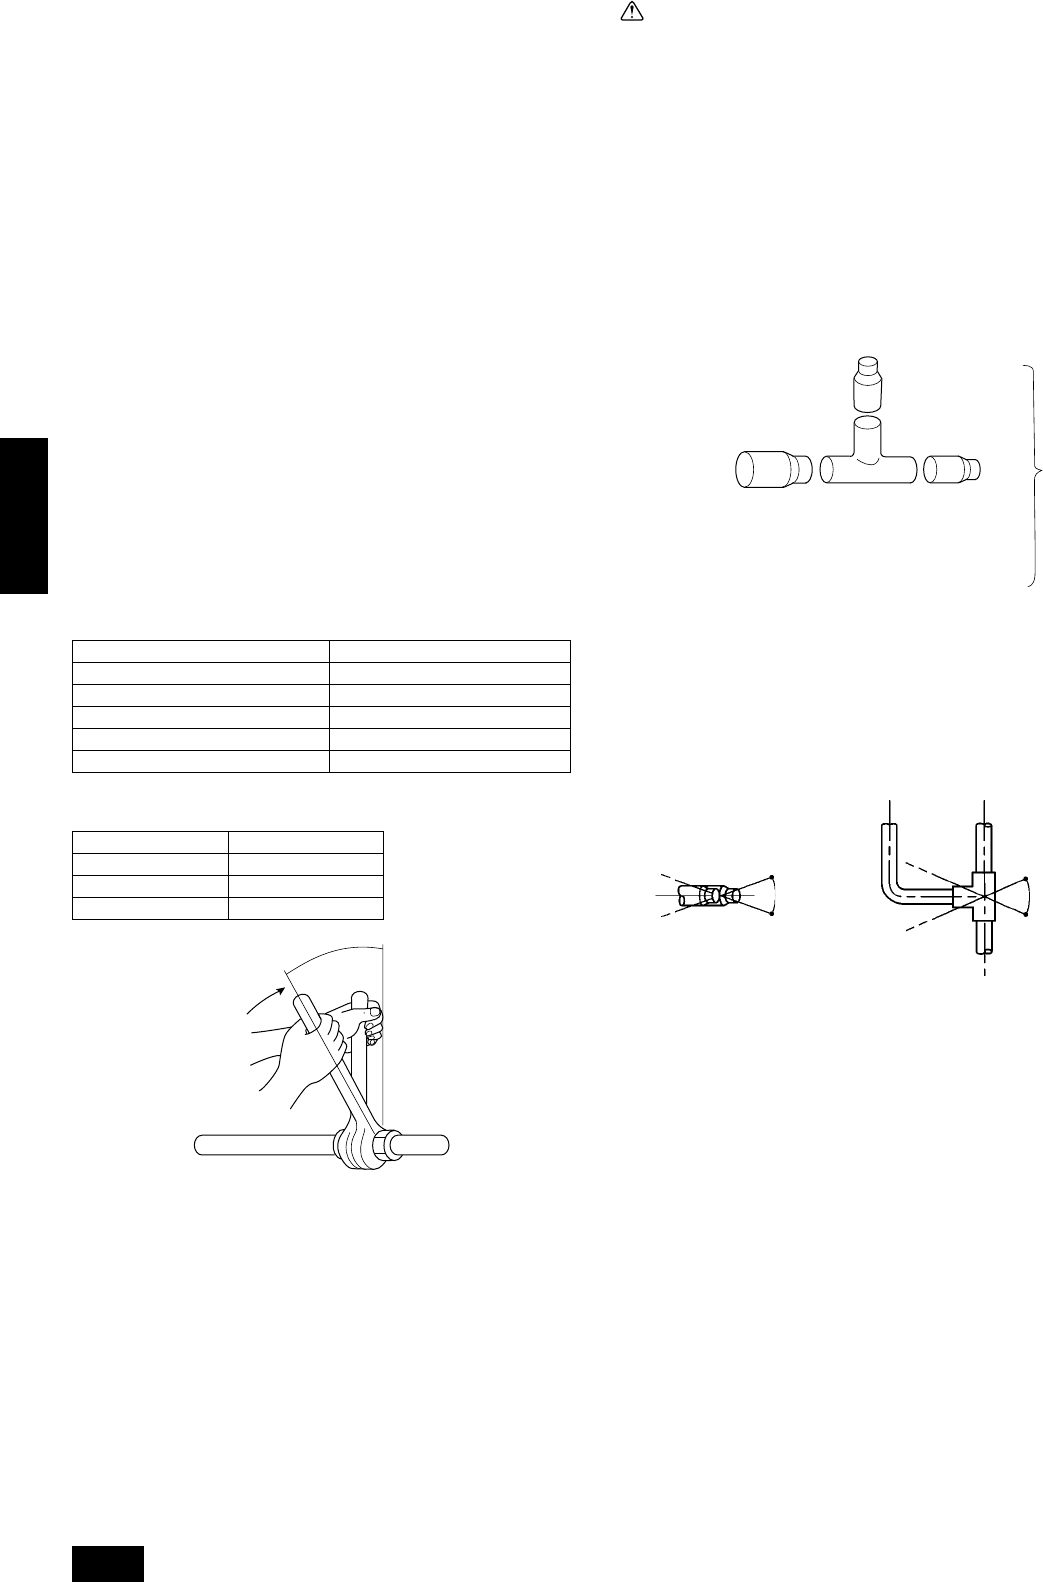
10.4. How to install branch pipe
For detail, please observe the instruction manual attached to the op-
tional refrigerant branch kit.
■ Joint
B
A
A To Outdoor Unit
B To Branch Piping or Indoor Unit
• Apart from the CMY-Y202-F gas side, there are no restrictions on the
posture for attaching joints.
• Ensure that the branch pipes for the CMY-Y202-F gas side are at-
tached horizontally or facing upwards. (See the diagram below.)
Horizontal Facing upwards
(Facing downwards is not possible)
• There is no limitation on the joint mounting configuration.
• If the diameter of the refrigerant piping selected by the procedures
described on pages
13
to
14
is different from the size of the joint,
match the sizes using a deformed joint. The deformed joint is in-
cluded with the kit.
Within ± 15˚
Within ± 15˚
Within ± 15˚


