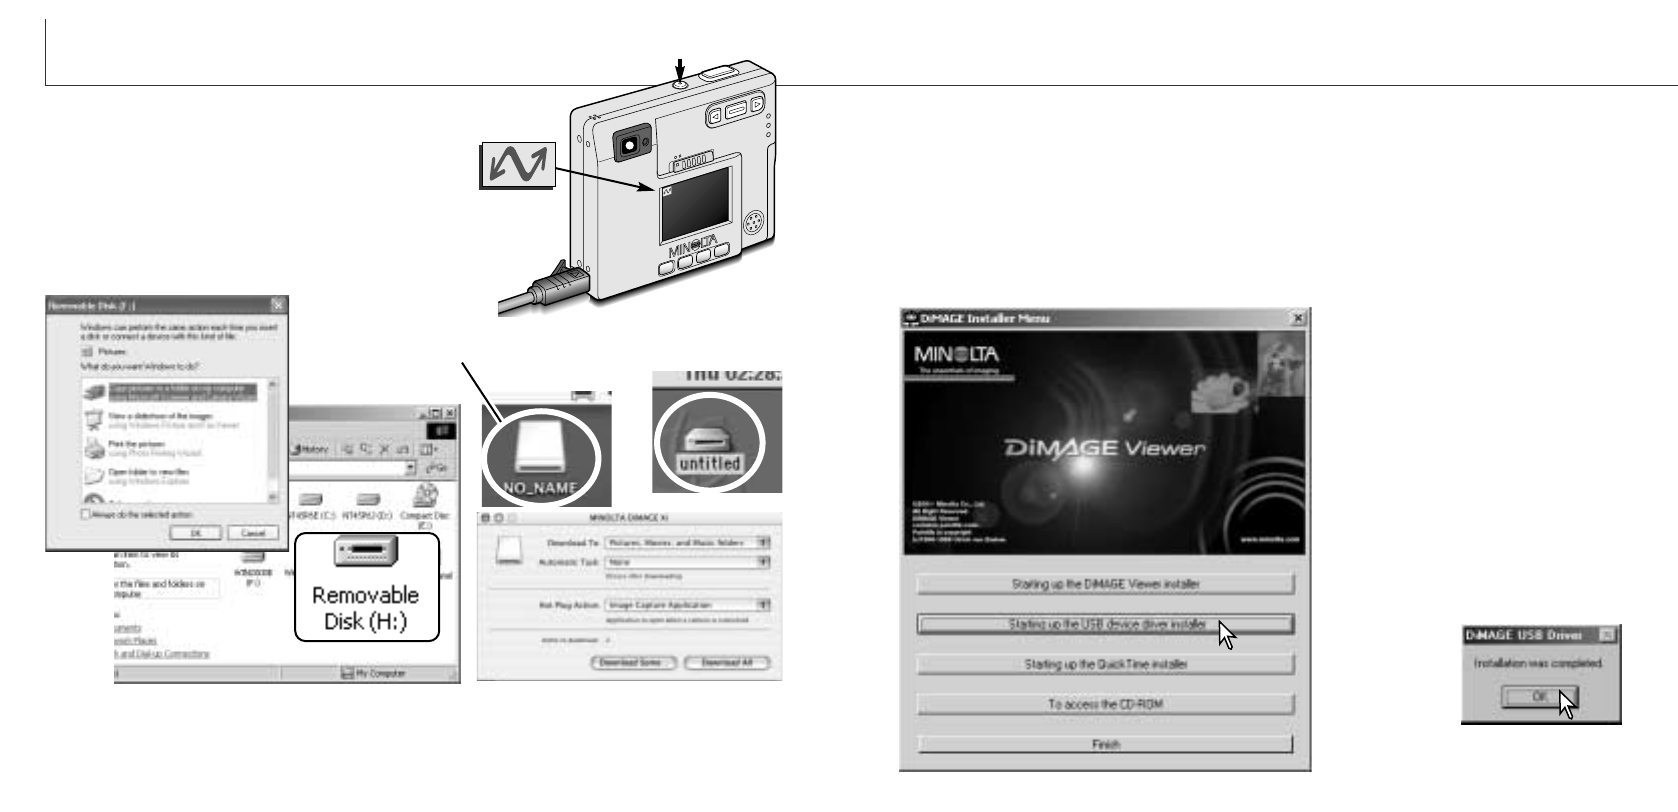
When the camera is properly connected to the
computer, a drive icon, or volume, will appear.
When using Windows XP or Mac OS X, a window
will open requesting instructions on what to do with
the image data; follow the directions in the window.
74 75
DATA
-TRANSFER MODE
Turn on the camera to initiate the USB connection.
• While the camera is connected to a computer, the
data-transfer screen will be displayed.
5
Connecting to Windows 98 and 98SE
The driver needs only to be installed once. If the driver cannot be installed automatical-
ly, it can be installed manually with the operating system’s add-new-hardware wizard;
see the instructions on the following page. During installation, if the operating system
requests the Windows 98 CD-ROM, insert it into the CD-ROM drive and follow the
accompanying instructions on the screen. No special driver software is required for
other Windows operating systems.
Before connecting the camera to the
computer, place the DiMAGE soft-
ware CD-ROM in the CD-ROM
drive. The DiMAGE installer menu
should automatically activate. To
automatically install the Windows 98
USB driver, click on the starting-up-
the-USB-device-driver-installer but-
ton. A window will appear to confirm
that the driver should be installed;
click “Yes” to continue.
When the driver has been success-
fully installed, a window will appear.
Click “OK.”
Restart the com-
puter before con-
necting the cam-
era (p. 73).
Automatic Installation
5
If the computer does not recognize
the camera, disconnect the camera and restart the computer. Repeat the connection
procedure above. For users with Windows operating systems, the diver software can
be uninstalled in the event of an error during installation. See page 88 for instructions.
The volume name varies between the
brand of memory card.
Windows XP
Windows
Mac OSX
Mac