35
EDITING
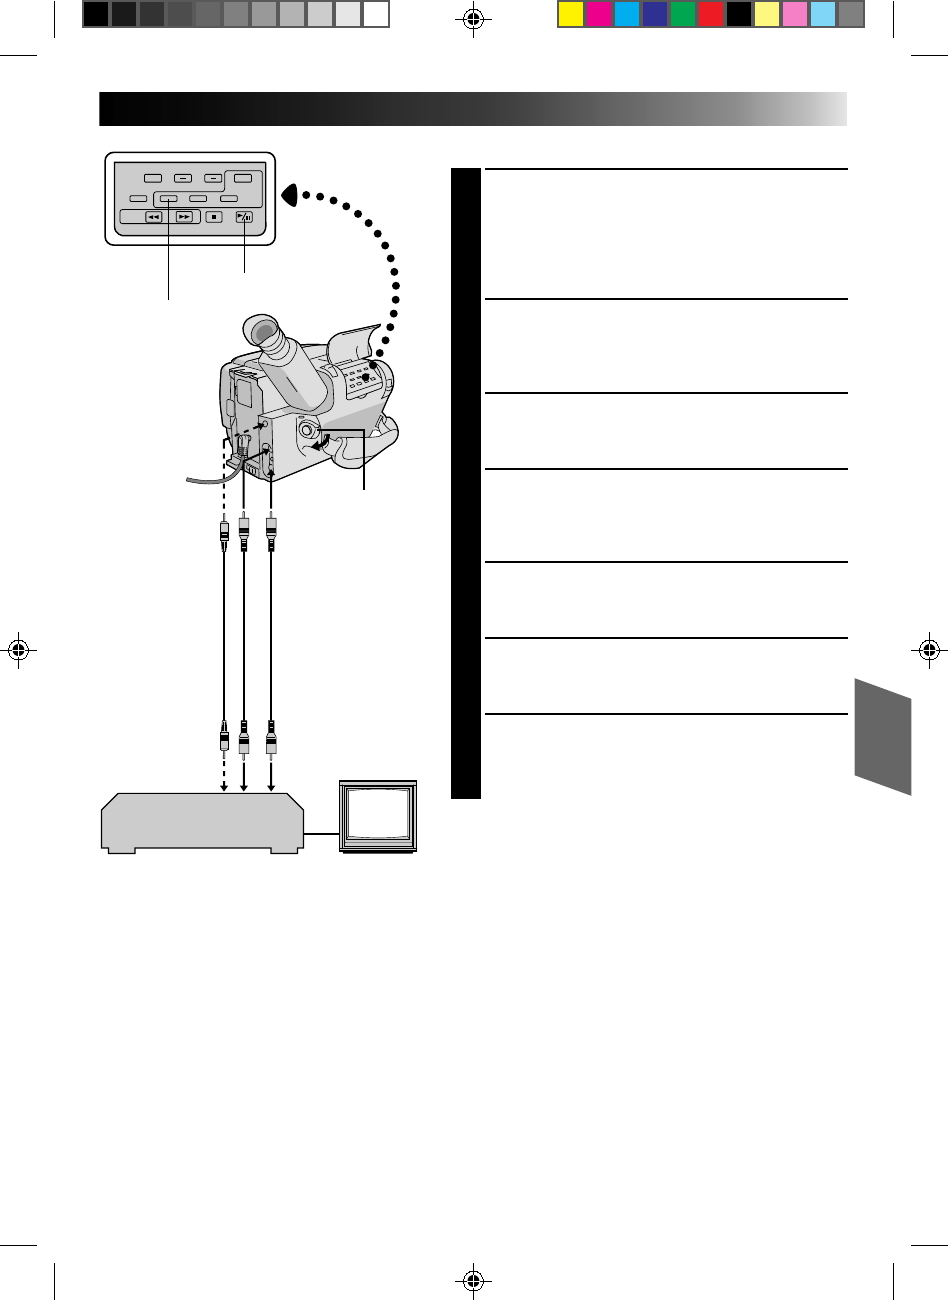
Tape Dubbing
CONNECT EQUIPMENT
1
Following the illustration on the left, connect the
camcorder and the VCR. If you have a Remote
PAUSE terminal, use the editing cable to connect it
to the camcorder and the VCR. (See “NOTES” below
for details.)
PREPARE FOR DUBBING
2
Set the camcorder’s power switch to PLAY, turn on
the VCR’s power, and insert the appropriate
cassettes in the camcorder and the VCR.
SELECT VCR MODE
3
Engage the VCR’s AUX and Record-Pause modes.
FIND EDIT-IN POINT
4
Engage the camcorder’s Play mode to find a spot
just before the edit-in point. Once it’s reached, press
PAUSE on the camcorder.
START EDITING
5
Press PLAY on the camcorder and engage the VCR’s
Record mode.
STOP EDITING TEMPORARILY
6
Engage the VCR’s Record-Pause mode and press
PAUSE on the camcorder.
EDIT MORE SEGMENTS
7
Repeat steps 4 through 6 for additional editing, then
stop the VCR and camcorder when finished.
NOTES:
●
When using a Remote PAUSE terminal, pressing EDIT
on the camcorder in step 5 automatically engages the
VCR’s Record mode.
●
When using a Remote PAUSE terminal, you can access
a function called Master Edit Control System. Before
beginning, reset the camcorder’s counter to
“M0:00:00” at an edit-out point. When the tape
reaches this point (remember there’s a small margin of
error) during editing, the camcorder and VCR pause
automatically. However, some VCRs are not compat-
ible with the Master Edit Control System.
VCR (Recording deck)
To AUDIO IN
To VIDEO IN
To Remote
PAUSE
Editing cable
(optional 3.5 ø
mini-plug cable)
Audio and Video
cable (optional)
PLAY/PAUSE
EDIT
To EDIT
Power switch
To AUDIO out
To VIDEO out


