5. Press + to select the photo for printing.
6. To adjust your image and print settings, do the following as necessary:
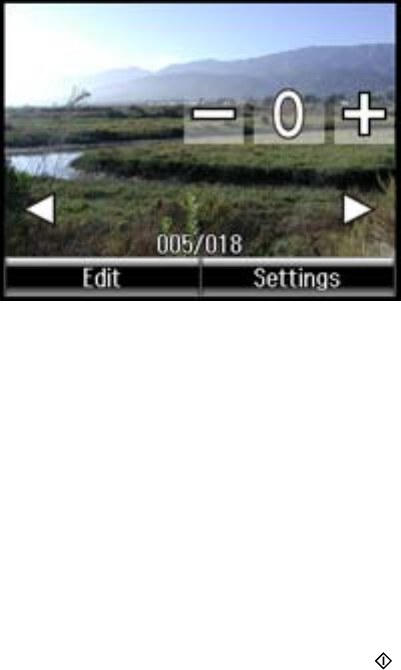
• To print more than one copy of the photo, select + or – to set the number (up to 99).
• To change the print settings, select Settings, and select the necessary settings.
• To adjust the image, select Edit > Photo Adjustments, then select your settings.
• To crop or zoom into your photo, select Edit > Crop/Zoom, then select the icons displayed on the
LCD screen to crop your image.
• To view additional photos and select others for printing, press the arrow buttons and repeat the
selections above.
7. When you are ready to print, press the Color button.
Note: To cancel printing, select Cancel.
Parent topic: Viewing and Printing Photos
Related references
Photo Adjustment Options
Print Setting Options - Photo Mode
Related tasks
Cropping Photos Displayed on the LCD Screen
208


