125
Direct Printing from the Camera
9
Printing
You do all the printing operations with the camera.
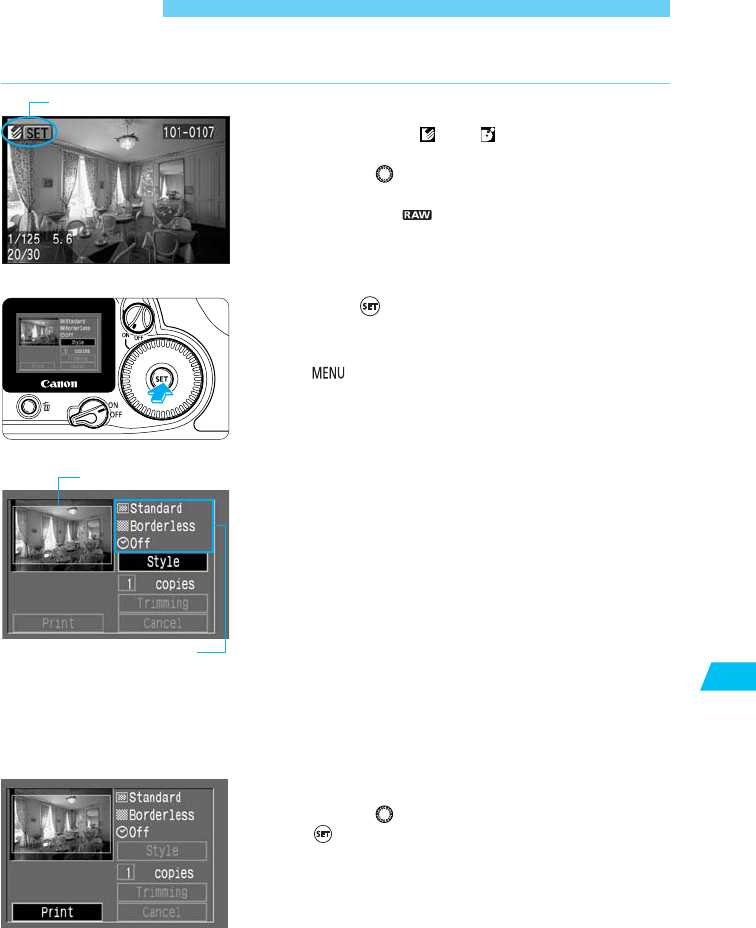
Select the image to be printed.
•
Check that the < > or < > icon is displayed on
the upper left of the camera’s LCD monitor.
•
Turn the < > dial to select the image to be
printed.
•
Images in the format cannot be printed directly
from the camera.
1
Press < >.
s
The direct printing screen will appear.
•
To change the image to be printed, press the
<
> button and start from step 1.
2
Set the printing options.
See pages 127-130 to set the printing options.
With a card photo printer:
•
On the upper right of the screen, you can check the
print style settings. And on the upper left, you can
check the printing area.
•
If the printing paper does not match the printing
settings (single or multiple images), go to the
[Style] (→p.127) and [Image] menu to select the
proper setting ([Standard] or [Multiple]).
•
If the printing settings are okay, go to step 4.
With a BJ printer:
•
Be sure to set the [Paper] setting with [Style]
(→p.127).
3
Print the image.
•
Turn the < > dial to select [PRINT], then press
<
>.
s
Printing will start.
•
If [Stop] is displayed on the LCD monitor, you can
stop the printing.(→p.126)
•
When the printing is completed properly, the screen
returns to step
1.
4
Printing area
Printing options
Connected printer icon


