Editing Still Images
152
You can specify a portion of an image to save as a separate image file.
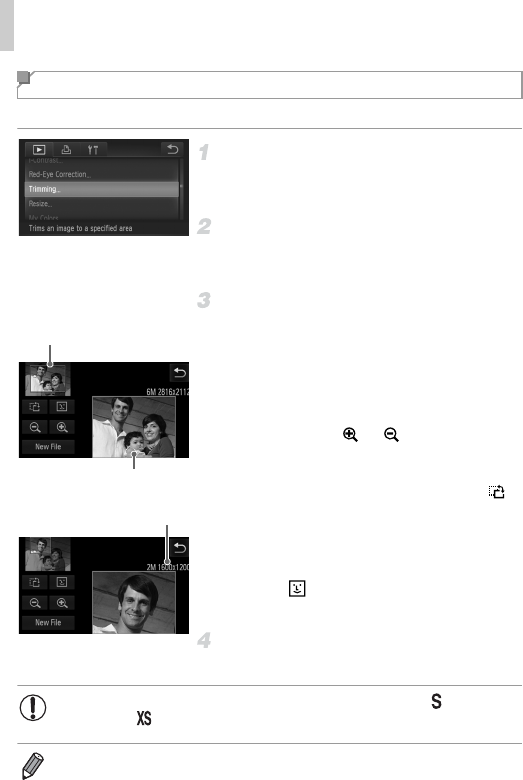
Choose [Trimming].
z Touch H, touch n, and choose
[Trimming] on the 1 tab (p. 50).
Choose an image.
z Choose an image after dragging left or right
to browse. Touch [OK].
Adjust the cropping area.
X A frame is displayed around the portion of the
image to be cropped.
X The original image is shown in the upper left,
and a preview of the image as cropped is
shown in the lower right.
z To resize the frame, either touch the lower-
right image or the or controls, or move
the zoom lever left or right.
z To move the frame, drag either image.
z To change the frame orientation, touch .
z Faces detected in the image are shown with
gray frames around them (in the upper-left
image), which can be used for cropping.
Switch between frames as needed by
touching .
z Touch [New File].
Save as a new image and review.
z Follow steps 4 – 5 on p. 151.
Cropping
Cropping Area
Preview of Image
After Cropping
Resolution After Cropping
• Editing is not possible for images shot at a resolution of (p. 76) or
resized to (p. 151).
• Images supported for cropping will have the same aspect ratio after cropping.
• Cropped images will have a smaller resolution than uncropped images.


