27 Chapter 3
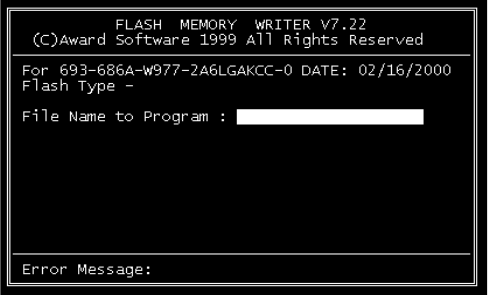
2. At the prompt, type AWDFLASH.EXE and press <Enter>. The
VGA configuration program will then display the following:
3. At the prompt, enter the new BIN file which supports your display.
When you are sure that you have entered the file name correctly
press <Enter>.
4. The screen will ask if you want to save BIOS? If you change your
mind or have made a mistake, press N to abort and end the setup
procedure. Press Y if you wish to save the existing configuration
before changing it. Then type the name under which you want to
save the current configuration.
5. The prompt will then ask “Are you sure”, Press Y if you want the
new file to be written into the BIOS. Press N to exit the program.
The new VGA configuration will then write to the ROM BIOS chip. This
configuration will remain the same until you run the AWDFLASH.EXE
program and change the settings.
Figure 3.1: VGA setup screen


