


2
INSTALLATION INSTRUCTIONS
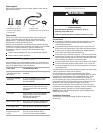
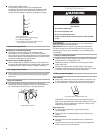
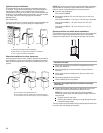
Tools and Parts
Gather the required tools and parts before starting installation. Read
and follow the instructions provided with any tools listed here.
Tools needed:
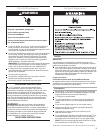
WARNING: For your safety, the information in this manual must be followed to minimize
the risk of fire or explosion, or to prevent property damage, personal injury, or death.
– Do not store or use gasoline or other flammable vapors and liquids in the vicinity of this
or any other appliance.
– WHAT TO DO IF YOU SMELL GAS:
•
Do not try to light any appliance.
•
Do not touch any electrical switch; do not use any phone in your building.
•
Immediately call your gas supplier from a neighbor's phone. Follow the gas supplier's
instructions.
•
If you cannot reach your gas supplier, call the fire department.
– Installation and service must be performed by a qualified installer, service agency, or
the gas supplier.
•
Clear the room, building, or area of all occupants.
In the State of Massachusetts, the following installation instructions apply:
Installations and repairs must be performed by a qualified or licensed contractor, plumber, or gasfitter qualified or licensed by
the State of Massachusetts.
If using a ball valve, it shall be a T-handle type.
A flexible gas connector, when used, must not exceed 3 feet.
IMPORTANT: The gas installation must conform with local codes, or in the absence of local codes, with the National Fuel Gas
Code, ANSI Z223.1/NFPA 54.
The dryer must be electrically grounded in accordance with local codes, or in the absence of local codes, with the National
Electrical Code, ANSI/NFPA 70.
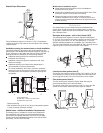
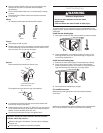
8" or 10" adjustable
wrench (for gas
connections)
Flat-blade screwdriver
Adjustable wrench that
opens to 1" (25 mm) or
" (14 mm) open-end
wrench (for adjusting
dryer feet)
Level
¼" nut driver or socket
wrench (recommended)
Tin snips (new vent
installation)
Caulking gun and
compound (for installing
new exhaust vent)
Pipe-joint compound
resistant to LP gas
Level
Knife
Vent clamps
Pliers
Wood block (for leveling)
Ruler or measuring tape
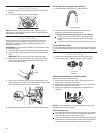
Parts needed for washer (not provided):
Inlet hoses Flat washers
To order:
Call the dealer from whom you purchased your washer/dryer.
Call the toll-free number listed on the cover of the Washer/
Dryer User Instructions.
Visit the website listed on the cover of the Washer/Dryer
User Instructions.
NOTE: Replace inlet hoses after 5 years of use to reduce the risk
of hose failure. Record hose installation or replacement dates for
future reference.
9
⁄16