


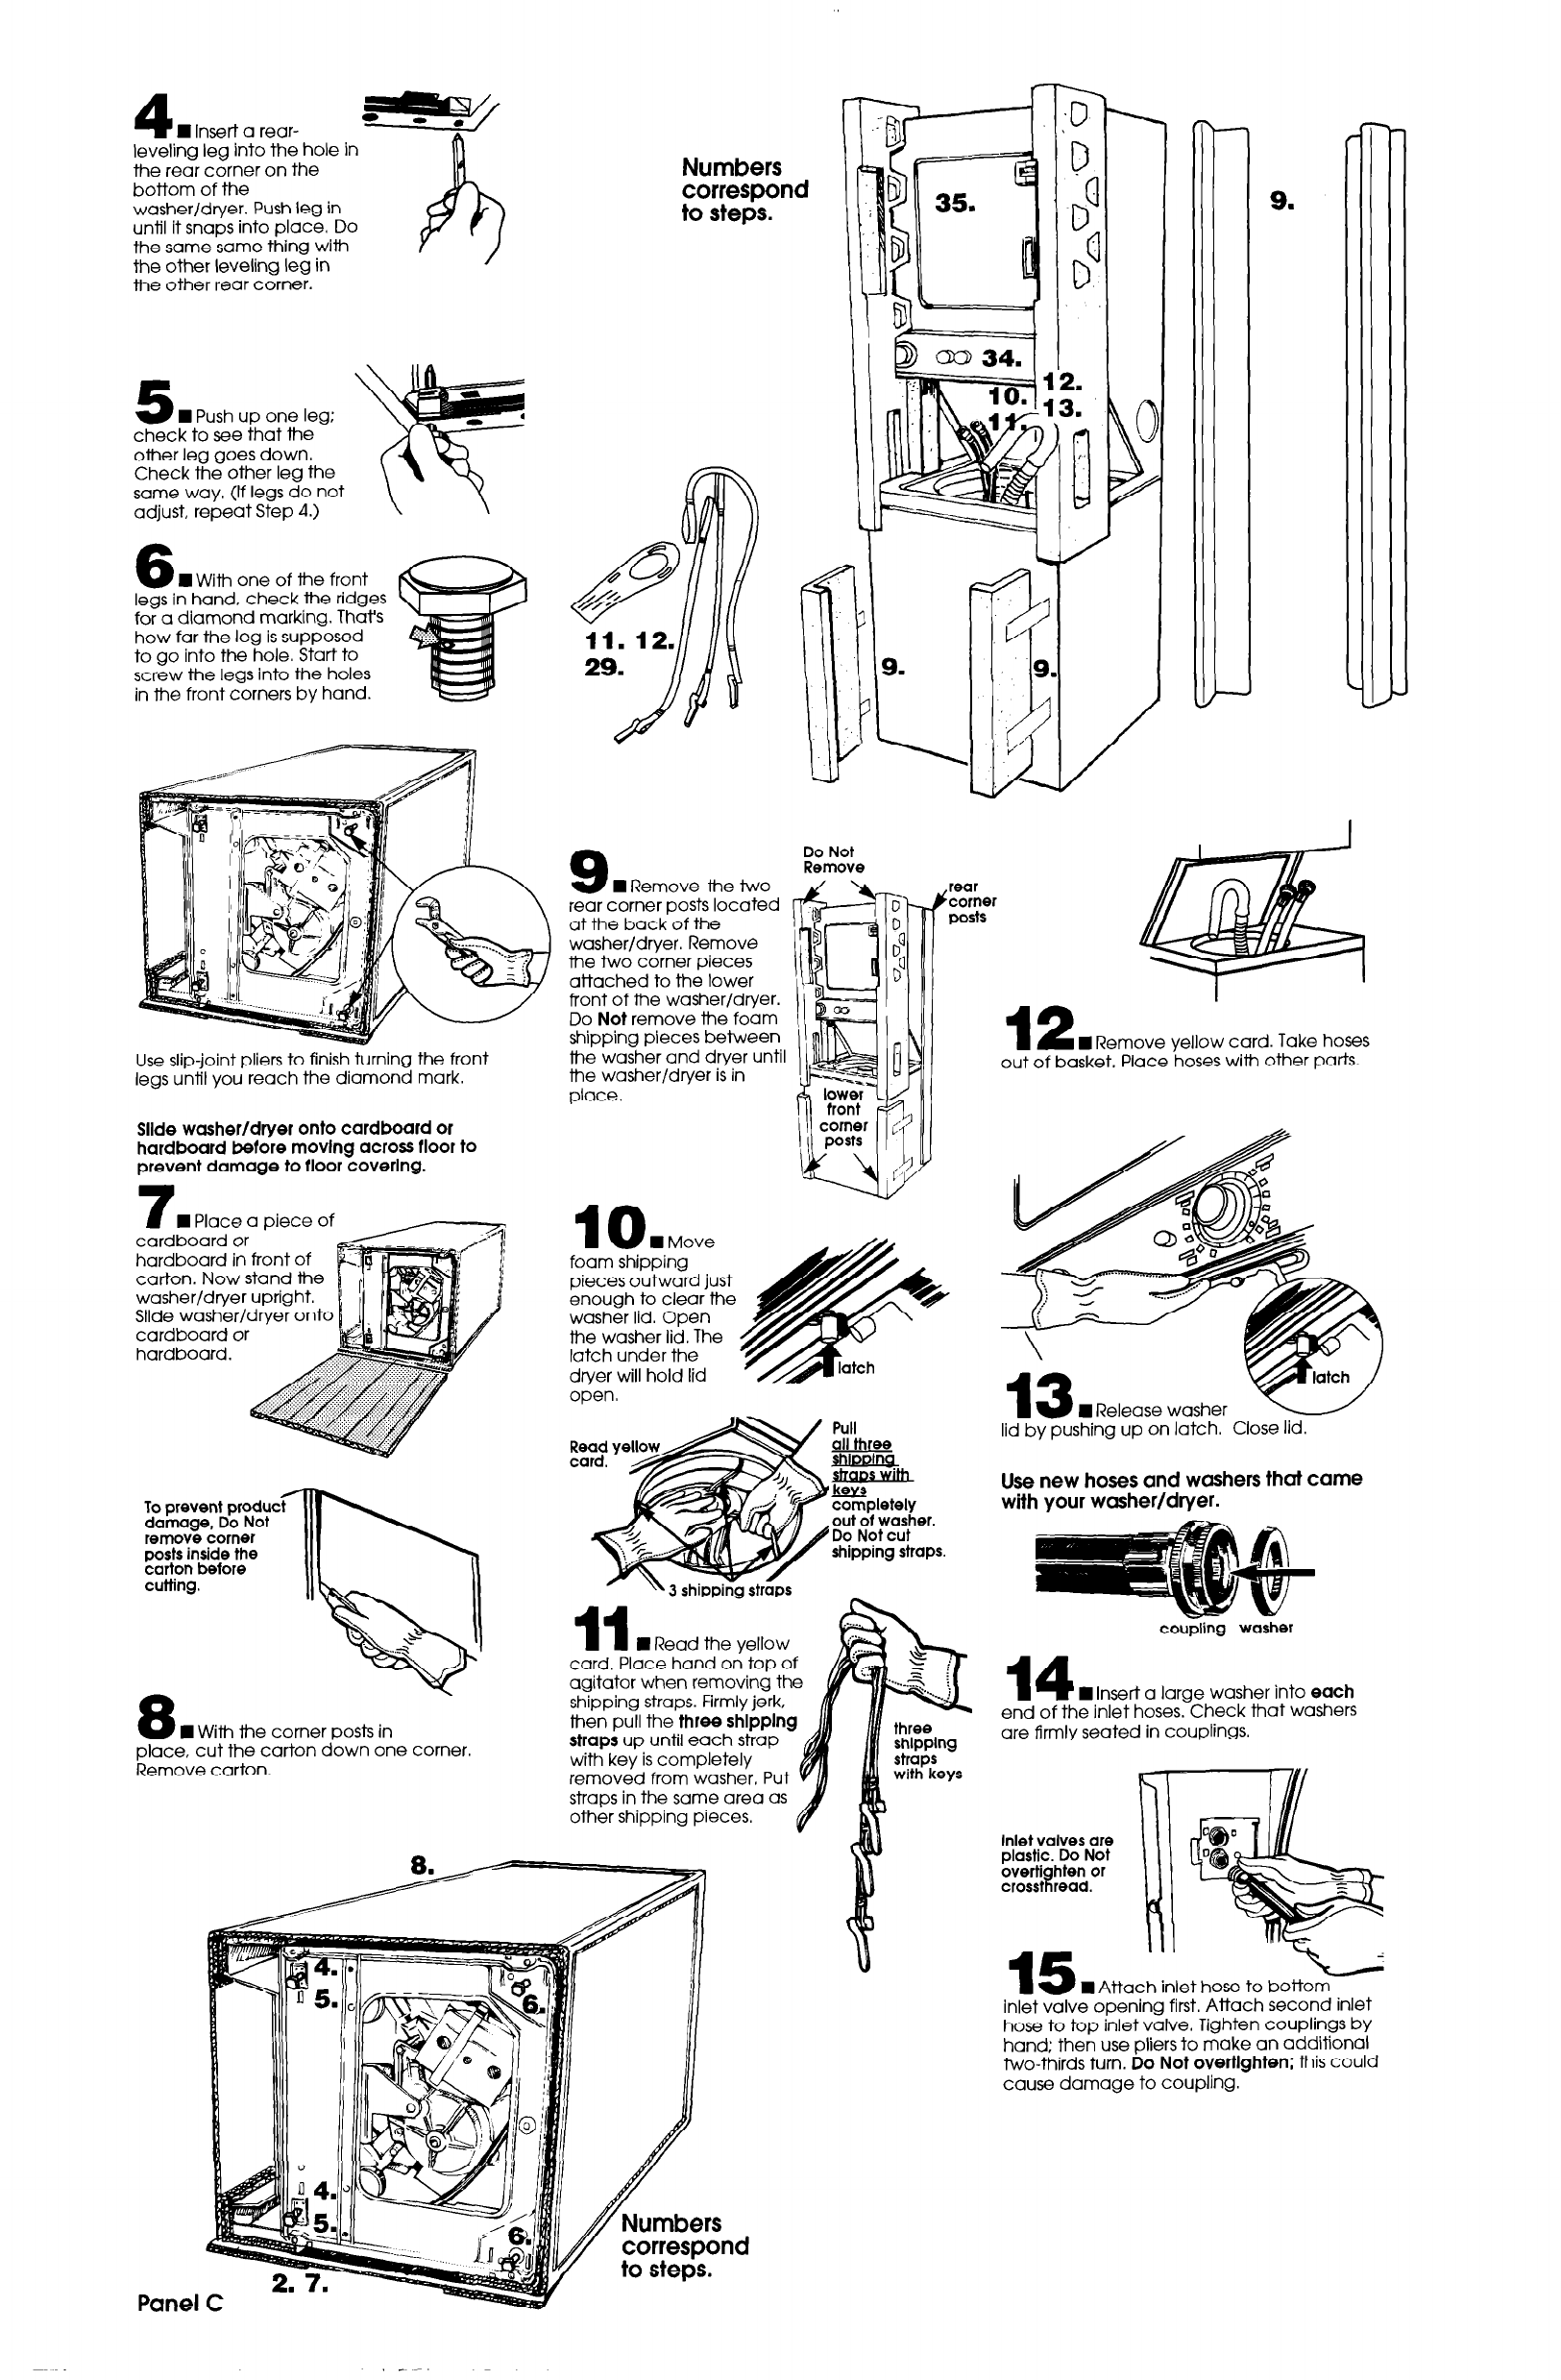
4
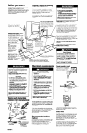
1 Insert a rear-
-w/
A
leveling leg into the hole in
the rear corner on the
bottom of the
washer/dryer. Push leg in
until it snaps into place. Do
the same same thing with
the other leveling leg in
the other rear corner.
h
Numbers
correspond
to steps.
5
n
Push up one leg:
check to see that the
other leg goes down.
Check the other leg the
same way. (If legs do not
adjust, repeat Step 4.)
6
n
With one of the front
legs in hand, check the ridges
for a diamond marking. That’s
how far the leg is supposed
to go into the hole. Start to
screw the legs into the holes
in the front corners by hand.
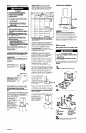
9
H Remove the two
Do Not
Remove
rear
corner
posts
rear corner posts located
at the back of the
washer/dryer. Remove
the two corner pieces
attached to the lower
front of the washer/dryer.
Do
Not
remove the foam
shipping pieces between
the washer and dryer until
me washer/dryer is in
place,
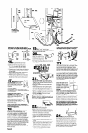
12
n
Remove yellow card. Take hoses
out of basket. Place hoses with other parts.
Use slip-joint pliers to finish turning the front
legs until you reach the diamond mark.
Slide washer/dryer onto cardboard or
hardboard before movlng across floor to
prevent damage to floor coverlng.
n
Place a piece of
cardboard or
hardboard in front of
carton. Now stand the
washer/dryer upright.
Slide washer/dryer onto
cardboard or
hardboard.
10
H Move
foam shipping
pieces outward just
enough to clear the
washer lid. Open
me washer lid. The
latch under the
dryer will hold lid
open.
H Release washer
lid by pushing up on latch. Close lid.
Use new hoses and washers that came
with your washer/dryer.
I
To prevent product
damage,
Do Not
out of washer.
remove corner
posts inside the
carton before
cutting.
\\ 3 shipping straps
11
n
Read the yellow
coupling washer
card. Place hand on top of
agitator when removing the
shipping straps. Firmly jerk,
then pull the
three shlpplng
straps
up until each strap
L
with key is completely
removed from washer, Put v
straps in the same area as
other shipping pieces.
/
%
three
shipping
straps
with keys
14
n
Insert a large washer into
each
end of the inlet hoses. Check that washers
are firmly seated in couplings.
8
.
n
With me corner posts in
place, cut the carton down one corner.
Remove carton.
Inlet valves are
plastic. Do Not
overt1
it
hten or
crosst read.
8.
A
n
Attach inlet hose to bottom
inlet valve opening first. Attach second inlet
hose to top inlet valve. Tighten couplings by
hand; then use pliers to make an additional
two-thirds turn.
Do Not overtlghten;
this could
cause damage to coupling.
Numbers
corresponc
to steps.
Panel