


I
I
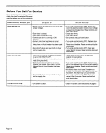
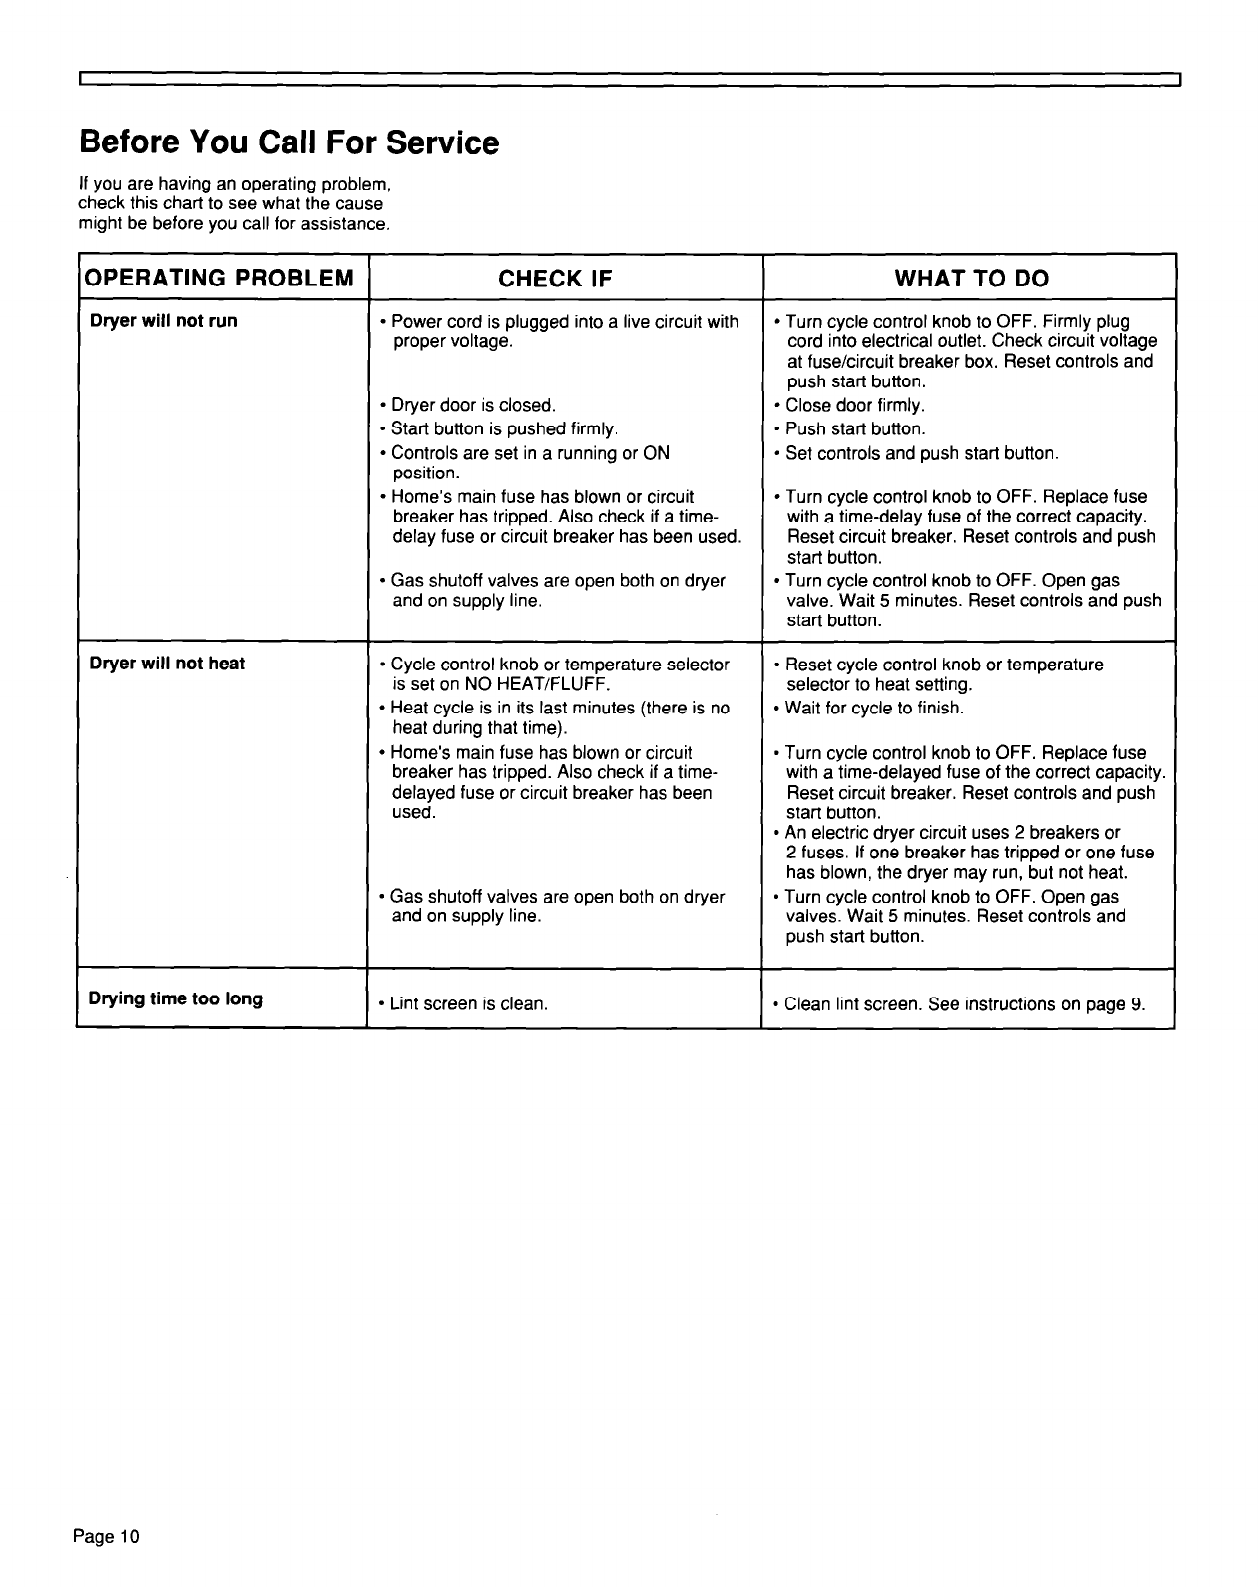
Before You Call For Service
If you are having an operating problem,
check this chart to see what the cause
might be before you call for assistance,
3PERATING PROBLEM
CHECK IF
WHAT TO DO
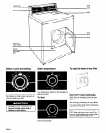
Dryer will not run
l
Power cord is plugged into a live circuit with
l
Turn cycle control knob to OFF. Firmly plug
proper voltage.
cord into electrical outlet. Check circuit voltage
at fuse/circuit breaker box. Reset controls and
push start button.
l
Dryer door is closed.
l
Close door firmly.
l
Start button is pushed firmly.
. Push start button.
l
Controls are set in a running or ON
l
Set controls and push start button.
position.
l
Home’s main fuse has blown or circuit
l
Turn cycle control knob to OFF. Replace fuse
breaker has tripped. Also check if a time-
with a time-delay fuse of the correct capacity.
delay fuse or circuit breaker has been used.
Reset circuit breaker. Reset controls and push
start button.
l
Gas shutoff valves are open both on dryer
and on supply line.
l
Turn cycle control knob to OFF. Open gas
valve. Wait 5 minutes. Reset controls and push
start button.
Dryer will not heat
l
Cycle control knob or temperature selector
is set on NO HEAT/FLUFF.
l
Heat cycle is in its last minutes (there is no
heat during that time).
l
Home’s main fuse has blown or circuit
breaker has tripped. Also check if a time-
delayed fuse or circuit breaker has been
used.
l
Reset cycle control knob or temperature
selector to heat setting.
l
Wait for cycle to finish.
l
Turn cycle control knob to OFF. Replace fuse
with a time-delayed fuse of the correct capacity.
Reset circuit breaker. Reset controls and push
start button.
l
An electric dryer circuit uses 2 breakers or
l
Gas shutoff valves are open both on dryer
and on supply line.
2 fuses. If one breaker has tripped or one fuse
has blown, the dryer may run, but not heat.
l
Turn cycle control knob to OFF. Open gas
valves. Wait 5 minutes. Reset controls and
push start button.
Drying time too long
l
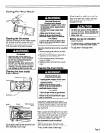
Lint screen is clean.
l
Clean lint screen. See instructions on page 9.
Page 10