


7
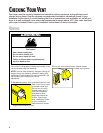
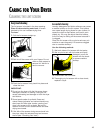
3. You can exhaust from the rear, left, right, or
bottom of the dryer.
•
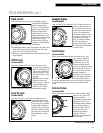
Exhaust from the
rear of the dryer: The
exhaust vent can be
routed up, down, left,
right, or straight out the
back of the dryer. Space
requirements are listed
in your Installation
Instructions.
CHECKING YOUR VENT
VENTING (CONT.)
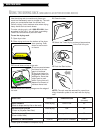
6. Clean exhaust vent periodically, depending on use,
but at least every 2 years,
or when installing your
dryer in a new location.
•
Disconnect vent from
the dryer and clean one
section at a time until
you reach the exhaust
hood.
•
Use the hose attach-
ment on your vacuum,
or a pole or wire with a
feather duster or rag attached, to clean out lint.
•
Be sure the flapper on the outside end of vent
moves freely.
•
When cleaning is complete, be sure to follow the
Installation Instructions supplied with your dryer
for final product check.
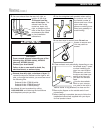
4. Use the straightest path possible when routing
the exhaust vent. Use
the fewest number of
elbows and turns. Allow
room when using
elbows or making turns.
Bend vent gradually to
avoid kinking.
5. Use duct tape to seal all joints. Do not use
screws to secure vent.
Lint may catch on
screws.
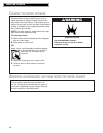
wWARNING
Fire Hazard
Cover unused exhaust holes with one of the
following kits: #279818 (white), #279819
(almond), #279820 (ebony).
Contact your local dealer.
Failure to do so can result in death, fire,
electrical shock, or serious injury.
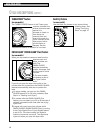
•
Exhaust from left, right, or bottom of dryer: To
convert the dryer for exhaust out the right or left
side, or through the bottom, you must use one of
the following kits:
Exhaust Kit No. 279818 (white)
Exhaust Kit No. 279819 (almond)
Exhaust Kit No. 279820 (ebony)
An exhaust kit can be ordered by calling
1-800-442-9991 and following the instructions
and telephone prompts you hear.