5
3.
(OPTIONAL) Add liquid fabric softener.
NOTE:
Your washer/dryer does not come with a fabric
softener dispenser installed.
To find out whether your model allows fabric softener
dispenser usage and for ordering information, refer to the front
page of your manual or call the dealer from whom you
purchased your washer/dryer. Ask for Part Number 3350834.
NOTE:
Do not spill or drip any fabric softener onto the clothes.
Undiluted fabric softener can stain fabrics. Always dilute fabric
softener with warm water. Too much fabric softener can make
some items (diapers and towels) nonabsorbent. If this
happens, do not use it in every load, or use less of it in each
load.
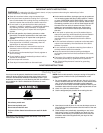
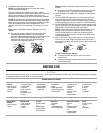
Style 1:
With Liquid Fabric Softener dispenser (on some
models)
■
Use only liquid fabric softener in this dispenser. Pour
measured liquid fabric softener into the dispenser.
Softener is added automatically during the rinse portion of
the cycle. Dilute liquid fabric softener by filling the
dispenser with warm water until liquid reaches the
crossbar in the dispenser opening.
Style 2:
Without Liquid Fabric Softener dispenser (on some
models)
■
In the final rinse ONLY, add fabric softener that has been
diluted with
¹⁄₂
to 1 cup (125 to 250 mL) warm water.
4.
Close the washer lid. Washer will not agitate or spin with the
lid open.
5.
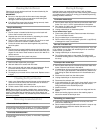
Turn the LOAD SIZE selector to the correct setting for your
wash load and the type of fabric being washed. You may
change the load size or water level selection after the washer
has started filling by turning the selector to a different setting.
6.
Set the TEMPERATURE selector to the correct setting for the
type of fabric and soils being washed. Use the warmest water
safe for fabric. Follow garment label instructions.
NOTE:
In wash water temperatures colder than 70ºF (21ºC),
detergents do not dissolve well. Soils can be difficult to
remove. Some fabrics can retain wear wrinkles and have
increased pilling (the formation of small lint-like balls on the
surface of garments).
7.
Push in the Cycle Control knob and turn it clockwise to the
wash cycle you want. Reduce the wash time when using a
small load size setting. Pull out the Cycle Control knob to start
the washer.
To stop or restart your washer:
■
To stop the washer at any time, push in the Cycle
Control knob.
■
To restart the washer, close the lid (if open) and pull out the
Cycle Control knob.
DRYER USE
Loading
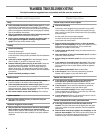
Load clothes loosely into the dryer. Do not pack the dryer. Allow space for clothes to tumble freely. The following charts show examples
of balanced loads that would allow for proper tumbling.
LARGE CAPACITY DRYER
Heavy Work
Clothes
2 pair of pants
3 pair of jeans
1 coverall
3 shirts
Mixed Load
2 double sheets
4 pillowcases
6 T-shirts
6 pair of shorts
2 blouses
6 handkerchiefs
2 shirts
Towels
8 bath towels
8 hand towels
10 washcloths
1 bath mat
Delicates
2 camisoles
4 slips
6 undergarments
2 sets of sleepwear
1 child’s outfit
Permanent Press
1 double sheet
1 tablecloth
1 dress
1 blouse
2 pair of pants
3 shirts
2 pillowcases
Knits
2 pair of pants
2 blouses
4 shirts
4 tops
2 dresses
COMPACT DRYER
Heavy Work
Clothes
2 pair of pants
3 shirts
Mixed Load
1 pair of pants
2 pillowcases
1 T-shirt
2 shirts
Towels
9 bath towels
-or-
6 bath towels
3 hand towels
6 washcloths
Delicates
1 camisole
2 slips
7 undergarments
1 set of sleepwear
Permanent Press
6 shirts
-or-
2 double sheets
2 pillowcases
-or-
2 single sheets
2 pillowcases
Knits
2 pair of pants
2 shirts
-or-
3 dresses


