


Panel B
Electrical
Requirements
Installation
Steps
Preparation
Inlet hose connection (to washer)
Do Not earth to a gas pipe.
Check with a qualified electrician if you are not sure that
washer is properly earthed.
Do Not have a fuse in the neutral or earthing circuit.
In the U.S. only: If codes permit and a separate earthing
wire is used, it is recommended that a qualified electrician
determine that the earthing path is adequate.
If the supply cord of this appliance is damaged, it must be
replaced only by a repair shop appointed by the
manufacturer, because special tools are required.
A 230-volt, 50-Hz, 10-amp, fused electrical supply is required. Time-
delay fuse or circuit breaker is recommended. It is recommended
that a separate circuit serving only this appliance be provided.
Electrical Shock Hazard
Plug into an earthed outlet.
Do not remove ground prong.
Do not use an adapter.
Do not use an extension cord.
Failure to do so can result in death, fire, or
electrical shock.
Recommended earthing method
For your personal safety, this washer must be earthed. This
washer is equipped with a power supply cord having an earthing
plug.
To minimize possible shock hazard, the power supply cord must
be plugged into a mating earthing-type wall receptacle earthed in
accordance with local codes and ordinances. If a mating wall
receptacle is not available, it is the personal responsibility and
obligation of the customer to have the proper earthed wall
receptacle installed by a qualified electrician.
WARNING
Excessive Weight Hazard
Use two or more people to move and install
washer.
Failure to do so can result in back or other
injury.
WARNING
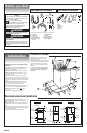
Pull firmly to remove the other end of the shipping strap (D) from
the back of the washer to release self-leveling legs (E).
Save the shipping strap to secure drain hose.
SLIDE WASHER ONTO CARDBOARD OR HARDBOARD
BEFORE MOVING ACROSS FLOOR.
Move washer close to its final location.
Read, then remove the label (A) that covers the power supply cord
and drain connector. Peel the tape down and off each side of the
cabinet.
Remove shipping strap (B).
Completely remove the shipping strap with 2 cotter pins (C) from
the inside of the washer.
Pull the strap completely out of the washer.
B
C
A
E
D
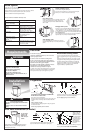
Insert one large flat washer (A) into each end of the inlet hoses
(B). Check that washers are firmly seated in couplings (C).
Use new hoses,
washers, and
adapters that
came with your
washer.
Check inlet hoses periodically. Replace inlet hoses if you
find bulges, kinks, cuts, wear or leaking. Replace inlet
hoses after five years of use.
A
C
B
Drain system
Untape and open washer lid. Remove packages and hoses from washer. Follow
directions for your type of drain system.
If a longer drain hose is needed, use drain hose extension kit (Part No. 285702).
If drain hose must be shortened, use drain hose kit (Part No. 285442).
All kits are available from authorized parts distributors.
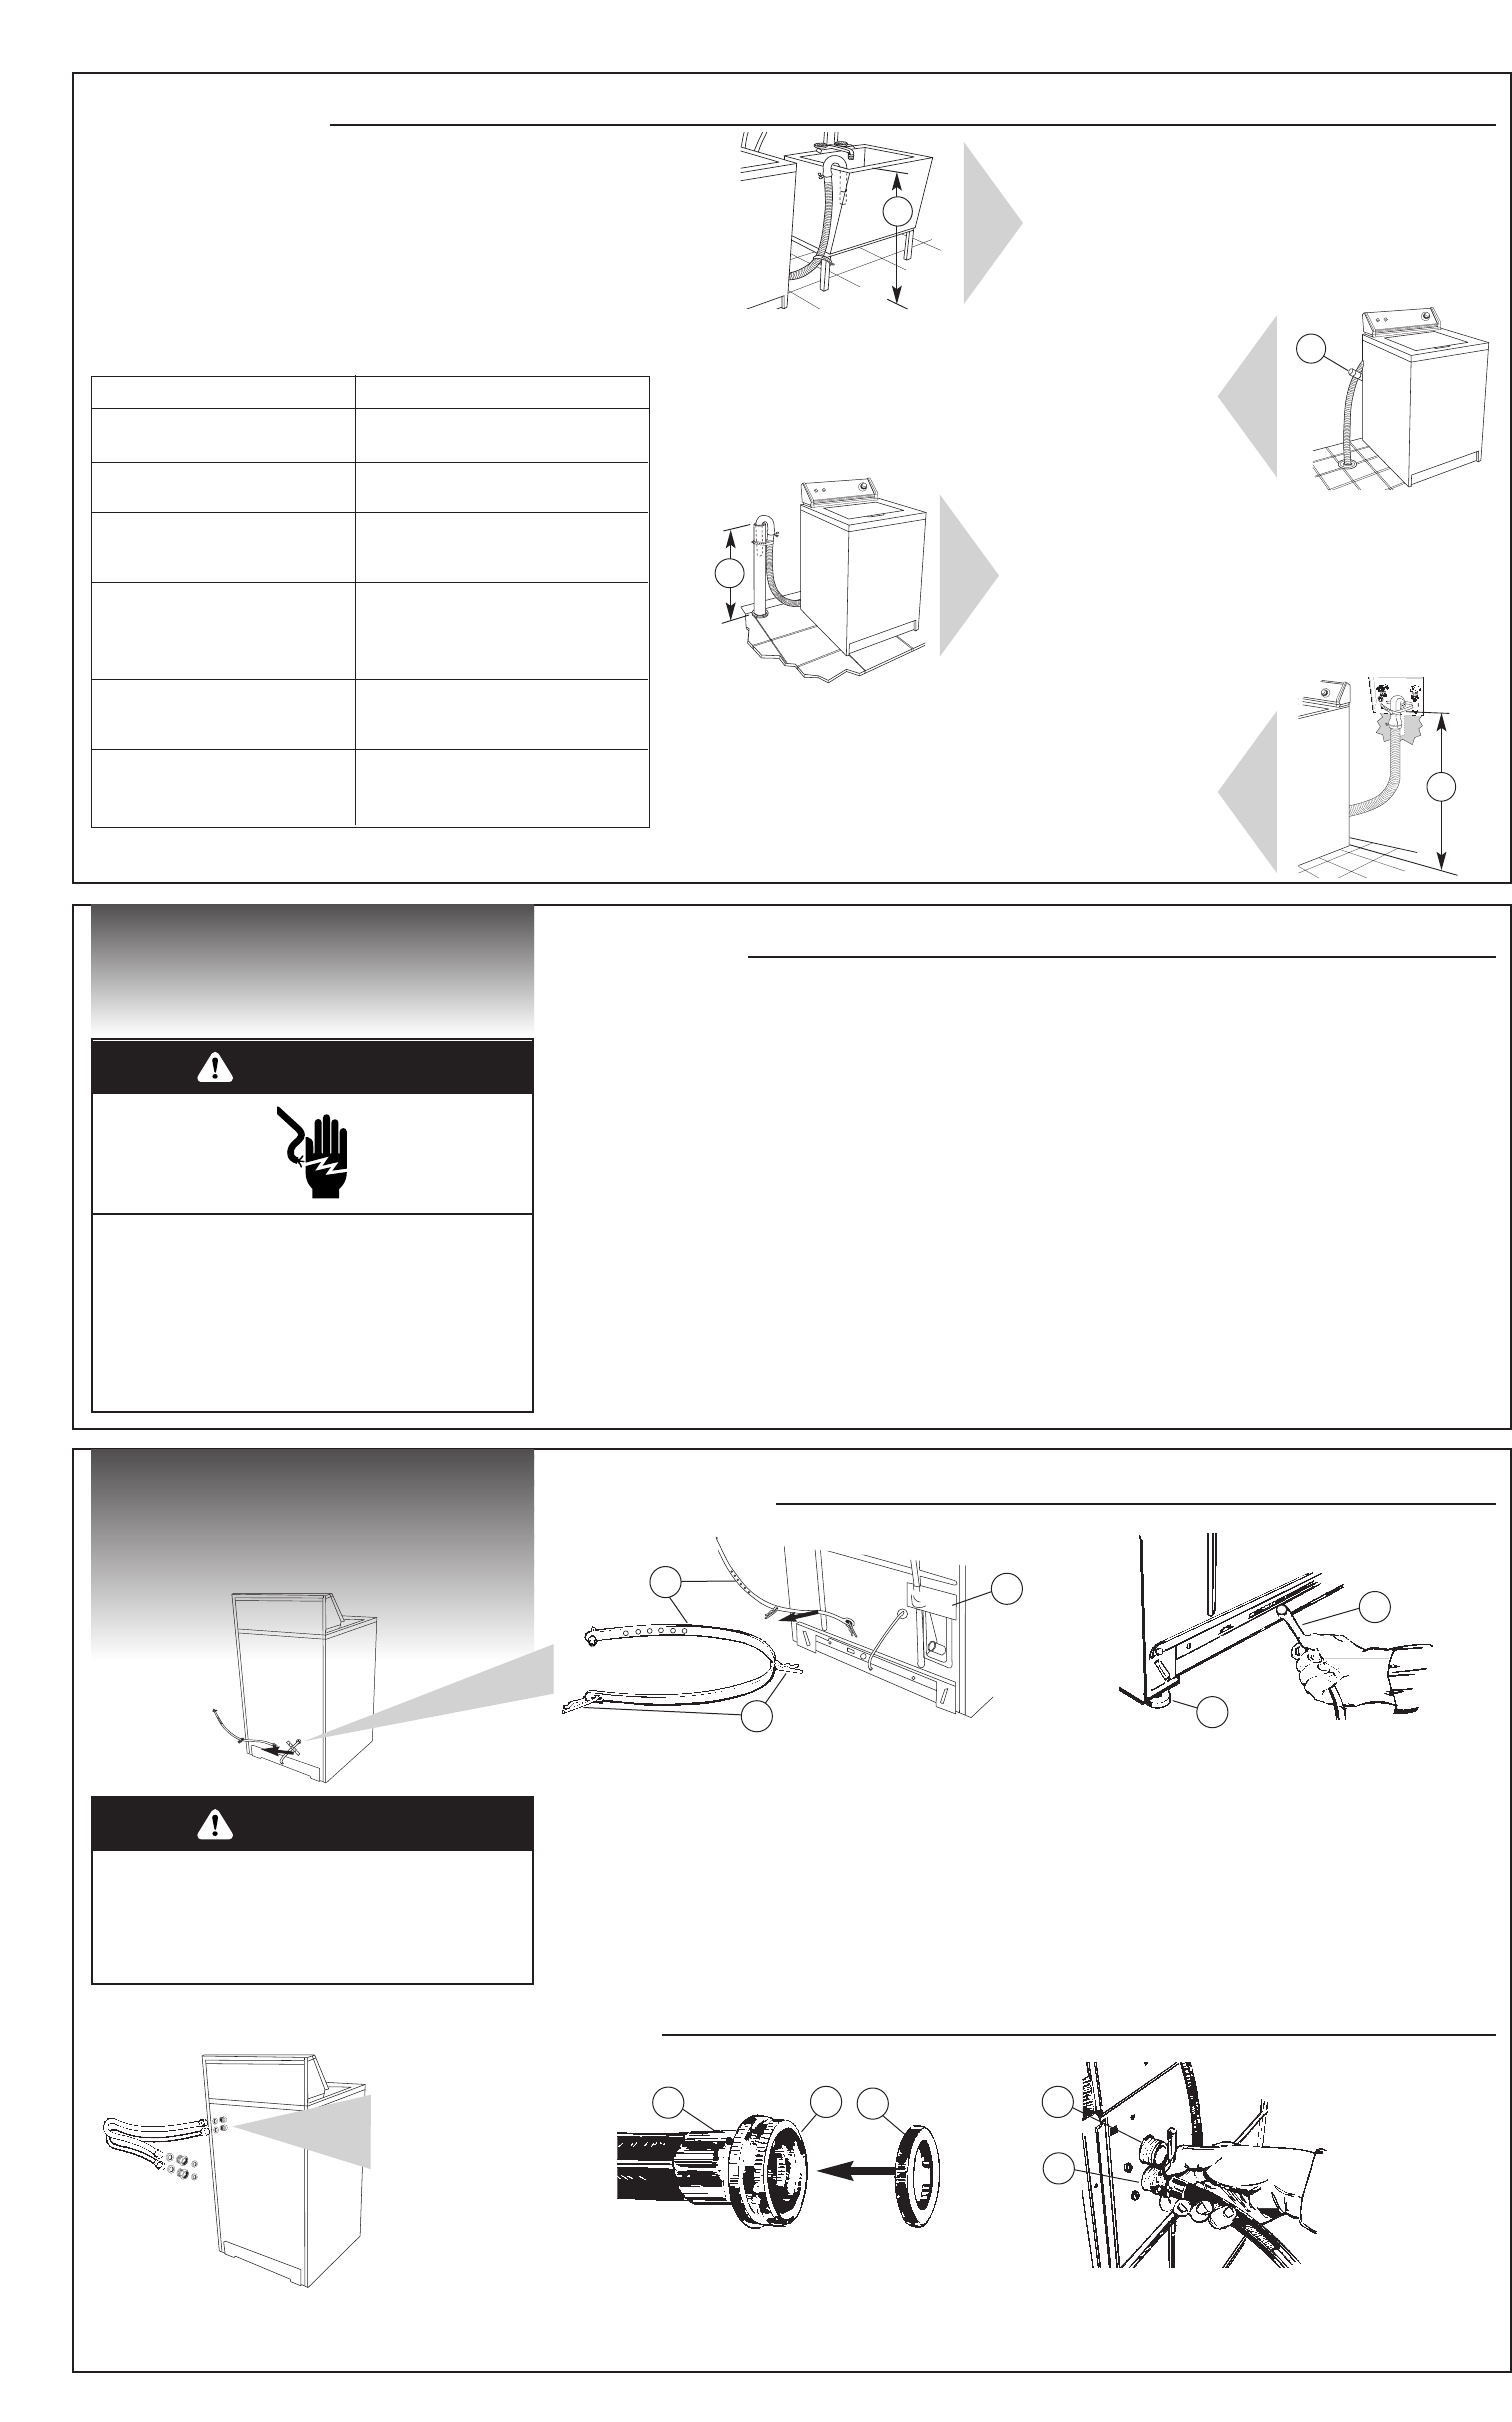
If your home has: You will need to buy:
99 cm (39") to 183 cm (72’’) high, nothing
5,1 cm (2") dia. standpipe
2,5 cm (1") 5,1 cm (2") dia. to 2,5 cm (1") dia.
standpipe standpipe adapter, Part No. 3363920
floor drain siphon break, Part No. 285320; additional
drain hose, Part No. 3357090;
and Connector Kit, Part No. 285442
overhead sewer standard 76 liters (20 gal.), 86 cm (34")
high drain tub or utility sink and sump
pump (available from local
plumbing suppliers)
standard 76 liters (20 gal.), nothing
86 cm (34") high drain tub or
utility sink
water not close by 2 longer water inlet hoses: 1,8 m (6 ft.)
hoses, Part No. 76313 or 3 m (10 ft.)
hoses, Part No. 350008
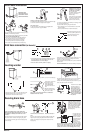
Select the drain hose installation method you need.
Laundry tub drain system:
Needs a 76-liter (20-gallon) laundry tub.
Top of tub must be at least 86 cm (34 inches) high and no higher
than 183 cm (72 inches) from bottom of washer (A).
Standpipe drain system:
Needs a 5-cm (2-inch) minimum diameter standpipe with minimum
carry-away capacity of 64 liters (17 gallons) per minute. A 5-cm
(2-inch) diameter to 2.5-cm (1-inch) diameter standpipe adapter, Part
No. 3363920 must be used with 2.5-cm (1-inch) diameter drain system.
Floor standpipe drain:
Top of standpipe (C) must be at least 99 cm (39 inches) high and no
higher than 183 cm (72 inches) from bottom of washer.
Floor drain system:
Requires a siphon break, Part No. 285320 (B). Siphon break
must be above high-water level in washer, at least 71 cm
(28 inches) from bottom of washer. Additional drain hose
will be needed.
Wall standpipe drain:
Top of standpipe (D) must be at least 99 cm (39 inches)
high and no higher than 183 cm (72 inches) from bottom of
washer.
A
B
C
D
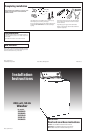
Attach hose (without
adapter) to hot water
(bottom) inlet valve
(D) first; then second
hose (without adapter)
to cold water (top)
inlet valve (E). Tighten
couplings by hand.
Then use pliers to
make additional two-
thirds turn.
DO NOT OVERTIGHTEN; this could cause damage to couplings.
Inlets are plastic. DO NOT STRIP OR CROSSTHREAD.
E
D