


76
MOUNTING INSTRUCTIONS
For use on sheetrock or wood walls only.
The Sunbeam wall mount hair dryer is designed for installation on sheetrock or wood
walls only. To mount onto wall, be sure there are no hidden electrical circuits or pipes
in the mounting location.
PLUG-IN MODEL 1629-020
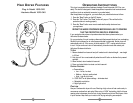
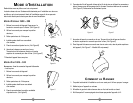
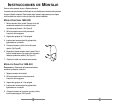
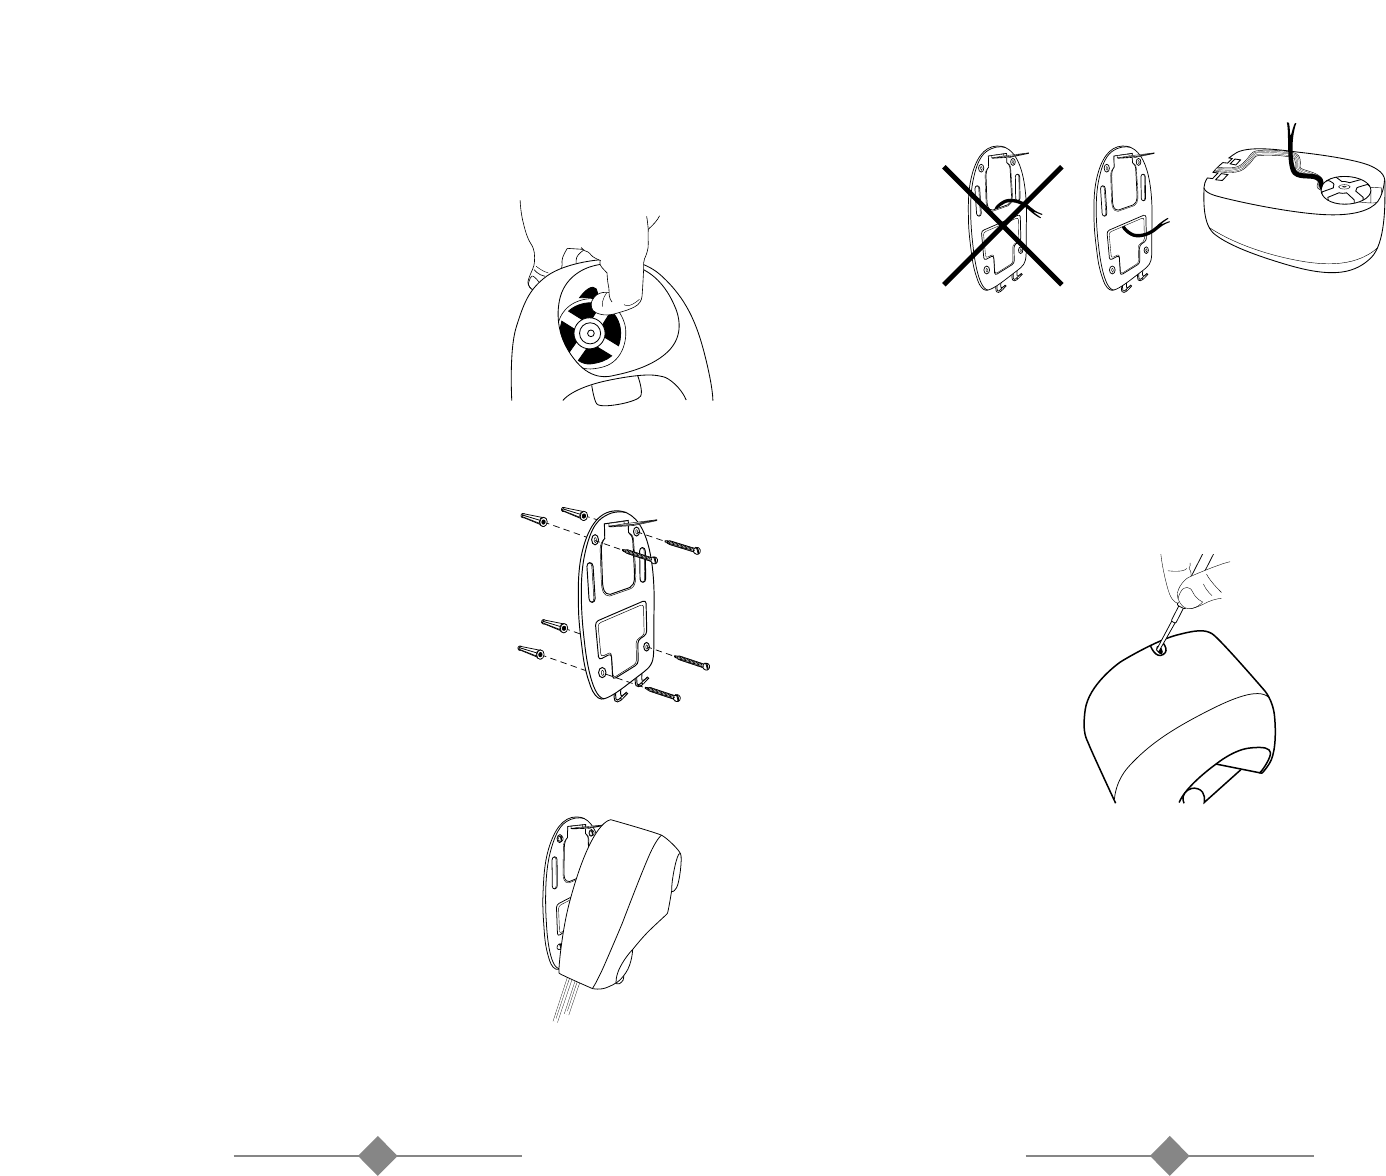
1.
Remove wall bracket from the unit. Push bracket
clip inside housing cavity as shown to release
bracket.
( See Figure A )
2. Use the bracket as template to mark position
of holes for drilling.
3. Drill four 1/4-inch holes.
4. Insert the four anchors by tapping lightly
with a hammer.
5. Position wall bracket and use screws to fasten.
(See Figure B)
6. Engage base unit to wall bracket. Rotate the top
of base unit towards the bracket upper clip until it
snaps into place. (See Figure C)
7. Plug the unit into nearby electrical outlet.
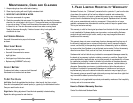
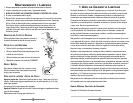
HARDWIRE MODEL 1629-040
PRECAUTIONS: Remove power from electrical
terminal before making wire connections.
1. Remove wall bracket from the unit.
2. Use the bracket as template to mark position
of holes for drilling.
3. Drill four 1/4-inch holes.
4. Insert the four anchors by tapping lightly
with a hammer.
5. Position wall bracket and use screws
to fasten. (See Figure B)
Figure B
Figure A
Figure C
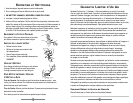
6. Connect base unit wires to the wires from wall junction box using supplied wire nuts.
Make sure wiring is routed through the lower opening on the bracket as shown.
(See Figure D) Push wiring into junction box.
7. Engage base unit to wall bracket. Rotate the top of base unit towards the bracket
upper clip until it snaps into place. (See Figure C)
8. Secure base unit to bracket by tightening supplied anti-theft screw on top of the unit
as shown. (See Figure F – Model 040 Only)
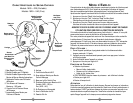
S
TORAGE
1. This product is designed to mount on a wall for both use and storage.
2. Always store handset inside the base.
3. Do not mount or store dryer in an area with excessive heat or moisture.
4. Do not hang dryer by cord or use cord as a handle
Figure E
Figure F
Figure D