


5
reducing temperature
20 If you’ve missed something, remember that reducing the temperature takes a lot
longer than raising it.
21 You must wait till the ready light comes on, then goes off again, to ensure that the
iron has come down to the correct temperature.
steam ironing
, Water spotting affects some fabrics. Test this out on a hidden part of the fabric.
22 Check that there’s water in the reservoir.
23 Set the temperature control to S or higher, or you’ll just get water.
24 Wait till the thermostat light goes out.
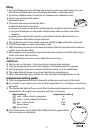
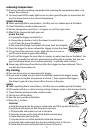
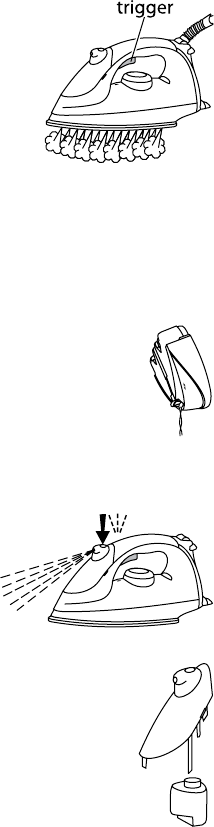
prime the iron
a) squeeze the trigger and hold it in
b) it may take a minute or so for the steam to reach the iron
c) you’ll hear the pump throbbing
d) the note will change, and steam will come from the soleplate
25 Press the trigger for steam, release the trigger to stop the steam.
26 Try not to let the reservoir run dry while the iron is in use, or
you’ll have to prime it again after refilling.
27 Don’t hold the trigger for more than 3 minutes, or water may drip on the fabric. You
wouldn’t normally iron part of a garment for anything like 3 minutes, but you can
get carried away when you’re ironing vertically – especially with curtains.
, Steam may still escape from the iron after the trigger has been released. This is
normal, don’t worry about it.
dry ironing
28 You can dry iron by not squeezing the trigger.
29 If you want to make sure you don’t accidentally squeeze the trigger, empty
the reservoir, bring the temperature to above S, then squeeze the trigger a
few times to get rid of any steam left in the iron or the pipe.
spray
, Water spotting affects some fabrics. Test this out on a hidden part of the fabric.
30 This works with dry or steam ironing, as long as there’s water in the atomiser bottle.
31 Check that the atomiser bottle contains water.
32 Lift the iron off the fabric.
33 Aim the spray nozzle at the fabric.
34 Press the * button.
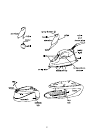
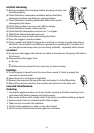
atomiser
a) hold the atomiser by the grips on either side, and lift it up and off the iron
b) pull the bottle down, to free it from the atomiser
c) fill the bottle with water, but not to the brim
d) align the arrows on the back of the bottle and atomiser
e) lower the tube into the bottle
f) stop when the rim of the bottle fits inside the atomiser
g) align the tabs underneath the atomiser with the slots in the iron
h) lower the atomiser and bottle into the front of the iron