


13
ted in steps of 5 minutes, within four minutes
after the start of the start of the drying pro-
gramme).
indicates 2 hours and 35
minutes, for example. Only the time for the
Time programme and Air fluff drying is indica-
ted for venting dryers.
During cooling,
is indicated in the display
together with the number of minutes remain-
ing.
If the Anti-crease option is selected, the drum
will rotate every minute for a certain period
after cooling. The text
is indicated in the
display during this period. The programme will
stop as soon as the door is opened.
DURING THE DRYING PROGRAMME
If you wish to interrupt or change the
programme
Hold down the button for three se-
conds. An extinguished LED next to the button
indicates that the programme has been inter-
rupted.
Changing the programme selector knob after
starting will not affect the programme.
Putting in or taking out washing
If you wish to put in or take out washing after
you have started the machine, opening the door
will cause the machine to stop automatically.
Put in more washing, close the door and press
the
button. The programme will restart
automatically from the point at which it was
interrupted.
DRYING PROGRAMME ENDED
The text in the display indicates
that the programme has ended.
If the Anti-crease option is selected, the drum
will rotate every minute for a certain period
after cooling. The text
is indicated in the
display during this period. The programme will
stop as soon as the door is opened.
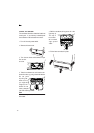
- Clean the lint filter after each tumble drying
operation.
- Drain the condensation water container.
WARNING
If the lint filter becomes completely clogged,
this may cause the overheating protection to
trip. The filter must then be cleaned and the
overheating protection must be reset before res-
tarting the machine; see Chapter 11, Trouble
shooting.
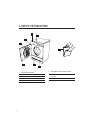
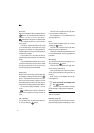
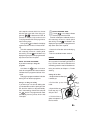
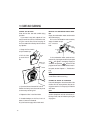
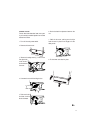
Cleaning the lint filter
1. Grasp the filter handle and pull
it towards you.
2. Pull the filter up out of the
holder.
3. Open the filter and
brush away any lint
with your hand.
4. Fold the filter to-
gether and replace it in
the filter holder.
1
2
8
8