


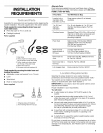
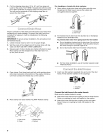


8. Ifthewasherisnotlevel,movethewasheroutslightly,tip
back,propupthefrontofthewasherwiththewoodblock
andadjustthefeetupordownasnecessary.Repeatsteps
5through8untilwasherislevel.
9. Afterthewasherisinthefinallocationandlevel,usea%ein.
(14mm)open-endwrenchtoturnthenutsonthefeettightly
againstthewashercabinet.
Ifthenutsarenottightagainstthewashercabinet,the
washermayvibrate.
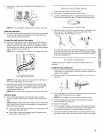
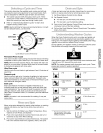
1. Checktheelectricalrequirements.Besurethatyouhavethe
correctelectricalsupplyandtherecommendedgrounding
method.(See"ElectricalRequirements.")
2. Checktobesureallpartsarenowinstalled.Ifthereisan
extrapart,gobackthroughthestepstoseewhichstepwas
skipped.
3. Check to be sure you have all of your tools.
4. Check to be sure that the yellow shipping strap was removed
from the back of the washer and used to secure the drain
hose.
5. Dispose/recycle all packaging materials.
6. Check to be sure the water faucets are on.
7. Check for leaks around faucets and inlet hoses.
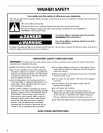
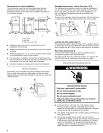
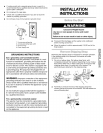
Electrical Shock Hazard
Plug into a grounded 3 prong outlet.
Do not remove ground prong.
Do not use an adapter.
Do not use an extension cord.
Failure to follow these instructions can result in
death, fire, or electrical shock.
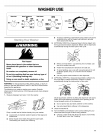
BENEFITS
Your new washer has many special features that contribute to
proper cleaning and fabric care. Here are descriptions of the
features and their benefits:
TOTAL CARE TM Agitator
The TOTAL CARE TM Agitator moves in three directions to ensure
proper cleaning. At the bottom of your washer the agitator vanes
move back and forth to flex the fabric, loosening the soil. The
upper portion of the agitator has vanes that push the clothes
down in a spiraling pattern to the area of best cleaning action. A
"roll-over" motion displaces the clothes already at the bottom.
For your largest loads, the TOTAL CARETM Agitator responds with
a vertical motion that senses the "large load" and guides items to
the bottom.
KING SIZE TM Capacity
Your washer can handle full-sized loads of heavy work clothes,
towels, or mixed items (see "Loading"). Loads with only a few
items can have a lower water level setting and need less wash
time.
Ultra Rinse System
Your washer allows you to add an automatic second rinse to the
Ultra Clean cycle and to the Permanent Press II cycle. Set the
Rinse Options control on 2nd rinse before you start the washer.
You can also select a "Rinse and Spin" option.
QUIET PAK TM II System
The QUIET PAKTM System is designed to reduce water sounds
and ringing noises. The cabinet is insulated with three sound-
damping materials for superior vibration and sound-damping
characteristics.
Timed Bleach Dispenser
The liquid chlorine bleach dispenser automatically dispenses
bleach at the proper time in the cycle to ensure the cleanest and
brightest loads. The dispenser is for liquid chlorine bleach only.
Do not use this dispenser to add powdered chlorine or color-safe
bleach to your washer load.
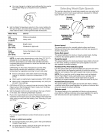
Wash/Spin Speeds
Six combinations of speeds are provided for wash action (of
agitator) and spin motion (of basket). A Speeds selector control
knob lets you select a wash/spin speed for different types of
fabrics and soil levels.
Water Level and Temperature
A Water Level control gives you the flexibility to save water when
washing small loads. The Water Temperature control knob lets
you select a wash and rinse water temperature setting based on
the type of load you are washing. The settings for Automatic
Temperature Control (ATC) take away the worry of undissolved
detergent and ensure consistent cleaning results from season to
season with warm and cold washes.
8. Plug into a grounded 3 prong outlet.
9. Remove the protective film on the console and any tape
remaining on the washer.
10. Read "Washer Use" in the Washer User Instructions.
11. To test your washer, measure 1/2 of the normal
recommended amount of powdered or liquid detergent and
pour it into the washer basket or detergent dispenser (on
some models). Close the lid. Select any cycle, and then press
START. Allow it to complete one whole cycle.
10