3. Cut the shipping strap about 16 in. (40 cm) from plug end.
Look for the words "CUT HERE." Discard end with the cotter
pins. Slide remainder of shipping strap from the power cord.
You will use the remainder of the shipping strap later to
secure the drain hose.
For standpipe or laundry tub drain systems:
1. Open yellow, single-wire clamp with pliers and slide over
hooked end of drain hose to secure the rubber and
corrugated sections together.
Proper connection of the drain hose will protect your floors from
damage due to water leakage. To prevent the drain hose from
coming off or leaking, it must be installed per the following
instructions.
IMPORTANT: To ensure proper installation, this procedure must
be followed exactly.
1. Check the drain hose to see if it is the proper length.
2. Wet the inside of the straight end of the drain hose with tap
water. DO NOT USE ANY OTHER LUBRICANT.
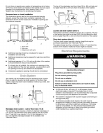
3. Squeeze ears of silver, double-wire clamp with pliers to open.
Place clamp over the straight end of the drain hose 1/4in.
(6 ram) from the end.
(6 ram)
21
1. Hooked end
2, Drain hose
Put hooked end of drain hose into laundry tub or standpipe.
Rotate hook to eliminate kinks.
To prevent drain water from going back into the washer:
• DO not straighten hooked end of drain hose. Do not force
excess drain hose into standpipe. Hose should be secure,
but loose enough to provide a gap of air.
• Do not lay excess drain hose in bottom of laundry tub.
• For floor drain installation, see kit number required under
"Alternate Parts."
4. Open clamp. Twist hose back and forth while pushing down
onto drain connector at the bottom of the washer. Continue
until hose contacts the ribbed stop on the cabinet.
5. Place clamp over area marked "CLAMR" Release clamp.
1/4"
(6ram)
(6ram)
1. Drain Hose 3. Ribbed Stop
2. Clamp 4. Cabinet


