


NAMES OF RESPECTIVE PARTS AND SIMPLE INSTALLATION
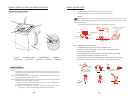
Names of respective parts
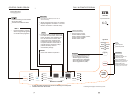
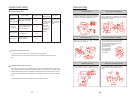
1. Top lid 2.Operation panel 3.Adjustable leg 4.Cabinet
5. Drain hose 6.Top frame 7.Pulsator 8.Lint filter 9.Inner tub
Simple installation
Step 1:
Step 2:
Step 3:
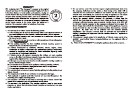
The washing machine should be placed inside the room with a flat floor, which is
convenient for water supply and drain, has low moisture and no direct sunshine, and
does not freeze in winter.
All foam packing (including the fixing frame on the base foam) should be taken off,
otherwise the washing machine will not work.
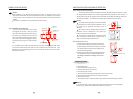
Please adjust the washing machine even according to the instructions below to make
the washing machine run steadily in low noise.
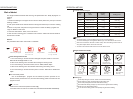
1.Loose the fixing pole on the adjusting foot, screw in or screw out the adjusting foot
to make the four feet placed even on the floor.
2. When the floor is slanting or uneven, it is not easy to make even only by the
adjusting foot. Then the rubber band can be added to the un-flat place.
SIMPLE INSTALLATION
3. Use gradienter to check whether the washine machine is place flat.
4. After the adjustment the fixing pole should be screwed back and tight.
Notices:
o
If the washing machine is not placed flat (the inclination angle is over 2 ), it may cause great
vibration or automatic check and rectification or other abnormal circumstances will often take place in
the course of spinning.
All foam packing including the fixing frame on the base foam in the step 2.
Bukly objects
Base foam Fixing frame
Screw in
Screw out
Loose
Adjustable foot
Fixing pole
Tight
Step 4:
Éè
ÖÃ
±ê
×¼
5
.
5k
g
Ê£
Óà
ʱ
¼ä
£¨
·Ö
£©
Ô¤
Ô¼
£¨
С
ʱ
£©
½Ú
ÄÜ
2
С
ʱ
ÖÇ
ÄÜ
¿ì
Ï´
½Ú
Ë®
1
С
ʱ
¸ö
ÐÔ
ÏË
ϸ
¾²
Òô
3
0
·Ö
ÖÓ
ͯ
ÒÂ
´ó
Îï
Ë®
ȯ
ÊÕ
Í°
·ç
¸É
Ñò
ë
X
Q
B5
5
-
80
9
G
¹¦
ÄÜ
Ñ¡
Ôñ
½þ
ÅÝ
Ï´µÓ
Ưϴ
ÍÑ
Ë®
7
8
9
Skirt
Tap
File
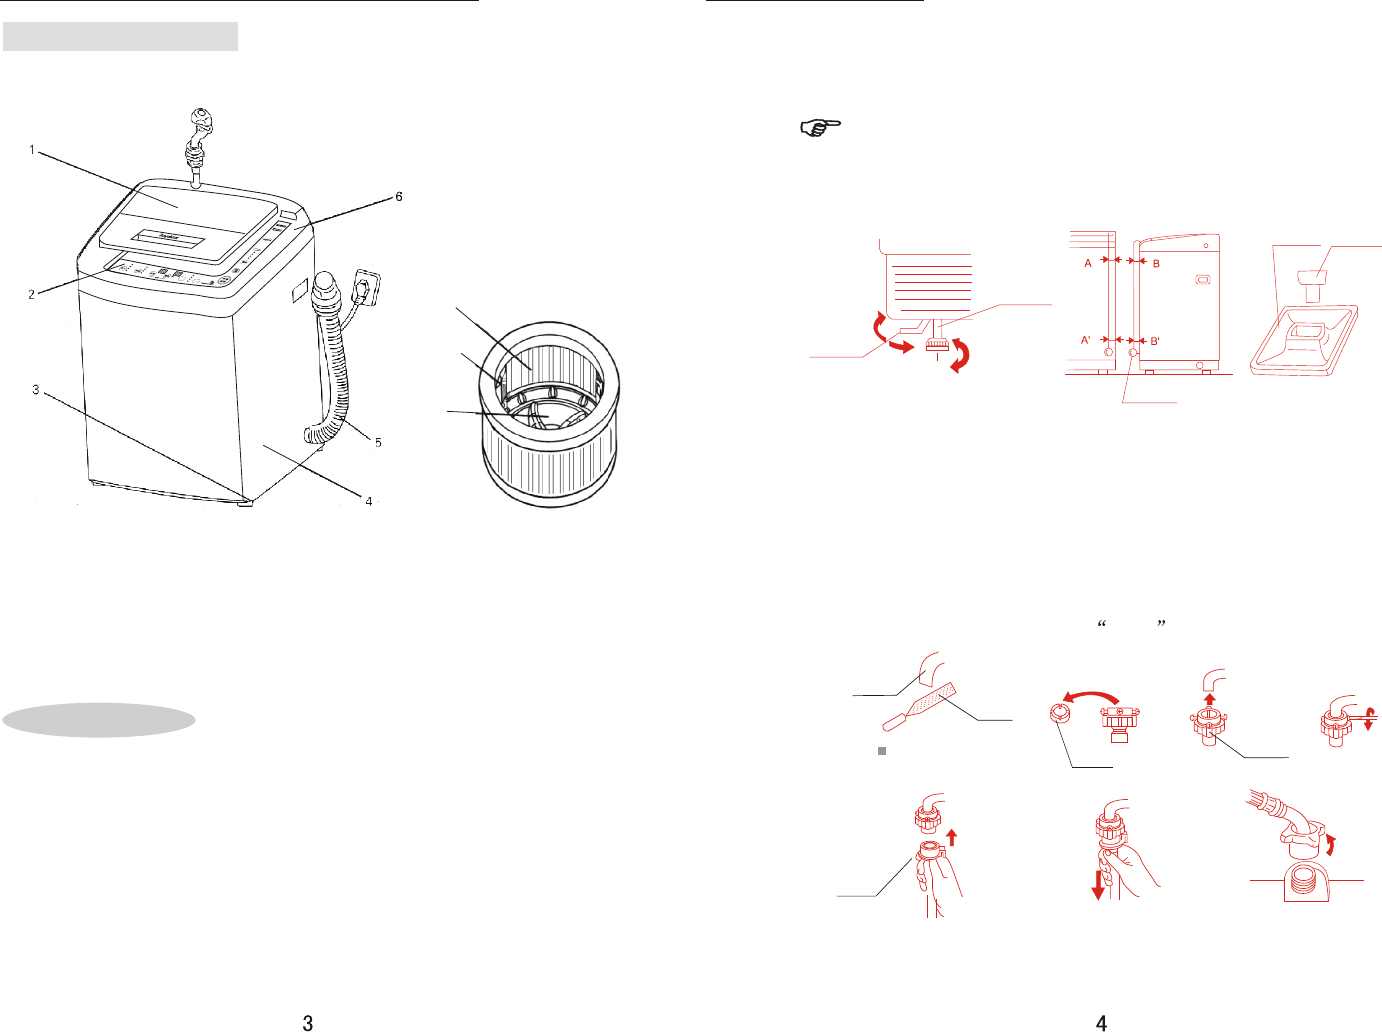
If the calibre of the tap
is big, the connecting
ring can be taken off.
Connecting ring
Locking ring
Installation of the water inlet hose
1. Check the tap mouth.If it is not even,it can be filed even.
2.Loosen the locking ring slightly , Screw the four screws into universal
connector at the same distance.
3. Put the tap deeply into the universal connector then screw in the screws.
4. Screw tight the locking ring clockwise at the most.
5. Pull the skirt of one end of the water inlet hose downwards, and then plug in
the universal connector. A sound of KA-TA means proper connection.