2
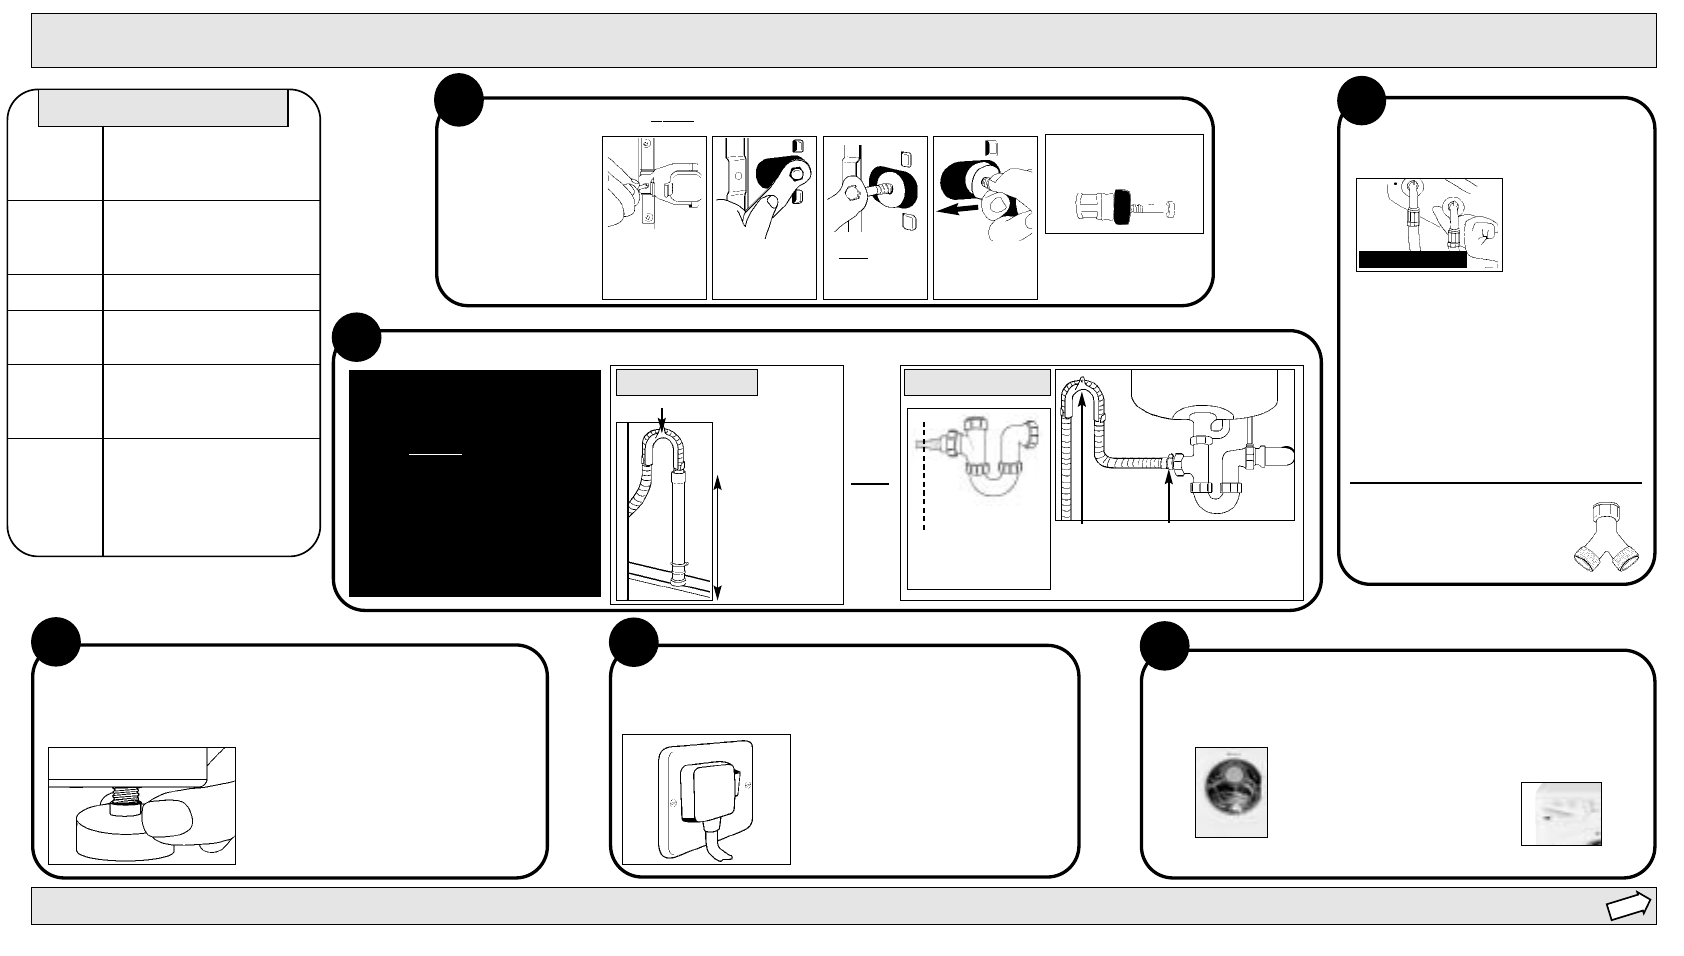
CONNECT TO THE WATER
SUPPLY...
Installation
ii
i
3
DRAINAGE SYSTEM... we recommend one of the following:
4
LEVEL?...
NOTE:ALTHOUGH YOU MAY NEED TO
MOVE THE HOOKED END SUPPORT
ALONG THE GREY DRAINAGE HOSE,
DO NO
T REMOVE IT.
WHICHEVER DRAINAGE METHOD
YOU USE,MAKE SURE THAT THE
HOOKED END SUPPORT IS FIXED
LEVEL TO, OR ABOVE THE ‘PLUMBING
INDICATOR LINE’*
(*see Getting to Know your Appliance)
PLEASE USE THE NEW HOSES SUPPLIED,FITTED
TO THE MACHINE.
If you have no hot water supply...
Old hoses may
cause leaks due to
worn out washers
or may split due to
water pressure.
YOUR MACHINE WILL BE NOISY IF THE TWO FRONT FEET ARE NOT
ADJUSTED SO THE MACHINE STANDS FIRM AND LEVEL.
Check both hot
and cold water
supplies are
running freely...
A cold fill adaptor is available from
your local Hotpoint authorised
Service Centre or by calling the
Genuine Parts & Accessories Hotline
(see KEY CONTACTS).
Connect fill hoses to the
water supply taps:
Red or Grey Hose end to
Hot and Blue Hose end
to Cold.
TURN BOTHTAPS ON...
iv
iii
Check the hoses
at least once a
year.Replace any
that show signs of
cracking,they
might burst due
to water pressure.
Water pressure at the tap
must be in the range...
Max.1Mpa (10 bar) and
Min.0.05Mpa (0.5 bar)
- Move your machine into final location.
Take care not to trap or kink the hoses.
- Turn one or both front feet clockwise until
the machine stands firm and level.
The spring on each foot will stop them
coming loose.
If it is placed on a fitted carpet,adjust the feet
to ensure that there is adequate ventilation
beneath the washing machine.
1
REMOVE TWO TRANSIT FIXINGS... Follow these instructions to remove the TWO transit fixings.
IMPORTANT:
Situated, one either
side of the rear panel,
both transit bolts
(complete with
spacers) MUST be
removed before use...
Failure to do so may
cause damage to
your machine!
DO NOT REMOVE!
STANDPIPE METHOD
UNDER SINK METHOD
TECHNICAL DETAILS
OR
Attach the GREY
drainage hose to the
under sink drainage
unit securely,using a
hose clip.
Fix the hooked
end support at
a minimum
800mm from
the floor.
cut off the blocked
end of the under sink
drainage unit.
6
READY...
TO CHECK ALL PARTS OF THE INSTALLATION AND TO THOROUGHLY
CLEAN THE INSIDE OF YOUR MACHINE:
RUN PROGRAMME ‘B’ (refer to ‘Programme Selection’, STEP 4).
5
CONNECT TO THE POWER SUPPLY...
PLUG YOUR MACHINE INTO AN ELECTRICAL SOCKET WHICH IS
EASILY ACCESSIBLE. SWITCH ON
NOTE: Hotpoint recommend extension
leads are not used.
NOTE: The mains cable must only be
replaced by an authorised serviceman.
WITHOUT ANY LAUNDRY
WITHOUT ANY DETERGENT
and
THIS WILL TAKE APPROXIMATELY 2hours 20minutes TO COMPLETE
.............................
Standpipe height:
minimum 500mm
from the floor.
Insert drainage hose
approximately 100mm
into the standpipe.
✗
✗
It is important the transit
bolt and spacer come out
intact (see pic).
For safety,replace both
plastic covers over the
holes left by removing
the two bolts.
Use a crosshead
screwdriver to
remove the
plastic cover.
Unscrew the
bolt using a
13mm spanner.
ST
OP when 3
threads can be
seen.
Hold,slide
across and pull
to remove.
800mm
from floor
Hooked End Support
STEP 2
The inclination of the machine,measured on the top,must not exceed 2˚.
Models
Dimensions
Capacity
Electric
Connections
Spin Speed
Control
programmes
according to
IEC456
directive
WF645,WF640,
WF630,
and WF620
59.5cm wide
85cm high
60cm deep
from 1 to 6kg
voltage 220/230 Volts 50Hz
maximum absorbed power 1700W
up to 1400rpm - WF645 & WF640
up to 1300rpm - WF630
up to 1200rpm - WF620
programme D
temperature 60˚C
run with a 6kg load


