


●
repeat steps 1 to 5 to remove the second transit
bolt.
! Packaging materials are not children's toys.
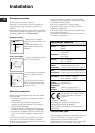
Levelling
Your machine will be noisy if the two front feet are not
adjusted so that the machine stands firm and level.
! The inclination of the machine, measured on the
top, must not exceed 2˚.
1. Move your machine into its final location.
- Take care not to trap or kink the hoses.
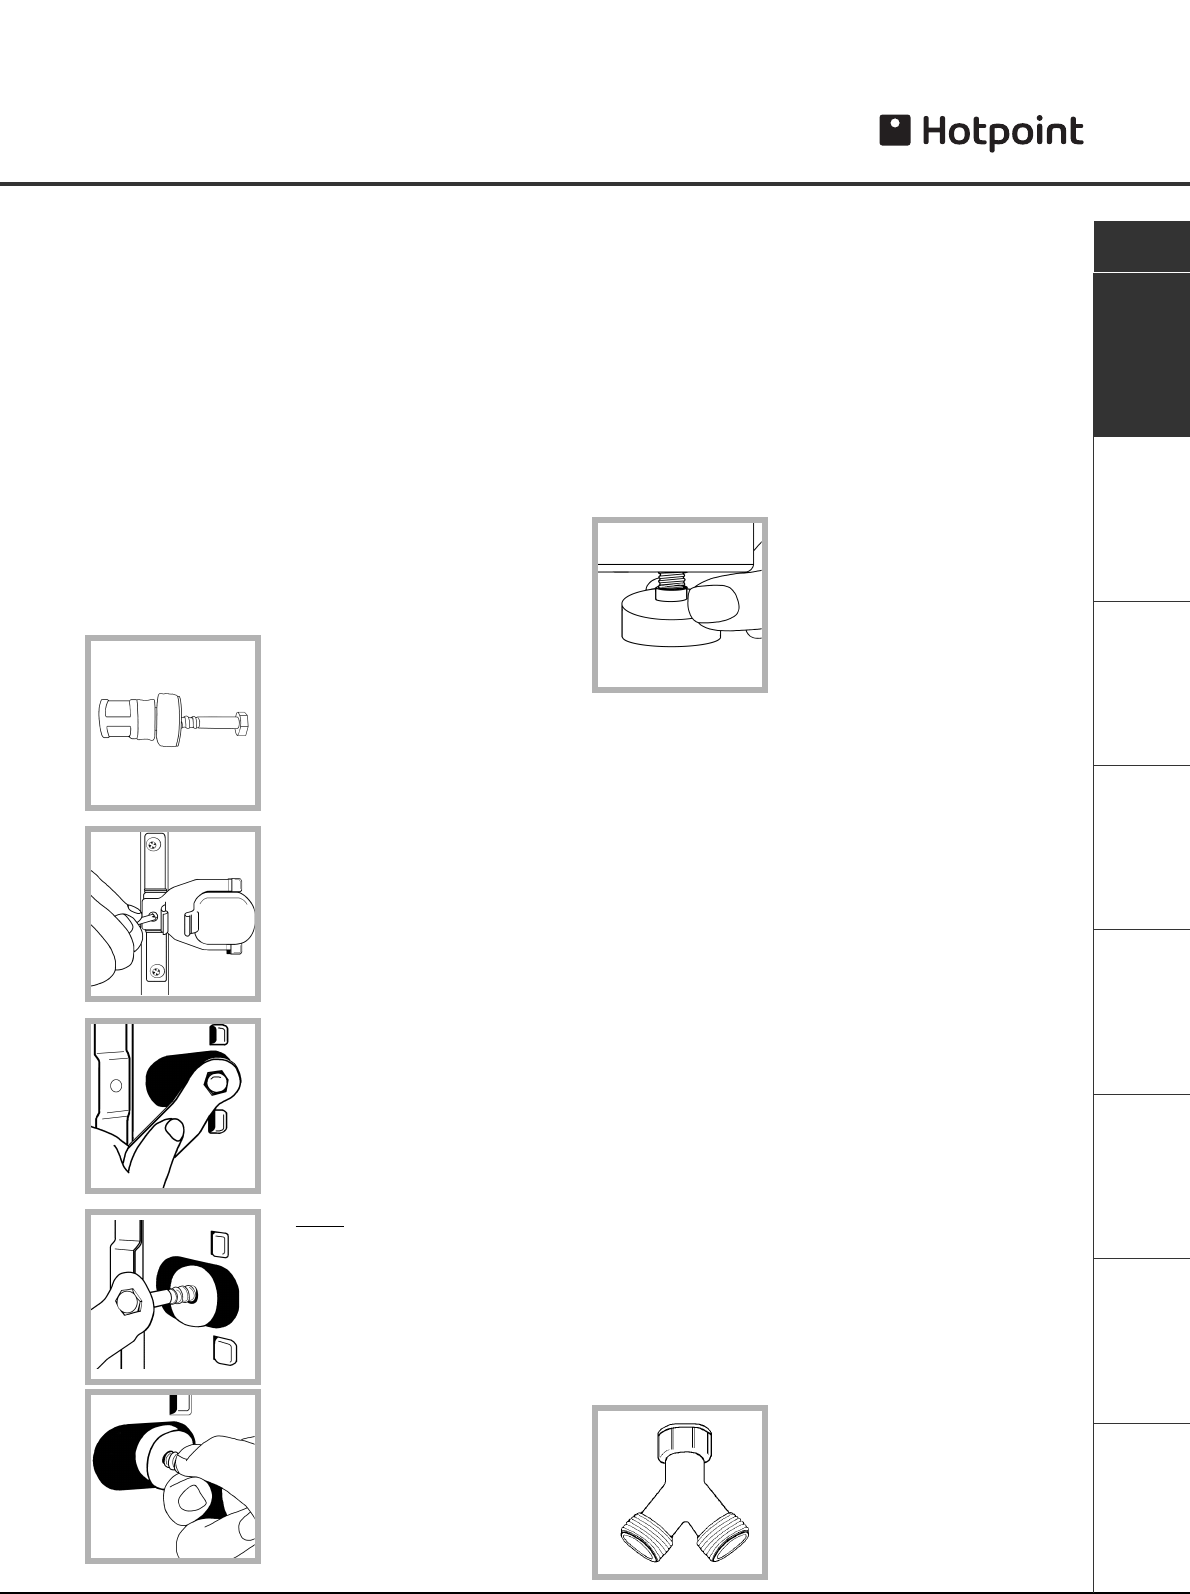
2. Turn one or both front feet
clockwise until the machine
stands firm and level. The
spring on each foot will stop
them coming loose.
If it is placed on a fitted or loose carpet, adjust the
feet in such a way as to allow enough room for
ventilation beneath the machine.
Water connection
Connecting the water inlet hoses.
Remember, please use the new hoses supplied, fitted
to the machine. Old hoses may cause leaks due to
worn out washers or may split due to water pressure.
1. Before making connections to both hot and cold
water supplies, allow the water to run freely from the
supply tap until it is perfectly clear.
2. Connect the new fill hoses to the water supply taps:
- Red or Grey hose end to Hot
- Blue Hose end to Cold
3. Turn both supply taps on and check for leaks,
tighten if necessary.
! Make sure there are no kinks or bends in the hoses.
! The water pressure at the tap must be within the
values indicated in the Technical details table (next
page).
! If the water inlet hoses are not long enough, contact
a specialist store or an authorised serviceman.
! Always use new hoses.
! Check the water hoses at least once a year, replace
any that are cracked as worn hoses could split under
water pressure.
! If you have no hot water
supply, a ‘Y’ piece adaptor is
available from your local
Hotpoint authorised Service
Centre or by calling the
Genuine Parts & Accessories
Hotline (see KEY CONTACTS).
Installation
2
! Keep this instruction manual in a safe place for
future reference. Should the appliance be sold,
transferred or moved, make sure the instruction manual
accompanies the washer dryer to inform the new
owner as to its operation and features.
! Read these instructions carefully: they contain vital
information on installation, use and safety.
Unpacking
1. Unpack the machine.
2. Check whether the washer dryer has been
damaged during transport. If this is the case, do
not install it and contact your retailer.
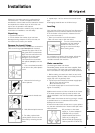
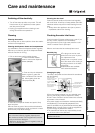
Remove the transit fixings
IMPORTANT: Follow these instructions to remove the
TWO transit fixings (see Description for location).
Situated one either side of the
rear panel, BOTH transit bolts
MUST be removed before use.
! Failure to do so may cause
damage to your machine.
It is important the transit bolt
and spacer (see pic) come out
intact.
1. Use a crosshead screwdriv-
er to remove the yellow plastic
cover.
2. Unscrew the bolt using a
13mm spanner.
3. STOP
when 3 threads can
be seen.
4. Hold, slide and pull to remove.
5. For safety, replace both
yellow plastic covers over the
holes left by removing the two
bolts.
Installation
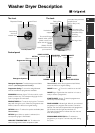
Description
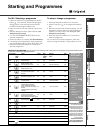
Starting and
Programmes
Detergent and
Laundry
Precautions and
advice
Care and
Maintenance Troubleshooting Service
GB