


Dryer Description
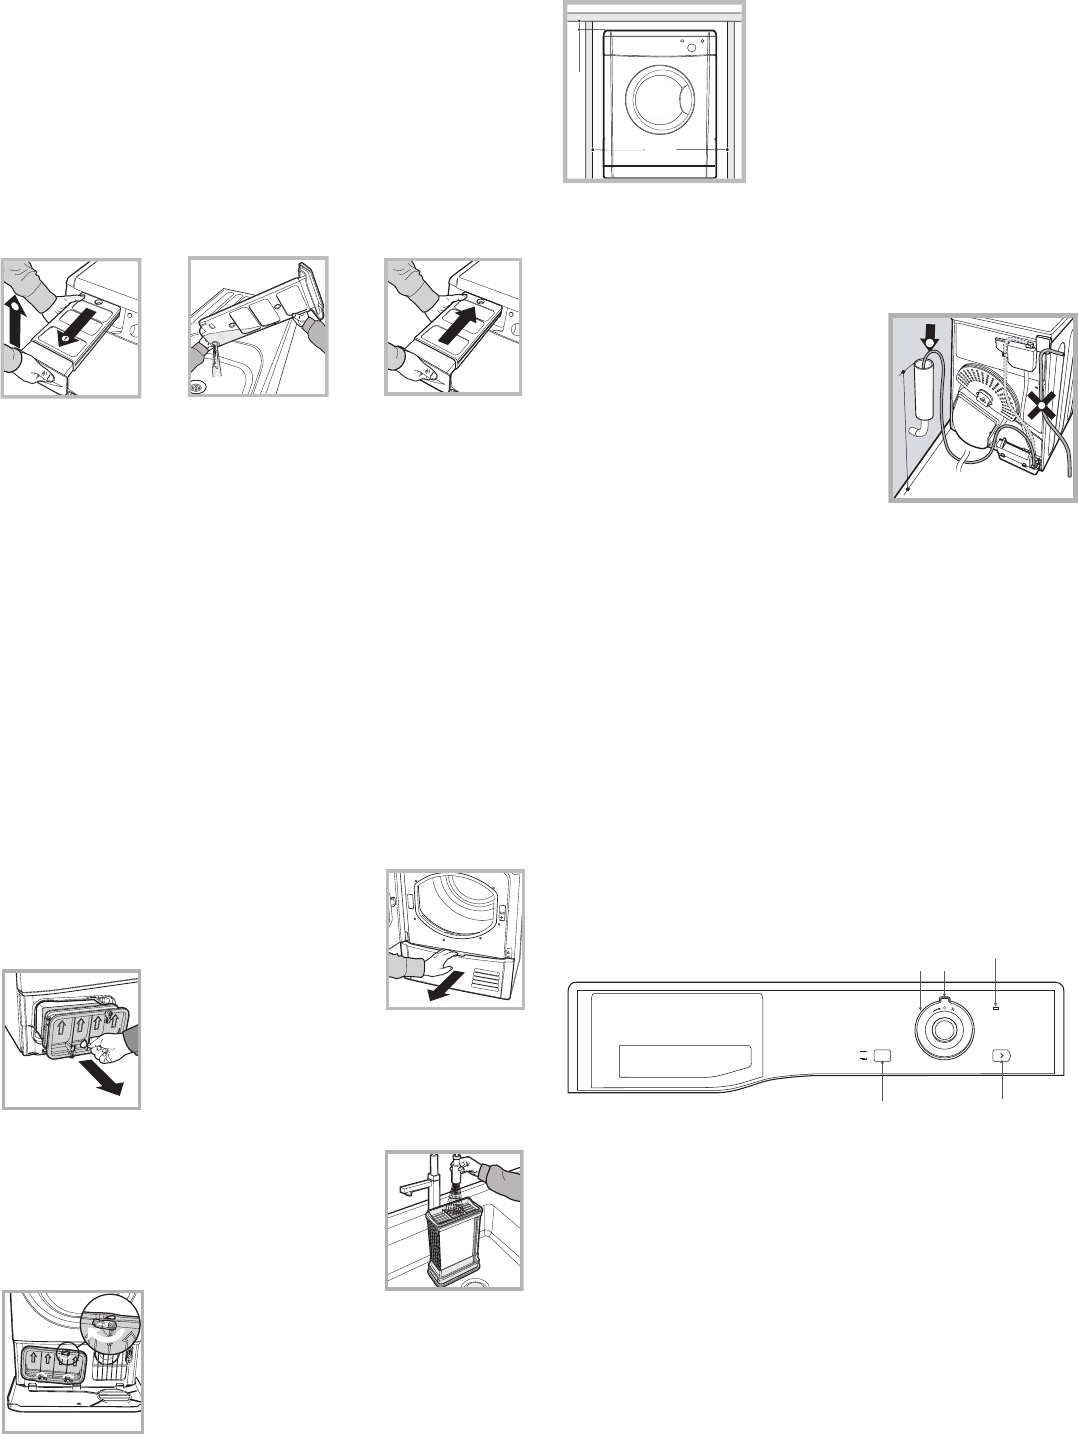
Control panel
Installation
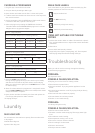
WATER CONTAINER
You MUST empty the water container
after EVERY drying cycle.
Removing the water container:
Step 1
Pull the water container towards you and remove it completely
from the dryer.
Step 2
Empty all the water in the water container.
Step 3
Replace the water container making sure that it is securely fixed.
Priming the Water Collection System.
When your dryer is new, the water container will not collect
water until the system is primed. This will take 1 or 2 drying
cycles. Once primed it will collect water during every drying
cycle.
!
CONDENSER UNIT
You MUST clean the fluff from the
condenser EVERY month. Failure to
clean the condenser could cause
premature failure of your dryer.
Remove the condenser unit regularly (at least monthly) and clean
off any fluff deposits.
Step 1
Open the condenser cover.
Step 2
Remove the condenser
by turning the 3 catches
and pulling the condenser towards you. It is
normal for some residual water to be left in
the condenser unit.
Step 3
Flush the condenser from the rear with water
to remove any fluff deposits.
Step 4
Replace the condenser unit and make sure
that all 3 catches are closed and that the
position arrows on the front of the condenser
are pointing upwards.
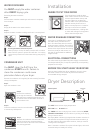
WHERE TO PUT YOUR DRYER
If you are going to install the dryer
under a work counter be sure to leave
a 10mm space between the top and
any other objects on or above the
machine and a 15mm space between
the sides and any kitchen units or
walls to ensure proper air circulation.
The dryer must never be installed
behind a lockable door, a sliding door
or a door with a hinge on the opposite
side to that of the dryer door.
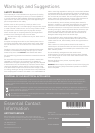
WATER DRAINAGE CONNECTION
If the dryer is installed next to a drain
the water can be plumbed into this
drain. This does away with the need to
empty the water container. The height of
the drain must be less than 1m from the
bottom of the dryer. Remove the existing
hose from the dryer and connect it to
the drain (if required add an additional
length of hose).
ELECTRICAL CONNECTIONS
The socket must be grounded. The power supply cord should be
checked periodically and, if required, replaced by a cord specially
prepared for this dryer.
BEFORE YOU START USING YOUR DRYER
Once you have installed your dryer and before you use it clean
the inside of the drum to remove any dust that could have
accumulated during transport.
10
m
m
15 mm
15 mm
15 mm
15 mm
20
30
40
50
60
70
80
100
110
120
130
0
TIMER
Knob
Indicator
HEAT
Button
START
Button
Empty water
Light
The HEAT button selects drying temperature.
OUT: LOW heat IN: HIGH heat
The TIMER knob sets the drying time: rotate it clockwise, NEVER
COUNTER-CLOCKWISE, until the indictor is pointing to the drying
time you want to select.
The Empty Water indicator light signals that the water container is
full and must be emptied. The light will take a few seconds to go
out after replacing the empty water container, the dryer must be
running for this to happen.
Note: If the water container fills up the indicator lights, the heat is
turned off and your laundry will not dry.
2
2
1
Less than 1m