


3
Important
Information
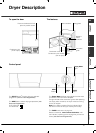
Installation Description
Start and
Programmes Laundry
Warnings and
Suggestions
Maintenance
and Care Service
Troubleshooting
GB
Important Information
Condenser Unit...
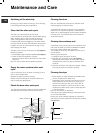
! You MUST clean the fluff from the condenser EVERY
month.
! Failure to clean the condenser could cause premature
failure of your dryer.
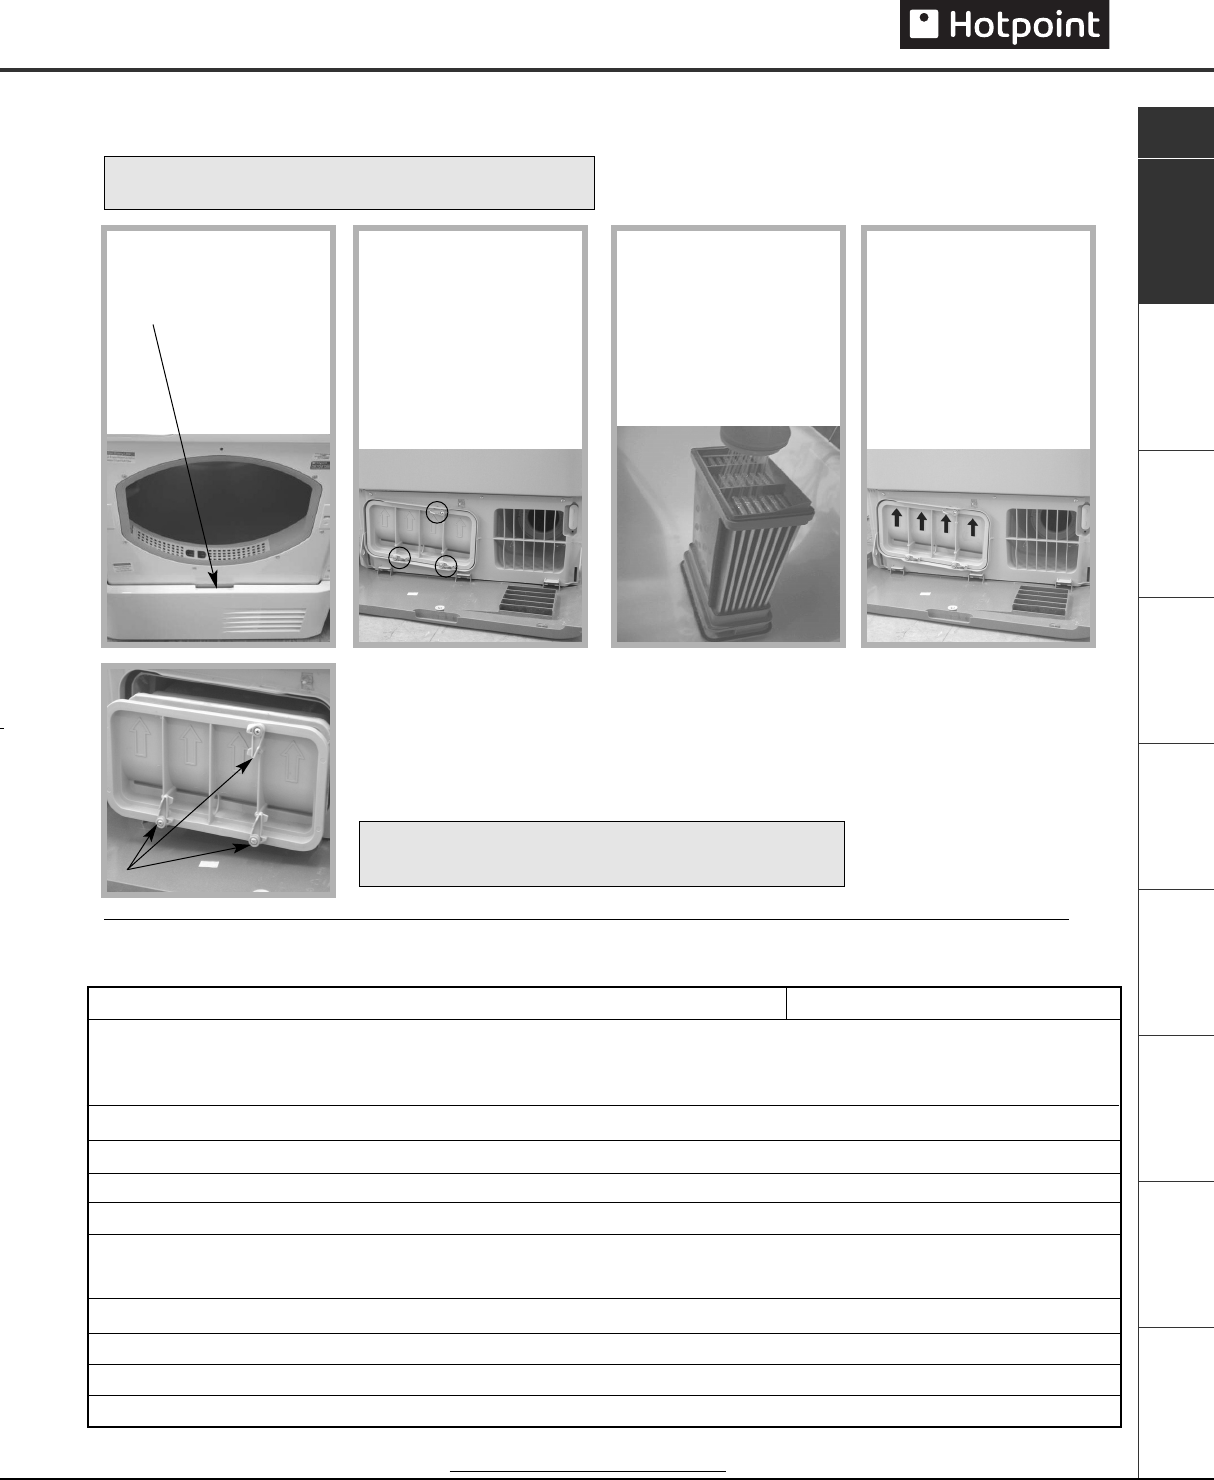
●
Check that:
- The positioning arrows are pointing upwards.
- The 3 clips are re-secured back into their ‘lock’ position.
Product Data... (EU Regulation 392/2012)
Rated capacity of Cotton laundry for the standard programme at full load 8 kg Energy efficiency class C
The weighted Annual Energy Consumption (AE
c
) 627.7 kWh
Consumption per year, based on 160 drying cycles of the standard cotton programme at full and partial load, and the
consumption of the low-power modes. Actual energy consumption per cycle will depend on how the appliance is used.
This household tumble dryer is a Non-Automatic Condenser Dryer
Energy consumption : full load E
dry
5.38 kWh, partial load E
dry1/2
2.83 kWh
Power consumption : off-mode (P
o
) 0.06 W, left-on mode (P
l
) - W
Duration of the ‘left-on mode’ for power management systems - minutes
The ‘standard cotton programme’ suitable for drying normal wet cotton laundry that is the most efficient programme in terms
of energy consumption for cotton used at full and partial load is High Heat
Programme time (minutes) : weighted (T
t
) full & partial load 112, full load (T
dry
) 154, partial load (T
dry1/2
) 80
Condensation efficiency class C
Average condensation efficiency (%) : full load (C
dry
) 72, partial load (C
dry1/2
) 71, weighted (C
t
) full & partial load 71
Airborne acoustical noise emissions 69 dB(A) re 1 pW
This data is also available on the website
http://www.hotpoint.eu/hotpoint/
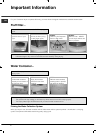
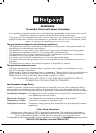
STEP 1.
Open the condenser cover
- hold the handle and
pull towards you.
STEP 2.
Remove the condenser by
rotating the 3 clips then
pulling the condenser
towards you.
(There may be some water
in the tubes, this is normal).
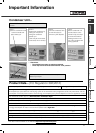
STEP 3.
Flush the condenser, from
the rear with water, to
remove any fluff deposits.
STEP 4.
Refit the condenser unit
- ensure that the unit is
pushed in fully, all 3 clips
are re-secured and the
positiong arrows on the
front of the condenser are
pointing upwards.
Rotate 3 clips