


Dear Dryer Vent Purchaser,
Your purchase of this Energy Saving Dryer Vent Closure
TM
demonstrates that
you are concerned about saving energy! This energy saving vent can be
installed in any standard vent opening. (Please read all instructions before
beginning installation.)
INSTRUCTIONS
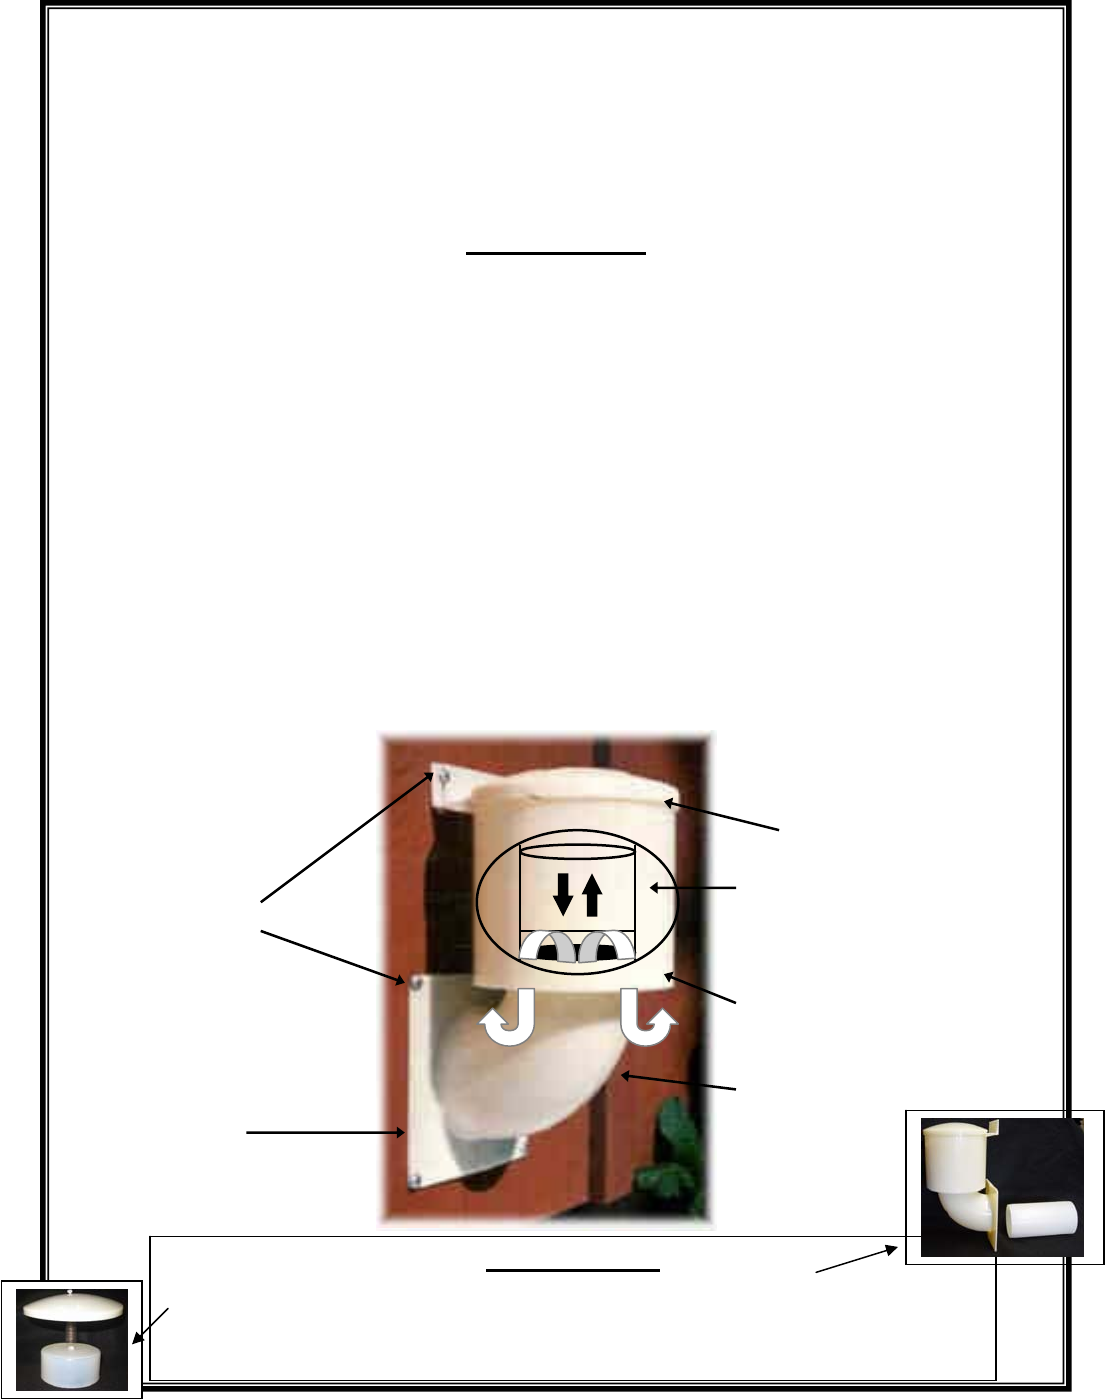
1. ASSEMBLE:
Insert the smooth edge of the plastic elbow into the bottom of the plastic vent body.
Set aside.
2. PREPARE VENT OPENING:
Remove the old hood and flapper of the existing dryer vent by removing screws or
cutting with hacksaw blade. The existing vent pipe should be cut so that it protrudes
from the outside wall ½ inch. Clean lint accumulated in vent pipe through wall.
3. INSTALL: (see side 2 for more detailed instructions)
Place the flat portion of the elbow on the wall, lining up holes in wall and elbow. The
existing vent pipe should insert ½ inch into the elbow. Mount the vent in a vertical
position as shown below. Secure the 6 screws (provided) through the top bracket of
vent and flat portion of elbow. If the fit does not appear to be airtight, you may have
to caulk with a bead of silicone around the square flanges.
4. PAINT:
Using latex paint, paint the vent when placed in an area of direct sunlight to protect
vent from UV rays.
5. MAINTENANCE:
Remove the vent lid periodically and clean out any lint build-up, which may restrict
free movement on the floating shuttle cup.
SCREWS
FLAT PORTION
OF
ELBOW
ELBOW
VENT BODY
FLOATING SHUTTLE
CUP IS POSITIONED
OPEN SIDE DOWN
INSIDE BODY
VENT LID
ACCESSORIES
Extension - Can be used through thicker walls from the inside duct pipe to the vent.
Spring Kit - Convert the Dryer Vent to work for low CFM vents such as Range Hood &
Bathroom Vents. Spring Kit comes with easy to install directions.
Call to order, 1-888-772-2345.
1-888-772-2345 • www.heartlandnatural.com