


7
6
This Warranty Supersedes All Other Product Warranties
LIMITED WARRANTY
This product is warranted to be free from defects in material and workman-
ship for a period of one (1) year from the date of original purchase, except
as noted below. During this period, we will repair or replace this product, at
our option, at no cost. THE FOREGOING WARRANTY IS IN LIEU OF ANY
OTHER WARRANTY, WHETHER EXPRESS OR IMPLIED, WRITTEN OR
ORAL INCLUDING ANY WARRANTY OF MERCHANTABILITY OR FIT-
NESS FOR A PARTICULAR PURPOSE. ANY LIABILITY IS EXPRESSLY
LIMITED TO AN AMOUNT EQUAL TO THE PURCHASE PRICE PAID,
AND ALL CLAIMS FOR SPECIAL, INCIDENTAL AND CONSEQUENTIAL
DAMAGES ARE HEREBY EXCLUDED. There is no warranty with respect
to parts subject to wear supplied with or a part of this product (motor brush-
es, container and cutter assembly, clutches, etc.). This warranty does not
cover defects resulting from abuse, neglect, or any use not in conformity
with the printed directions. Always use this product in accordance with the
Operation Manual.
If you have a claim under this warranty, please deliver or mail the product to
the nearest authorized service center which you can locate by calling our
toll-free customer service number 1-800-572-3331 or by looking in your
local yellow pages for the nearest authorized Hamilton Beach Commercial
Service Center.
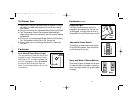
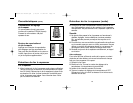
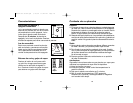
Caring for Your Iron
Iron
1. The water tank of your iron should be emptied after each
use. Turn Temperature Control Dial to Off. Unplug the iron
and hold over a sink. Slowly tilt pointed end of iron
down over sink. Water will run out of water tank opening.
2. After iron has completely cooled, wrap cord loosely around
the iron and store in an upright position. Do not store iron
laying flat on soleplate.
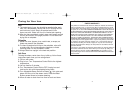
Soleplate
1. Never iron over zippers, pins, metal rivets, or snaps, as
these may scratch the soleplate.
2. To clean occasional build-up on the soleplate, wipe with
a sudsy cloth. Do not use abrasive cleansers or metal
scouring pads. Do not immerse in water.
3. Always store iron upright in the heel rest position.
Self-Clean
To keep the steam vents clear of any build-up, follow these
instructions each time you iron using steam.
1. Fill iron with water.
2. Plug in iron. Turn Temperature Control Dial to the highest
temperature.
3. Let iron heat for 3 minutes.
4. Turn Temperature Control Dial to OFF. Unplug iron and
hold over a sink with the soleplate facing down.
5. Turn Adjustable Steam Switch to Steam . Hot water and
steam will flow out of the steam vents. Press the Blast
Button several times to increase cleaning.
6. Allow all water to drain from iron then let cool and store.
840101300 ENv02.qxd 5/10/02 11:22 AM Page 6