


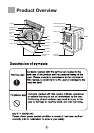
Back
Front
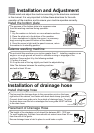
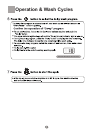
Screw
Bottom plate Carpet
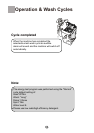
Do not install this machine on an incline greater than 2° . Installing machine on an
angle or on rough ground will result in unstable running or stoppage of the
machine. Please adjust it by the following method:
1.Confirm it is level
2.Lift up the side of the leg slightly and twist the adjustable leg.
Note:The distance between the washing machine
and wall:at least 20 mm.
20mm
20mm
High
Low
Balance washing machine
Install the bottom plate
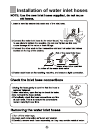
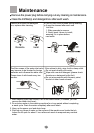
Placement of Drainage Hose
Please install and adjust the machine according to the directions contained
in this manual. It is very important to follow these directions for the safe
operation of the machine, and to ensure your machine operates correctly.
First connect the drainage hose to the connection point on the lower
right side of the cabinet, and fasten with drain hose clamp (provided).
Connect drain hose guide on to the outside of drainage hose. To guide
the drain hose over the tub or standpipe the hose guide MUST be fitted
to the drain hose.
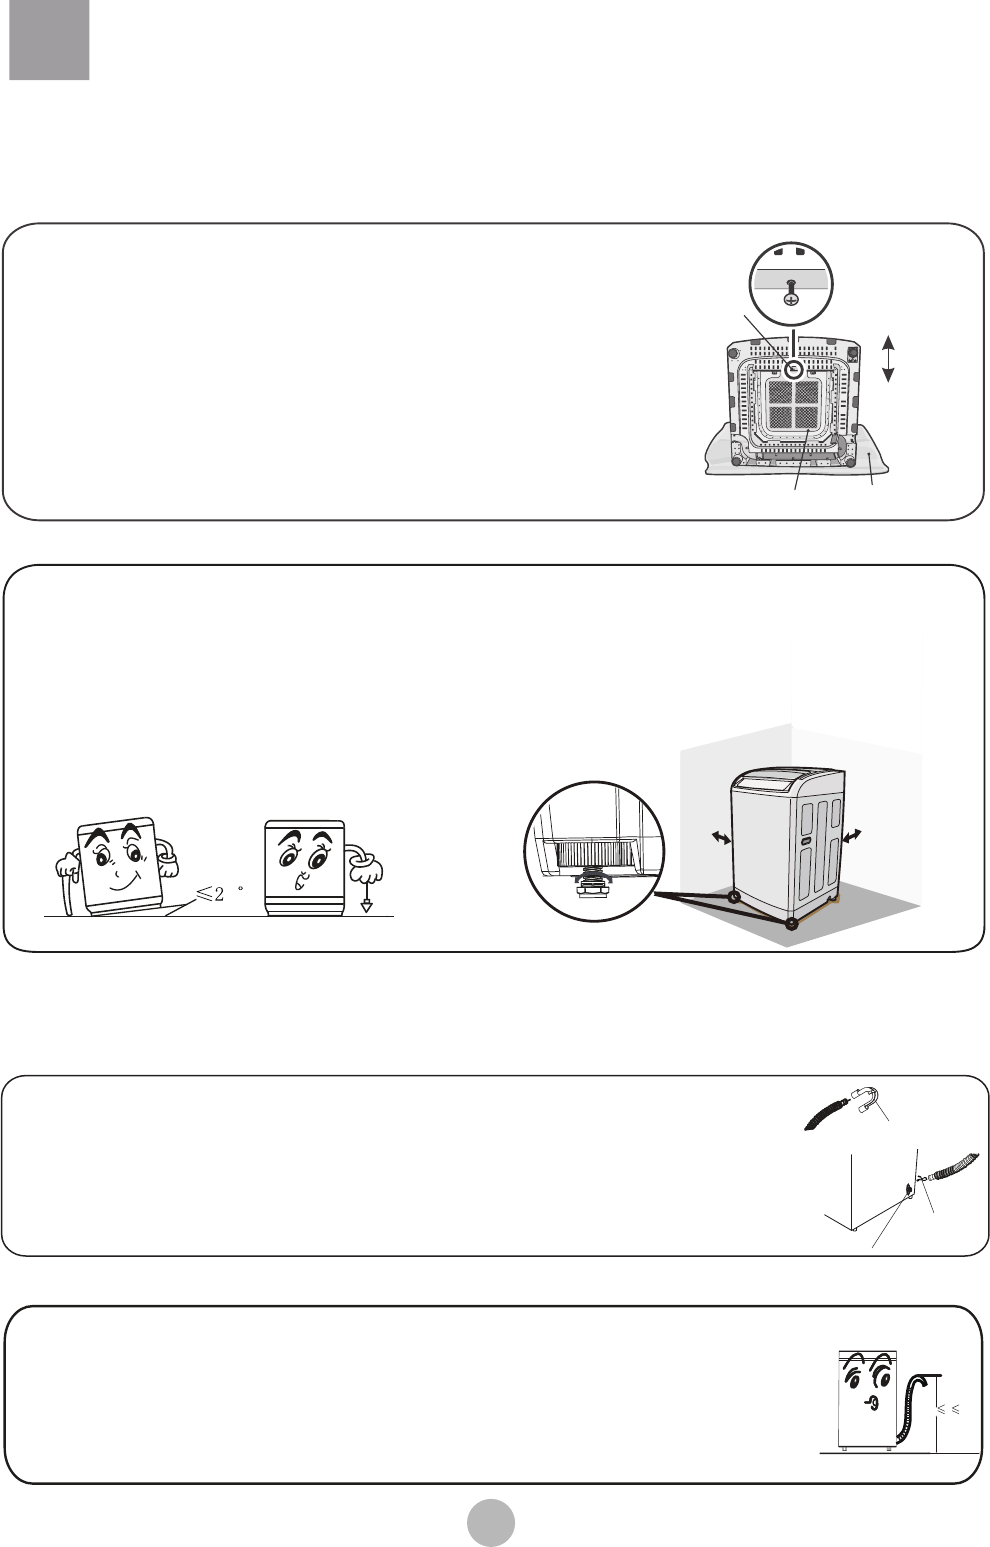
0.8m h
1.2m
Installation of drainage hose
Drain hose
clamp
Drain hose joint
The purpose of the bottom plate is to suppress noise
from the washing machine during operation.
Steps:
1. Lay the washer on its back, on a non-abrasive surface.
2. Place the plate on to the bottom of the machine.
3. Use a screwdriver to tighten the screw ( in accessory
bag) securing the panel to bottom of the washer.
4. Once the screw is tight and the panel is secure, return
the washer to its standing position.
Installation and Adjustment
Install drainage hose
The height of the standpipe or tub should be between 850 - 1200 mm.
To avoid syphoning, the drain hose should not extend more than 20 mm
from the end of the guide.
Ensure drainage hose is held in place to avoid leaks or spills.
Drain hose neck guide
4