<10cm
<1.5m
5
12
> 30mm
b
1.Push "POWER" button to switch on the power
2.Push "PROGRAM"button to select suitable full-auto program
After the power is switched on, "Normal" is automatically set. To select other full-auto program, please push
the "PROGRAM" button till the corresponding indicator is on. Refer to the "PROGRAM" button on Page 11.
E.g. Set to "Speedily"program for small quantity of laundries with light soil.
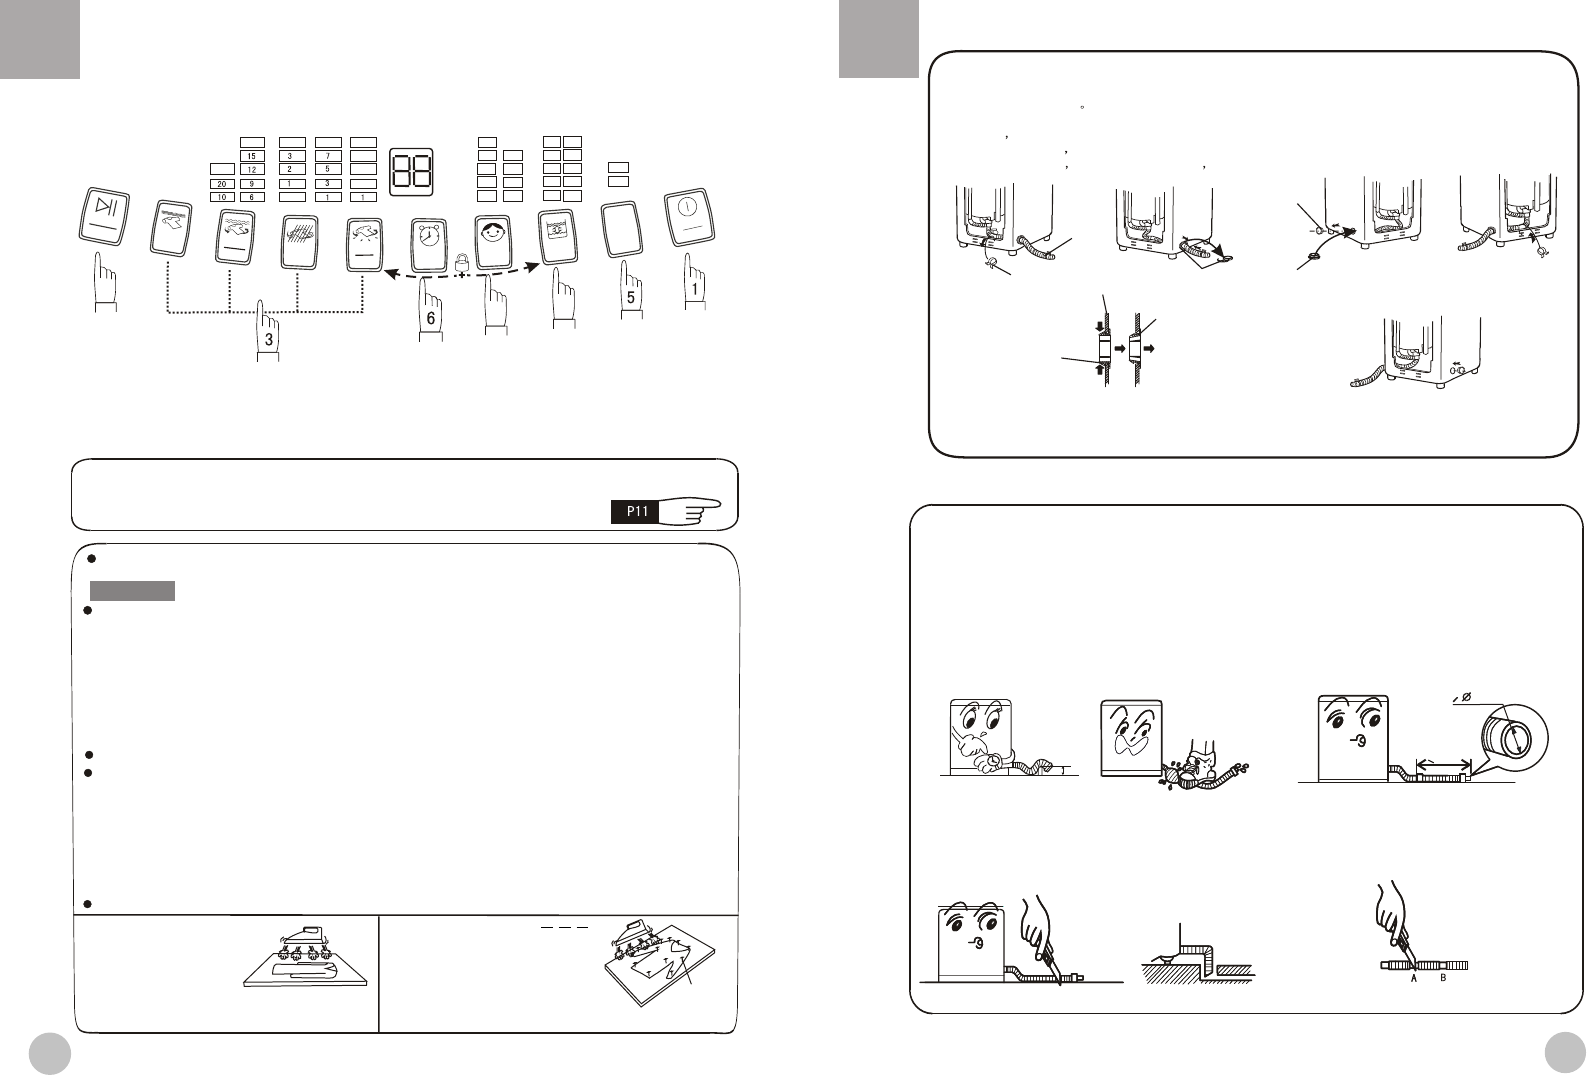
The drainage shall be smooth with the drain hose.
1.The height of the drain hose shall be less than
10cm, or the drainage will not be smooth, and
cost such long time that the machine may stop
at mid way.
2.Do not step on or press the drain hose.
4.If extra drain hose is needed, please make
separate purchase. The inner diameter of the
extra hose shall not less than 30mm, and the
length shall not exceed 1.5m.
3. If the drain hose is too long, cut it at mid point.
To make smooth drainage, cut the front end of
the hose slantingly.
Usage the drain hose
5.If the extra hose is too long, cut it either at A
or at B.
Steps of using the operation buttons and description
of the steps
Figure 1
When a standard cycle is selected, the fuzzy program is run. The water level and the washing time can be
selected according to be texture and volume of the laundry. The washing cycle is automatically controlled.
Notes:
The washing machine has a Woollen program and a Carpet program, intended for high-grade fabrics such
as cashmere and carpet. First, make sure the laundry can be washed with water or not. If not,do not use the
washing machine to wash the laundry. If yes, select the washing cycle recommended by the fabric man
ufacturer. The Woollen program can be used to wash fine clothes such as cashmere sweater, linenblouse,
woolen pants; the Carpet program can be used to wash carpets or heavy fabrics indicated as hand wash or
machine wash compatible. For clothes with local stains, such as sticky stains at collar or cuff, lay the clothes
upon a towel and spread neutral detergent (for washing machine) on the stains. Use a soft brush to pat at the
clothes gently before putting the clothes into the machine. Do not rub the clothes hard.
Before washing, please fold up the laundry as needed, then put the laundry into the inner tub, flat and neat.
These fabrics are not washable:
1. Fabrics that deform when soaked in water;
2.Fabrics that shrink, discolor or go through other exterior changes when soaked in water;
3.Fabrics that lose original texture when soaked in water;
4.Fabrics that discolor when soaked in water;
5.Fabrics that have pilling or pressed pile when soaked in water;
6.Fabrics that have damage when soaked in water.
Upon completion of washing, iron the laundry with a steam iron.
Hold the steam iron above
the laundry and do not touch
the laundry. Reshape the
laundry. (As illustrated
in Fig 1)
Figure 2
Pin
When shrinkage occurs
Stretch the laundry to its original
size and locate it with pins. Use
a steam iron to dry the laundry
completely. Do not touch the
laundry. (As illustrated in Fig 2)
4
2
7
SOAK
WASH
RINSE
Overflow
Wash/spin
speed
4
3
2
REMAIN
RESERVE
SPIN
POWER
ON/OFF
WATER
LEVEL
PROGRAM
RESERVE
SPIN
SPEED
RINSE
WASH
SPEED
SOAK
START
PAUSE
Woollen
Normal
Carpet
Standard
120
60
Air dry
•
Program
•
•
•
•
•
•
•
•
••
LOCK
Air dry
Quick wash
Posthaste
Saving water
Jean
How to change the direction of the drain hose
Remarks: in order to make sure of the correct of installation, it is suggested to change the direction of the drain hose
with our company serviceman .
Drain hose support
Drain hose
Drain bushing
Drain bushing
drain outlet protecting
cover
Drain bushing
Drain hose fixing
clamp
Cabinet
Inner
Outer
Push
Push
Take down
Figure 1
Figure 2
Figure 3
Figure 4
Figure 5
Figure 6
2.Put down the drain hose Take off the drain hose
frame as indicated in Figure 1.Take the drain hose into
the cabinet then nip the drain fixing clamp to make
it deviated from the clip the other hand is used to put
down the drain bushing as indicated in Figure 2 3.
1.Dismantle the rear cover of the washing machine.
3.Dismantle the drain outlet protecting cover at the other side,
(the way is the same as the drain bushing),then install the drain
bushing, as indicated in Figure 4.
4.Extend the drain hose from the other side. Fix the drain hose
with drain hose frame onto the cabinet, as indicated in Figure 5.
5.Install the drain outlet protecting cover to the other side,
as indicated in Figure 6


