


HOW TO LOAD YOUR
WAS~R
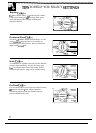
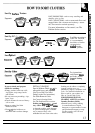
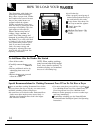
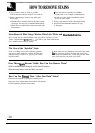
This illustration, with clothes just
reaching the Clothes Retaining
Ring, shows a proper load. Clothes
have ample room to move because
they are not packed down, nor
wrapped around the agitator.
Clothes are loaded dry since wet
items are likely to pack down which
encourages overloading. This size
load requires a full water fill.
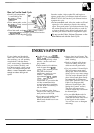
What is the best size load of
clothes—large, medium, or
small? Save time, energy and
detergent by avoiding extra use of
the washer.
Try to wash a full load
of clothes. If you can it is better to
save clothes until you have a full
load. If you must wash smaller
loads, save water, energy and
detergent by adjusting the water
level for the size of the load. See
Operating Instructions.
—
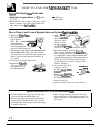
● Load clothes dry.
● Take a properly sorted group of
clothes and drop them loosely in
the wash basket in this order:
~
Large Items–1ike sheets. Do
not wrap around the agitator.
@
Small Items–like
washcloths.
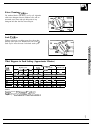
To Add Items After the Washer Has Started
● Turn off the washer.
NOTE: When washing stockings,
●
Carefully remove the
Filter-Flo
panty hose and other easily tangled
pan.
items, always handle separately. To
minimize tangling, we recommend
● Add any additional articles by
the use of a net laundry bag.
submerging them next to the
agitator.
● Replace the
Filter-Flo
pan and
restart the washer.
Special Recommendations for Washing Permanent Press If You Do Not Have a Dryer
[f
you are machine-washing Permanent Press clothes
● Use more water than you would for a regular
load.
that you plan to line dry or drip-dry, use extra care to
Use a Medium Water Level for a Small Load; an
minimize wrinkling in the wash process: Extra Large Water Level for a Medium Load.
● Be careful not to overload washer. Permanent Press ● Remove clothes promptly as soon as washer stops
clothes must have ample room to move freely. A
and hang immediately.
Medium size Permanent Press load is the largest
“
To minimize wrinkling, use the Normal/Gentle
that should be washed.
or Gentle/Gentle Wash/Spin Speed. See Operating
Instructions.
14