


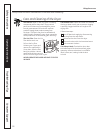
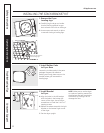

%2:<C2A52?F2?
2C296;4 24@
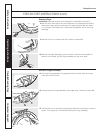
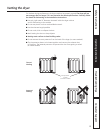
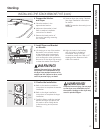
Carefully lay the dryer on its side.
Use the packing material so you
don’t scratch the finish on the dryer.
Use an open-end wrench or pliers
to remove the dryer leveling legs.
$% %$%#%%
Back out and remove
all 4 leveling legs
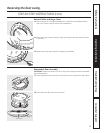
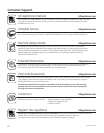
;@A.99%B//2?$.1@
A<?F2?.@2
Locate the 4 rubber pads in the parts
package. Remove the adhesive
backing and firmly place over on the
bracket where you removed the
leveling legs.
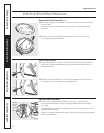
;@A.99?.082A
A<?F2?
Align the holes in the left bracket
with the holes in the bottom left
corner of the dryer. Use a Phillips
screwdriver to install the 2 #12 x 1″
tapping screws.
Repeat the above step with the right
bracket on the bottom right corner
of the dryer.
Set the dryer upright.
"#' Make sure to set the dryer
on a piece of packing material so
the brackets that are attached to
the bottom of the dryer do not
damage the floor.
==96.;02@0<:
22
<;@B:2?&B==<?A'?<B/92@5<<A6;4'6=@#=2?.A6;4;@A?B0A6<;@&.32AF;@A?B0A6<;@