


7
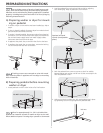
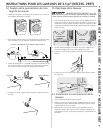
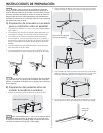
C5) Attaching dryer (style 3) mounting
hardware
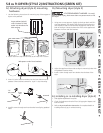
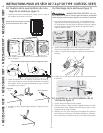
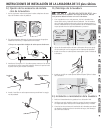
D5) Mounting dryer (style 3)
E
5
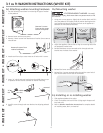
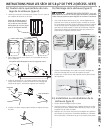
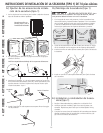
) Installing or re-installing dryer (style 3)
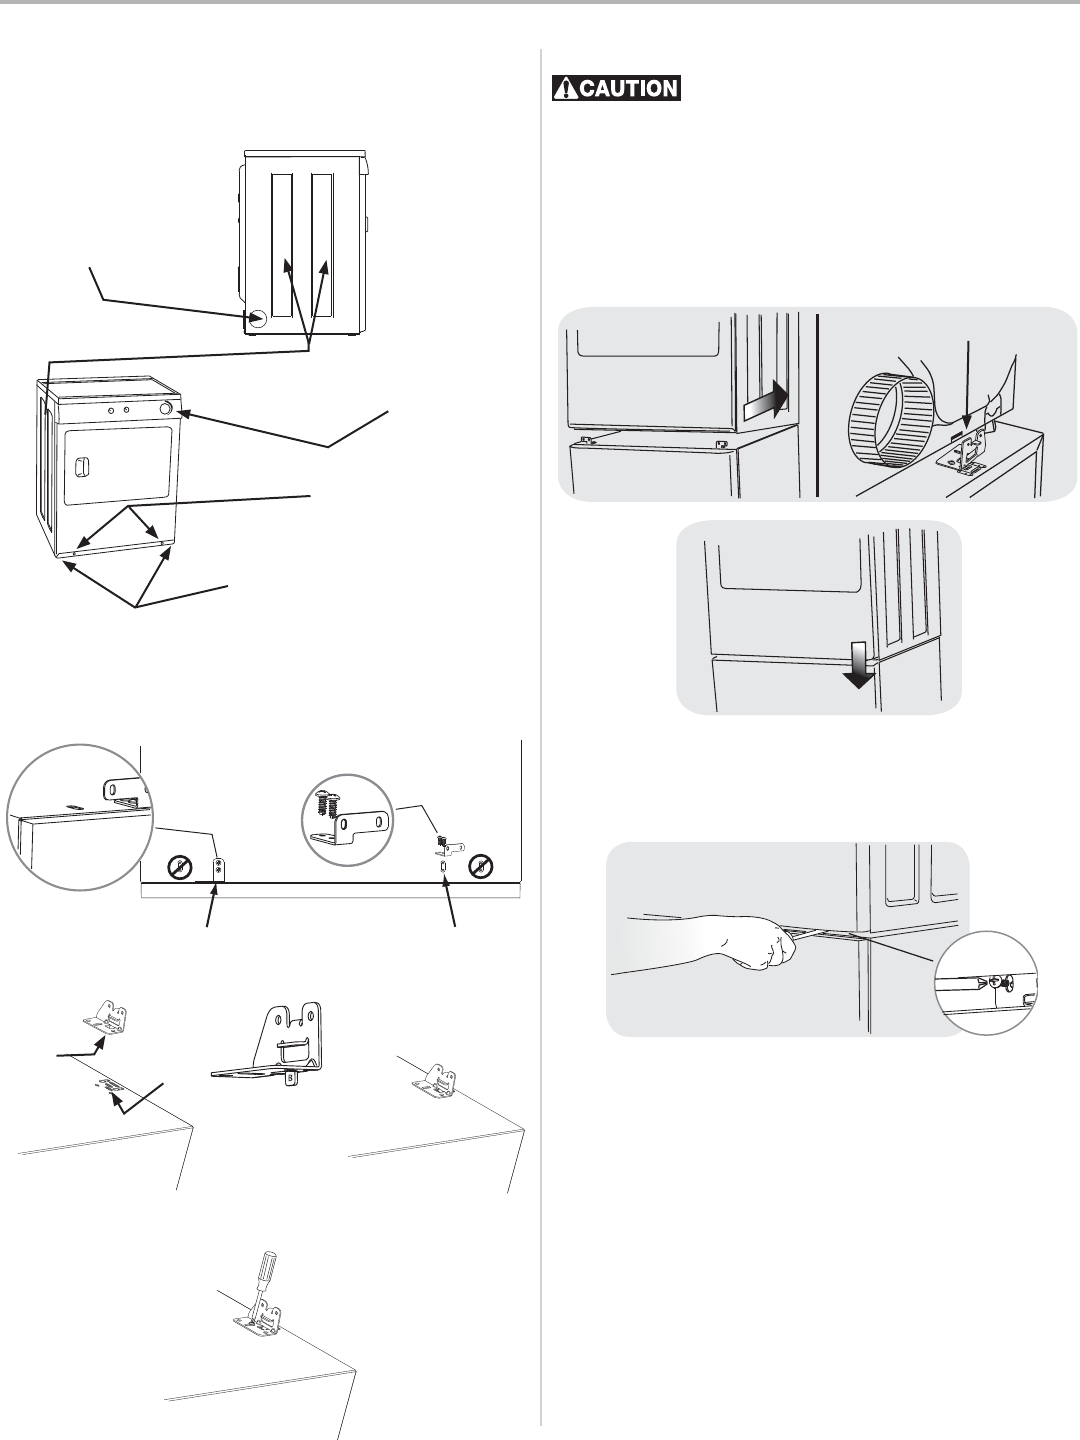
Using two or more persons, slightly tip the dryer back and lift it 1.
onto the pedestal. Still tipped, slide the dryer back against the
rear brackets so tabs on rear brackets engage the slots on the
back of the dryer. Gently set down the front so the appliance is
between the front and rear brackets.
Adjust the appliance side-to-side to align its mounting holes with 2.
the pedestal’s bracket holes.
Install a screw through the inner hole of each front bracket into 3.
the base of the dryer.
Slide appliance/pedestal into place.1.
Check for levelness and rock all four (4) legs again. Repeat until 2.
level and solid.
Refer to 3. Dryer Installation Instructions for complete details on
installing electrical, gas, or exhaust venting.
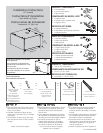
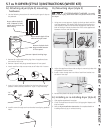
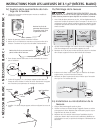
5.7 cu ft DRYER (STYLE 3) INSTRUCTIONS (WHITE KIT)
- EXCESSIVE WEIGHT HAZARD - To avoid
back or other injury, have more than one person move or lift
the dryer.
TIP DOWN
SLIDE BACK
ENGAGE REAR TABS
Reinstall the plastic hole plugs in front panel.4.
• WHITE KIT • WHITE KIT • WHITE KIT • WHITE KIT • WHITE KIT • WHITE KIT •
Use the following instructions for mounting this type of dryer to 1.
the pedestal:
Remove all 4 adjustable leveling legs from the appliance base 2.
and save for future use.
Remove 2 plastic hole plugs toward bottom of front panel.3.
Attach each front clip to outer-most set of holes with 2 screws.4.
Insert “B” tab of each rear bracket into the front slots on rear of 5.
pedestal. Orient bracket outward for “style 3” dryer mounting.
outward
Install 2 screws through each rear bracket into aligning pedestal 6.
holes.
Dryer cabinet (style 3)
with 2 indents on side
and 4 inch knockout for
side venting.
Dryer console (style 3) has
mechanical style timer.
Remove 2 plastic hole
plugs toward bottom
of front panel.
Remove 4 plastic leveling legs.
“B”
tab
front
slot