


9
EN
8
3 / INSTALLING YOUR TUMBLE DRYER
EN
3 / INSTALLING YOUR TUMBLE DRYER
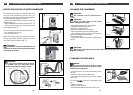
• BUILT-IN INSTALLATION
An adaptation kit is available from your dealer. This is used to mount your tumble dryer above your
washing machine.
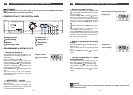
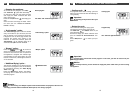
• MODIFYING THE DOOR OPENING DIRECTION
Important :
Check with your dealer that the kit is compatible with your washing machine. For safety rea-
sons, fitting must be performed by a qualified professional.
Important :
If you are fitting the appliance underneath a worktop, you must either keep the original
laminated top, or replace it with a slimmer version using a kit available for this purpose from your
dealer. For safety reasons, the appliance must never be operated without a top.
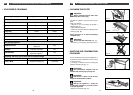
• COMBINED WASHER/DRYER INSTALLATION
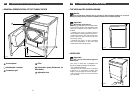
If you wish, you can alter the direction the door opens as follows
(Fig. 04 or 05).
— Remove the 4 screws in the front panel holding the hinges and
.
— Reverse the hinge and fasten it back on.
— Refit the door on the hinge .
— Reverse the hinge and fasten it back on.
— Reverse the positions of the lock and the cover on the machine’s front.
— Reverse the positions of the bolt .
CC
EEFF
BB
AA
AA
BBAA
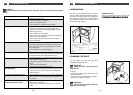
• IMPORTANT SAFETY INSTRUCTIONS
•
Grounding instructions
— This appliance must be grounded. In the event of malfunction or breakdown, grounding will
reduce the risk of electric shock by providing a path of least resistance for electric current.
— This appliance is equipped with a cord having an equipment-grounding conductor and a groun-
ding plug. The plug must be plugged into an appropriate outlet that is properly installed and groun-
ded in accordance with all local codes and ordinances.
WARNING :
Improper connection of the equipment-grounding conductor can result in a risk of electric
shock. Check with a qualified electrician or service representative or personnel if you are in
doubt as to whether the appliance is properly grounded.
Do not modify the plug provided with the appliance: if it will not fit the outlet, have a proper out-
let installed by a qualified electrician.
SAVE THESE INSTRUCTIONS
E
F
B
C
A
A
B
E
F
C
Fig. 04
Fig. 05
Left-hand Door
Right-hand door