


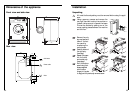


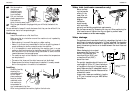


Water inlet (cold water connection only)
Before connect-
ing the hose be
sure to fit the
mesh filter «A»
supplied as per
diagram.
Installation
should comply
with local water
authority and building regulations’ requirements.
Set the hose correctly by loosening the ring nut. After positioning the
inlet hose, be sure to tighten the ring nut again to prevent leaks.
Do not connect to a hot water supply.
Water drainage
The appliance drain hose should hook into a standpipe, the hook in the
drain hose is formed using the plastic “U-Piece” supplied. The standpipe
should have an internal diameter of approximately 38 mm (see dia-
gram) thus ensuring there is an air break between the drain hose and
standpipe.
When discharging into a stand-
pipe ensure that the top of the
curve in the hose end is no
more than 90 cm (35.4”) and
no less than 60 cm (23.6”)
above floor level.
The upright standpipe should have a mini-
mum length of 30 cm (12”) from the bottom
of the elbow to the top of the pipe (see dia-
gram). Make sure that it is designed in such a
way that the end of the drain hose cannot be
covered with water.
Longer drain hoses are available in lengths
of 2.7 and 4 metres from your AEG Service
Force Centre.
47
46
Installation
A
3 pin
Max. 90 cm.(35.4")
Min.60 cm.(23.6")
Min. 30 cm.(12")
38 mm.(1/ ") diameter
standpipe
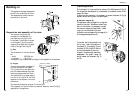
1
2
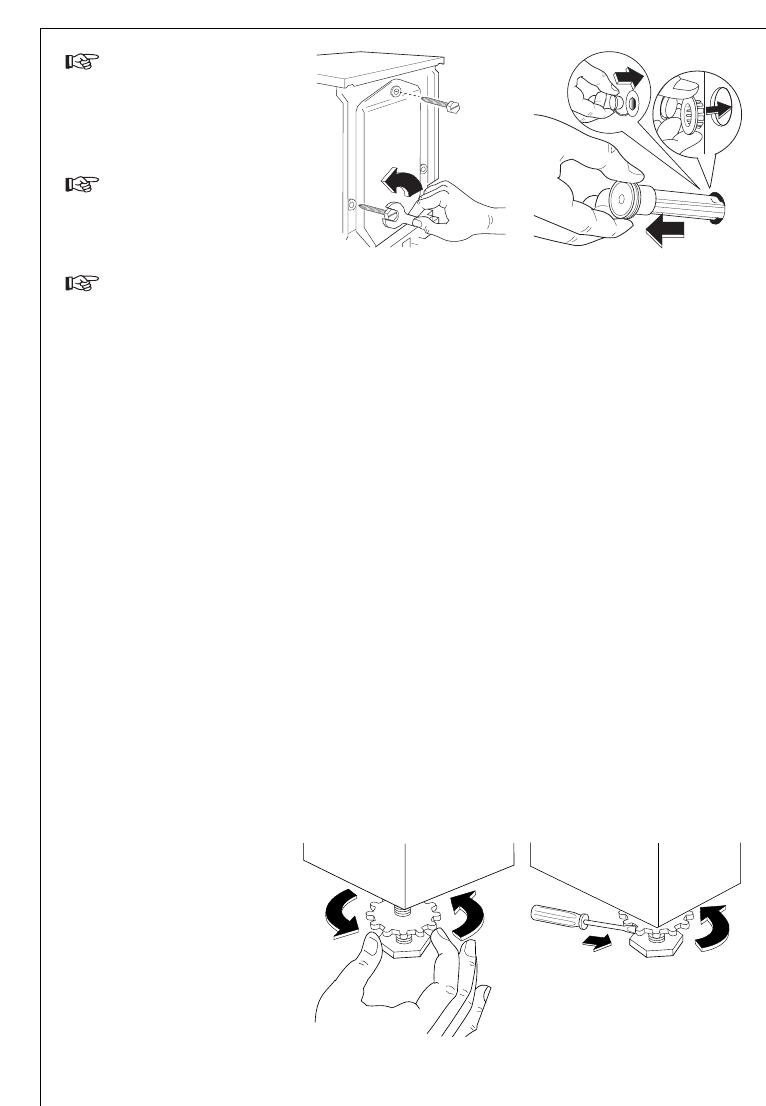
Set the machine
upright and
remove the two
remaining bolts
from the back.
Pull out the three
plastic spacers from
the holes into
which the bolts were fitted.
Plug the open holes with the plugs which you will find at the back of the
machine.
You are advised to keep all transit devices so that they can be refitted if the
machine ever has to be transported again.
Positioning
Install the machine on a flat hard floor.
Make sure that air circulation around the machine is not impeded by
carpets, rugs etc.
• Before placing it on small tiles, apply a rubber coating.
• Never try to correct any unevenness in the floor by putting pieces of
wood, cardboard or similar materials under the machine.
• If it is impossible to avoid positioning the machine next to a gas
cooker or coal-burning stove, an insulating panel (85x57 cm) covered
with aluminium foil on the side facing the cooker or stove, must be
inserted between the two appliances;
• The machine must not be installed in rooms where the temperature
can drop below 0.
• The water inlet hose and the drain hose must not be kinked.
• Please ensure that when the appliance is installed, it is easily accessi-
ble for the engineer in the event of a breakdown.
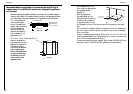
Levelling
Carefully level by
screwing the
adjustable feet in
or out. Never
place cardboard,
wood or similar
materials under
the machine to
compensate for
any unevenness in the floor.
After having levelled the machine, tighten the lock nuts.
Installation