


16
17
FR
CHAPITRE 5
MISE EN PLACE
INSTALLATION
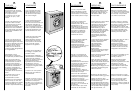
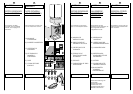
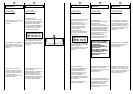
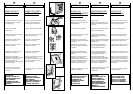
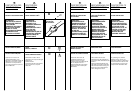
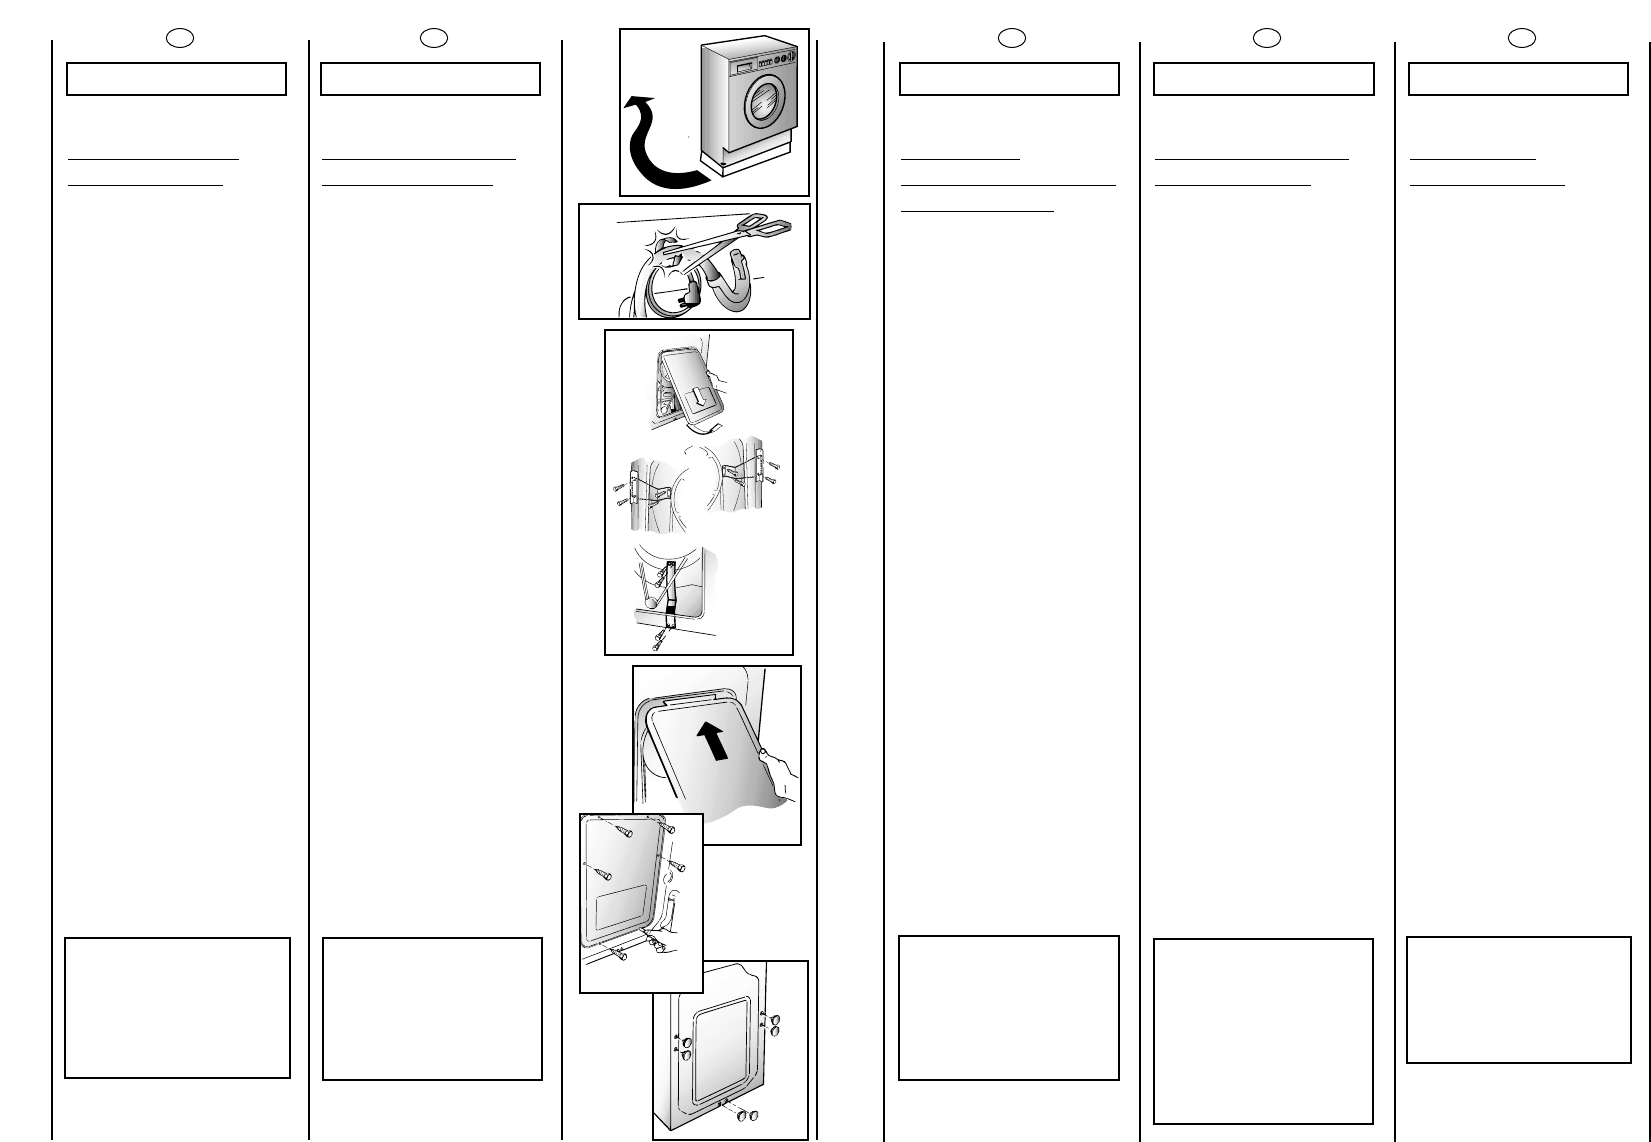
Placer la machine sur le lieu
d’utilisation sans le socle
d’emballage.
Couper les colliers
serre-tubes
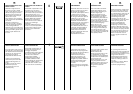
Extraire les 2 vis et enlever le
panneau arrière.
Extraire les 4 vis de l’étrier
gauche et l’enlever.
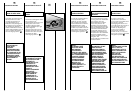
Extraire les 4 vis de l’étrier
droit et l’enlever.
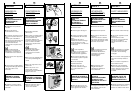
Extraire les 4 vis de l’étrier
inférieur et l’enlever.
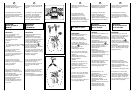
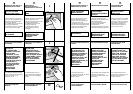
Remonter le panneau
arrière en encastrant la zone
supérieure,visser les 2 vis
enlevées et les 4 vis
contenues dans l’enveloppe
des instructions.
Fermer les 6 trous par les
bouchons livrés avec la
machine.
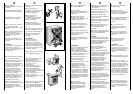
ATTENTION:
NE PAS LAISSER À LA
PORTÉE DES ENFANTS
DES ELEMENTS
D’EMBALLAGE QUI
PEUVENT CAUSER DES
RISQUES.
IT
CAPITOLO 5
MESSA IN OPERA
INSTALLAZIONE
Porti la macchina vicino al
luogo di utilizzo senza il
basamento dell’imballo.
Tagli le fascette fermatubo
Tolga le due viti e rimuova il
pannello posteriore.
Tolga le 4 viti della staffa
sinistra e la asporti.
Tolga le 4 viti della staffa
destra,e l’asporti.
Tolga le 4 viti della staffa
inferiore e l’asporti.
Rimonti il pannello posteriore
incastrando la zona
superiore,avviti le 2 viti tolte
e le 4 viti contenute nella
busta istruzioni.
Richiuda i 6 fori con i tappi in
dotazione.
ATTENZIONE:
NON LASCI ALLA
PORTATA DI BAMBINI
GLI ELEMENTI
DELL’IMBALLAGGIO IN
QUANTO POTENZIALI
FONTI DI PERICOLO.
ES
CAPÍTULO 5
PUESTA EN
FUNCIONAMIENTO
INSTALACIÓN
Ponga la máquina cerca
del lugar de uso sin la base
del embalaje.
Corte las cintas del tubo
Extraiga los 2 tornillos y retire
el panel posterior.
Extraiga los 4 tornillos del
soporte de fijación izquierdo
y quitélo.
Extraiga los 4 tornillos del
soporte de fijación derecho
y quitélo.
Extraiga los 4 tornillos del
soporte de fijación inferior y
quitélo.
Vuelva a colocar el panel
posterior encajando la
parte superior,enrosque los
2 tornillos extraídos más los 4
tornillos contenidos en el
sobre de instrucciones.
Cierre los 6 agujeros con los
tapones adjuntos.
ATENCIÓN:
NO DEJE AL ALCANCE
DE LOS NIÑOS LOS
ELEMENTOS DE
EMBALAJE YA QUE
PUEDEN SER
PELIGROSOS.
DE
KAPITEL 5
INBETRIEBNAHME
INSTALLATION
Gerät ohne
Verpackungsunterteil in die
Nähe des Aufstellungsortes
bringen.
Lösen Sie die Klammern der
Schlauchbefestigung.
Die beiden Schrauben
entfernen und Rückwand
abnehmen.
Die vier Schrauben des linken
Bügels entfernen und Bügel
abnehmen.
Die vier Schrauben des
rechten Bügels entfernen
und Bügel abnehmen.
Die vier Schrauben des
unteren Bügels entfernen
und Bügel abnehmen.
Die Rückwand wieder
montieren,dabei die obere
Fläche einrasten lassen,die
beiden vorher entfernten
sowie die 4 mitgelieferten
Schrauben eindrehen.
Die sechs Öffnungen mit den
mitgelieferten Stöpseln
abdecken.
ACHTUNG:
DIE VERPACKUNG IST
IN DEN HÄNDEN
VON KINDERN EINE
GEFAHRENQUELLE.
BITTE ENTSORGEN SIE
DAS VERPACKUNGS-
MATERIAL
ORDNUNGSGEMÄß.
EN
CHAPTER 5
SETTING UP
INSTALLATION
Move the machine near its
permanent position without
the packaging base.
Cut tube-holding straps.
Unscrew the 2 screws and
remove the back panel.
Unscrew the 4 screws on the
left bracket and remove.
Unscrew the 4 screws on the
right bracket and remove.
Unscrew the 4 screws on the
lower bracket and remove.
Remount the back panel by
slotting the upper edge in
place.Screw in the 2 screws
removed previously and the
4 screws from the instruction
envelope.
Cover the 6 holes with the
caps provided.
WARNING:
DO NOT LEAVE THE
PACKAGING IN THE
REACH OF CHILDREN
AS IT IS A POTENTIAL
SOURCE OF DANGER.