


16
17
FR
CHAPITRE 5
MISE EN PLACE
INSTALLATION
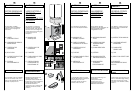
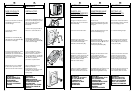
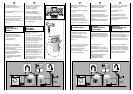
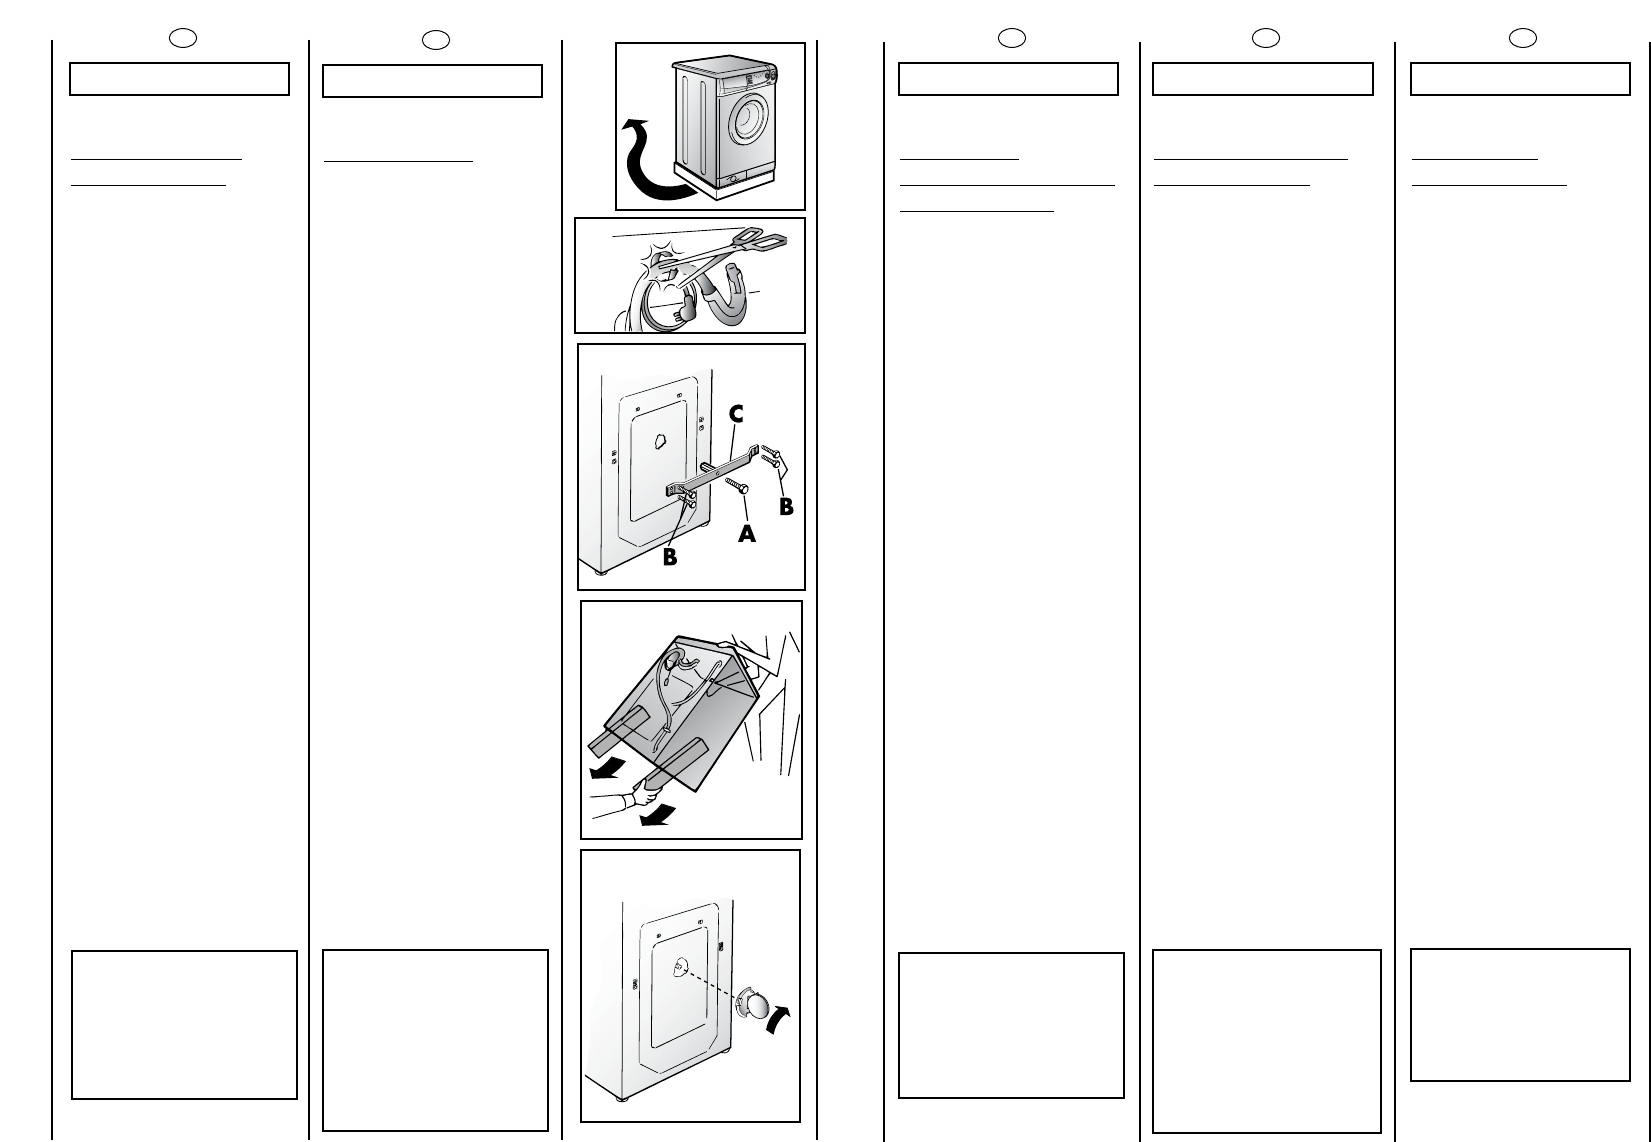
Placer la machine sur le lieu
d’utilisation sans le socle
d’emballage.
Couper les colliers
serre-tubes
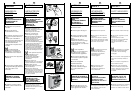
Dévisser la vis centrale (A);
dévisser les 4 vis latérales (B)
et enlever l’axe (C).
Incliner la machine en avant
et enlever les sachets en
plastique qui contennent les
2 arrêts en polystyrène qui
se trouvent sur les 2 côtés en
tirant vers le bas.
Refermer le trou en utilisant
le bouchon qui se trouvè
dans le sachet “instructions”.
ATTENTION:
NE PAS LAISSER À LA
PORTÉE DES ENFANTS
DES ELEMENTS
D’EMBALLAGE QUI
PEUVENT CAUSER DES
RISQUES.
ES
CAPÍTULO 5
PUESTA EN
FUNCIONAMIENTO
INSTALACIÓN
Ponga la máquina cerca
del lugar de uso sin la base
del embalaje.
Corte las cintas del tubo.
Desenroscar el tornillo
central (A); desenroscar los
4 tornillos laterales (B) y
extraer el travesaño (C).
Inclinar la máquina hacia
delante y sacar los sacos de
plástico que contienen los
dos protectores de plástico
puestos sobre 2 lados,
tirando hacia abajo.
Tapar un agujero utilizando
el tapón que contiene la
bolsa con las instrucciones.
ATENCIÓN:
NO DEJE AL ALCANCE
DE LOS NIÑOS LOS
ELEMENTOS DE
EMBALAJE YA QUE
PUEDEN SER
PELIGROSOS.
EN
CHAPTER 5
SETTING UP
INSTALLATION
Move the machine near its
permanent position without
the packaging base.
Cut tube-holding straps.
Unscrew the central screw
(A); unscrew the 4 lateral
screws (B) and remove the
cross piece (C).
Lean the machine forward
and remove the plastic
bags containing the two
polystyrene blocks at the
sides,pulling downwards.
Press the plug (to be found
in the envelope with the
instructions) into the hole.
WARNING:
DO NOT LEAVE THE
PACKAGING IN THE
REACH OF CHILDREN
AS IT IS A POTENTIAL
SOURCE OF DANGER.
DE
KAPITEL 5
INBETRIEBNAHME
INSTALLATION
Gerät ohne
Verpackungsunterteil in die
Nähe des Aufstellungsortes
bringen.
Lösen Sie die Klammern der
Schlauchbefestigung.
Schrauben Sie die
Mittelschraube (A) und die 4
Seitenschrauben (B) ab und
entfernen Sie die
Transportquerstrebe (C).
Neigen Sie das Gerät nach
vorne.Ziehen Sie die
Plastiktüten,die 2 Styropor-
Stangen enthalten,nach
unten heraus.
Schließen Sie die Öffnung mit
Hilfe des Stöpsels (der im
Beipack mitgeliefert wird).
ACHTUNG:
DIE VERPACKUNG IST IN
DEN HÄNDEN VON
KINDERN EINE
GEFAHRENQUELLE. BITTE
ENTSORGEN SIE DAS
VERPACKUNGS-
MATERIAL
ORDNUNGSGEMÄß.
PT
CAPÍTULO 5
INSTALAÇÃO
Coloque a máquina,sem a
base da embalagem,perto
do local onde vai ficar
permanentemente
instalada.
Corte a tira que prende os
tubos e o cabo eléctrico.
Desaperte o parafuso
central (A); desaperte os
quatro parafusos laterais (B)
e retire a barra (C).
Com a ajuda de outra
pessoa incline o aparelho
para a frente e solte os
sacos de plástico contendo
os dois blocos de esferovite
de ambos os lados,
puxando-os para baixo.
Tape a abertura com o
bujão (fornecido
juntamente com a
máquina,no envelope que
contém o manual de
instruçóes).
ATENÇÃO:
NÃO DEIXE A
EMBALAGEM DA
MÁQUINA OU OS SEUS
COMPONENTES AO
ALCANCE DE
CRIANÇAS: ELA É UMA
POTENCIAL FONTE DE
PERIGO.