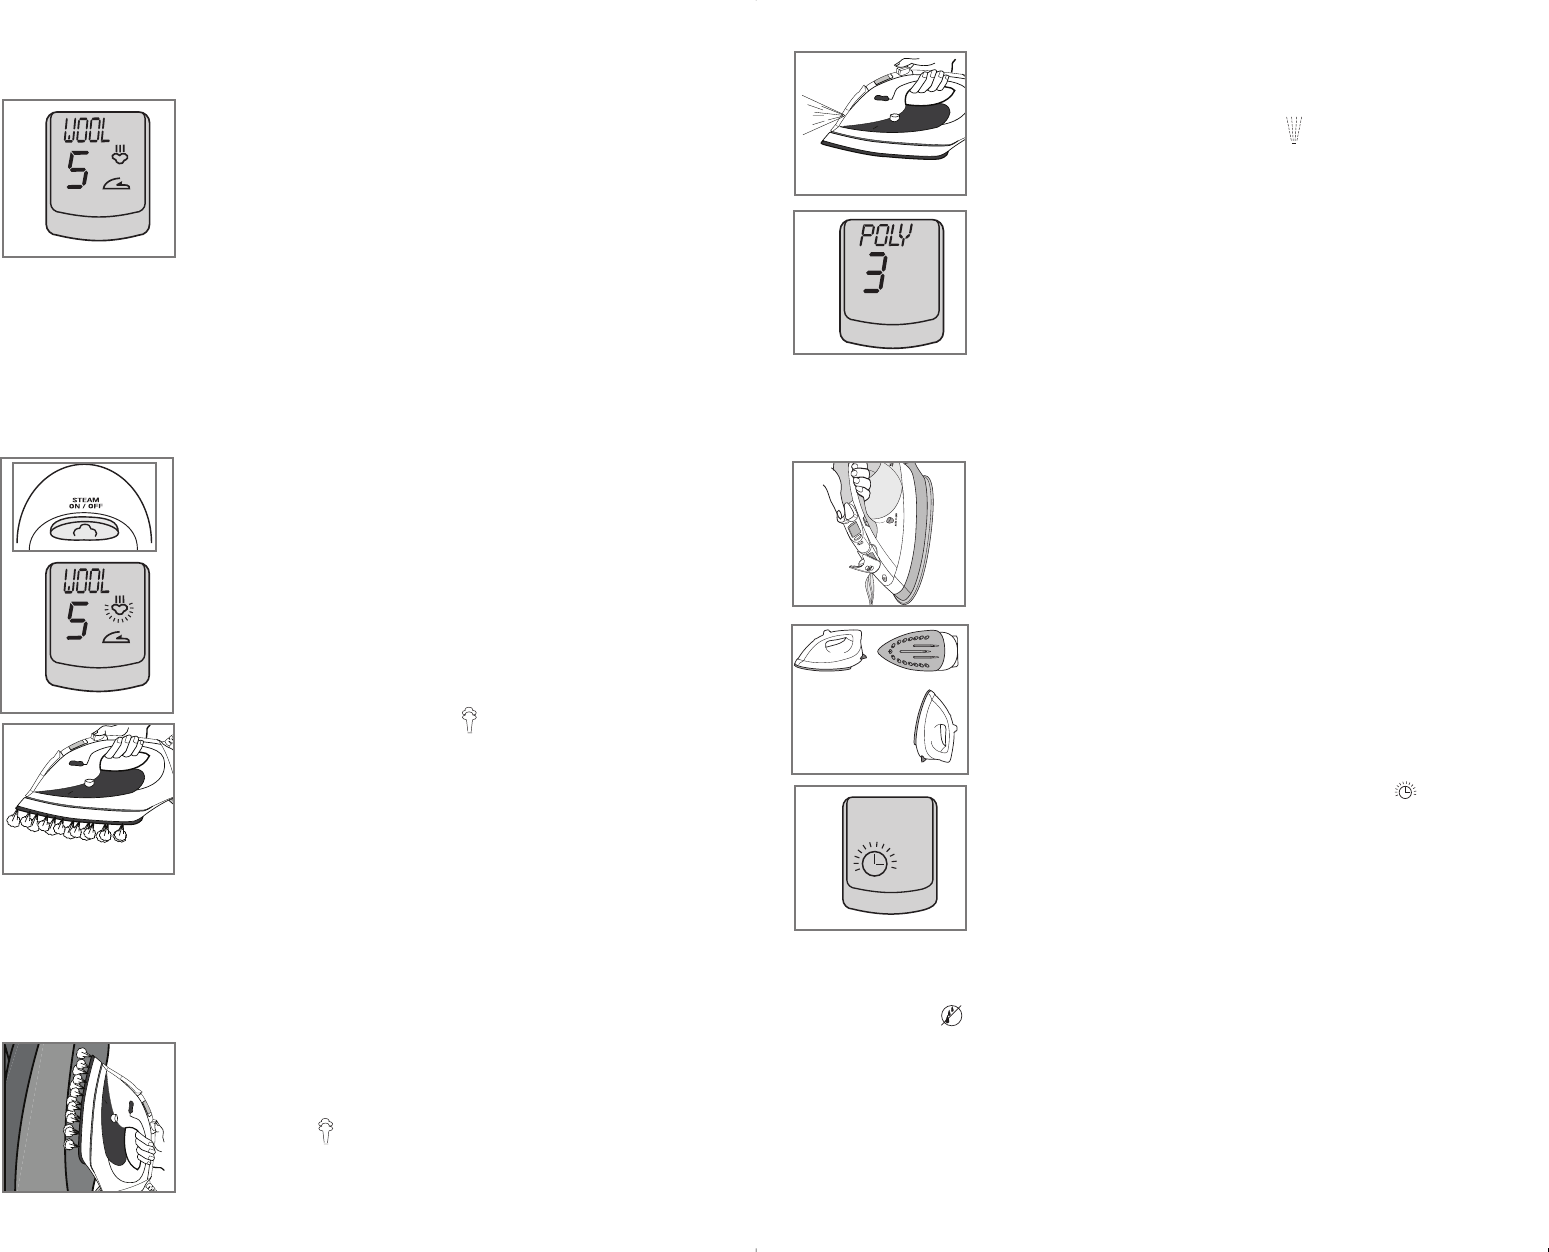
IRONING WITH STEAM
Smart Steam
™
Technology
The Smart Steam
™
system generates steam at higher temperature
settings (between 5 and 7) (F). Once you select the temperature, the
Smart Steam
™
technology detects the set temperature and adjusts the
steam power accordingly. The higher the setting, the more powerful
the steam.
Surge of Steam
Use to remove stubborn creases.
1. With the water tank filled to the MAX mark, press appropriate fabric temperature
selector pushbutton to select the setting (between 5 and 7) for your fabric. Read
garment's label to help you determine fabric type.
Note: Steam is automatically turned off between settings 1 and 4.
2. Once you select the appropriate fabric setting, wait for iron to beep and display
selected setting.
3. Press the Steam On/Off button to turn on the steam function.
The Steam symbol on the digital display flashes, indicating that
steam function is ready (G).
4. Press the surge-of-steam button to generate a burst of steam
(H). For best performance, leave an interval of 5 seconds
between bursts.
Important: Always stand the iron on its heel rest when powered on
but not in use.
Vertical Steam
Use for removing wrinkles from hanging clothes and drapes.
1. Make sure the water tank is filled to the MAX mark and iron is plugged into electrical
outlet.
2. Press Steam On/Off button to activate steam function.
3. Hang the garment to be steamed on a clothes hanger. (Curtains or drapes can be
steamed once they are hung.)
4. Press appropriate fabric temperature selector pushbutton to select appropriate setting
(between 5 and 7) for your fabric.
5. Wait for iron to beep and digital display to show selected setting
with a flashing steam symbol.
6. Hold the iron close to, but not touching, the fabric.
7. Pull the fabric tight in your free hand and pump the surge-of-
steam button as you move the iron over the fabric (J).
Important: Always stand the iron on its heel rest when powered
on but not in use.
6
5
USING SPRAY
Use to dampen tough wrinkles at any setting (K).
1. Be sure the iron is filled with water.
2. On first use, pump the spray button several times.
IRONING WITHOUT STEAM
Note: You can use the Steam On/Off button to turn off the steam
function in all settings (1-7).
1. Select setting 1, 2, 3 or 4 to iron without steam (L). The Smart
Steam
™
system will automatically turn off and there will not be
any steam generated.
2. To dry iron at higher settings, empty the water from the reservoir
to prevent steaming.
3. Plug in the iron, wait until iron beeps and digital display shows
selected setting. If the steam symbol is flashing, press the Steam
On/Off button to turn off the steam function.
Tip: The steam symbol becomes steady, indicating the steam function is off.
EMPYTING WATER TANK (OPTIONAL)
Note: It is not necessary to empty the water after each use.
1. Unplug the iron and let it cool.
2. To release the water, hold the iron over a sink with the
tip pointing down. Water will empty out of the water-fill
opening (M).
SPECIAL FEATURES
3-Way Automatic Shutoff
The automatic shutoff feature in your iron works as follows:
• The iron will shut off after 30 seconds of inactivity if left on its
soleplate or tipped over on its side. If left vertically on its heel
rest, it will shut off after 8 minutes of inactivity (N) .
• The unit beeps once and the AUTO OFF symbol flashes
on the digital display to let you know the iron has stopped
heating (P).
• After a few seconds, the digital display light goes off.
• If you pick up the iron, an internal motion-sensitive detector
is activated and the iron starts heating again.
Tip: You might have to move the iron or shake it gently.
• The unit beeps two times, the digital display light comes on and the set temperature is
displayed again.
Note: Wait for iron to reheat completely before resuming operation.
Anti-Drip System
The anti-drip system prevents water spotting at low temperatures.
MAX
A
UT
O
C
L
EA
N
k
H
M
A
X
AU
T
O
C
L
E
A
N
k
J
M
A
X
A
UT
O
C
L
EA
N
k
K
k
L
k
M
k
P
k
G
k
F
k
N
8 minutes
30 seconds
D5000Pub1000003116 6/21/06 2:08 PM Page 6


