


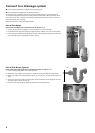
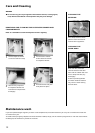
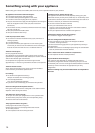
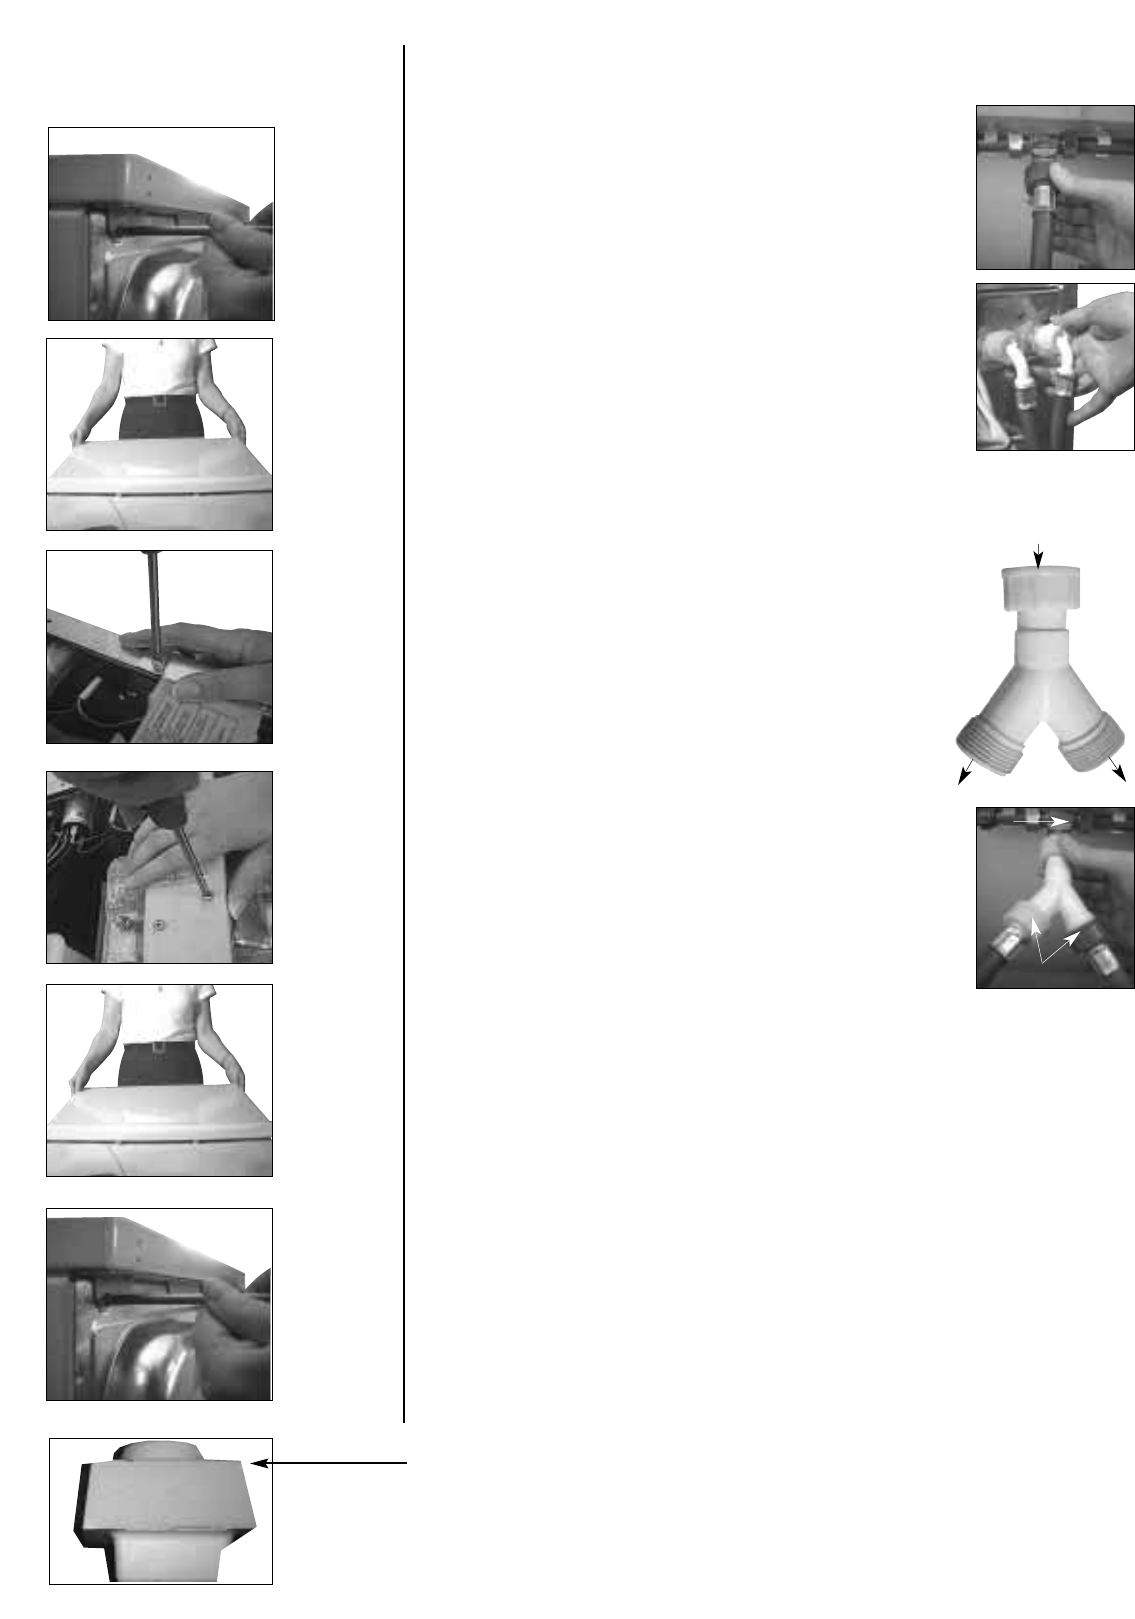
Hot and Cold Fill Connection
1. Connect the straight end of the supplied RED or GREY hose to
the HOT water supply tap (Fig 1). Connect the straight end of
the supplied BLUE hose to the COLD water supply tap.
2. Hand tighten connectors sufficiently to ensure water does not
leak from the hose connections.
3. Before connecting each of the hoses to the appliance,confirm
the water supply is flowing by holding the free end of each
hose in a bucket,turn the relevant water supply taps on and
then off.
4. Connect the angled end of the RED or GREY hose to the white
plastic inlet valve marked ‘H’ (Fig 2) and the angled end of the
BLUE hose to the white plastic inlet valve marked ‘C’at the back
of the appliance.
5. Hand tighten connectors sufficiently to ensure water does not
leak from the hose connections.
6. Turn on the water supply taps and check for leaks from the connectors. In the event
of a leak,turn off supply tap, remove connector and check that the sealing washer is
in place. Refit the connector and tighten. Turn on water supply taps.
Cold Fill Only Connection
A Cold Fill Adaptor is available from your local Creda authorised Service
Centre.
1. Connect angled end of supplied hoses to hot and cold inlets
at the back of appliance
2. Connect straight end of hoses to cold fill adaptor.
3. Connect adaptor to cold water supply.
NOTE: Hand tighten sufficiently to ensure water is not leaking from
the tap hose connections.
Fill Hoses
Ensure the supplied hoses are not kinked when connected.
2m long extension fill hoses are available from your local retailer
or Genuine Parts and Accessories UK 08709 077 077.
Water Pressure
Incoming hot and cold water pressure should be between 3 and 150
psi (21 - 1034 Kpa).
The temperature of the incoming household hot water supply should ideally be 60°C and
no higher than 70°C as this could cause damage to both your laundry and appliance.
Methods of Plumbing
The water supply taps must be easily accessible when the appliance is installed. Your
taps should be in good condition or it may leak when turned full on. Mixer taps are
unsuitable,if you have them you will need to use permanent plumbing.Adaptors are
required to connect to sink taps.
Permanent Plumbing
There must be taps or stopcocks so that the water supply can be turned off,isolating
the appliance from the household supply.
Existing Plumbing
If you have an existing installation please check that this includes taps or stopcocks to
isolate the appliance.The appliance must be connected to the water supply using
the new hose set supplied,old hose sets should not be used.
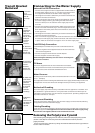
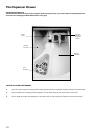
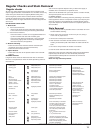
4.Remove 2
screws and
transit
bracket.
Retain for
future use.
3.Remove
1 screw and
clamp.
Retain for
future use.
Transit Bracket
Removal
Connecting to the Water Supply
3
5.Slide and
push work
top lid into
position
ensuring it
is located
on the
console
correctly.
2.From the
rear of
appliance,
grip the
sides of the
work top
lid,lift, slide
and pull
towards
you to
remove.
1.Remove
the 3
screws from
back of
work top
lid.
6.Replace
the 3
screws into
the back of
the work
top lid.
Inlet to machine
Cold
Water
Supply
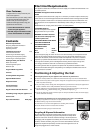
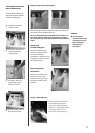
After removing the packaging from the machine, ensure that the polystyrene pyramid
(shown at the side) has come away from the underside of the machine,with the
polystyrene base.
If it has not come away, remove it by tilting the machine backwards until the pyramid can
be seen and then remove.
Removing the Polystyrene Pyramid
Inlet to machine
Inlet to machine
Cold Water Supply
Fig. 3
Fig 2
Fig 1
Fig. 4