


3. Use the mount command to update DMS on the server, as in the
following example (using /mnt as the mount point):
# /mnt/isl/utilupdate -d -m /mnt
• In this example, the -d copies several files from the distribution
CD to the server’s /usr/sbin directory. This ensures DMU
compatibility with the operating system.
• The -m
directory is the mount point of the distribution media. In
this example, directory is /mnt, and is a required parameter.
This procedure copies files in the /usr/sbin directory to files with
a *.pre-V5.1A suffix, for example: /usr/sbin/setld is copied to
/usr/sbin/setld.pre-V5.1A.
When the utilupdate script completes, this RIS server can serve the
current version of the operating system to a DMU client. See Appendix C for
more information about the utilupdate utility.
If the utility finds existing *.pre-V operating system files on your system,
no copies are made. If the server is already running the current version of
the operating system (or higher), a confirmation is displayed and no copies
are made.
11.2 Installing Software in a New DMS Environment
You must install and configure all the software you plan to use in a
DMS environment before you can add clients to share the environment.
Section 11.3 describes how to install additional software into an existing
DMS environment.
Follow these steps to install software into a new dmsN .alpha environment.
Repeat the installation procedures for each dmsN .alpha environment you
plan to set up.
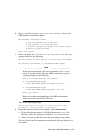
1. Log in as root or use the su command to gain superuser privileges.
2. Insert the Operating System Volume 1 CD-ROM into the drive, then
mount the CD-ROM.
• If your server is running the current version of the operating system,
use a command similar to the following example:
# mount -rd /dev/disk/cdrom0c /mnt
This example mounts a CD-ROM drive that is device 0 on the mount
point /mnt.
• If your server is running an earlier version of the operating system,
use a command similar to the following example:
# mount -rd /dev/rz4c /mnt
11–2 Setting Up a DMS Environment